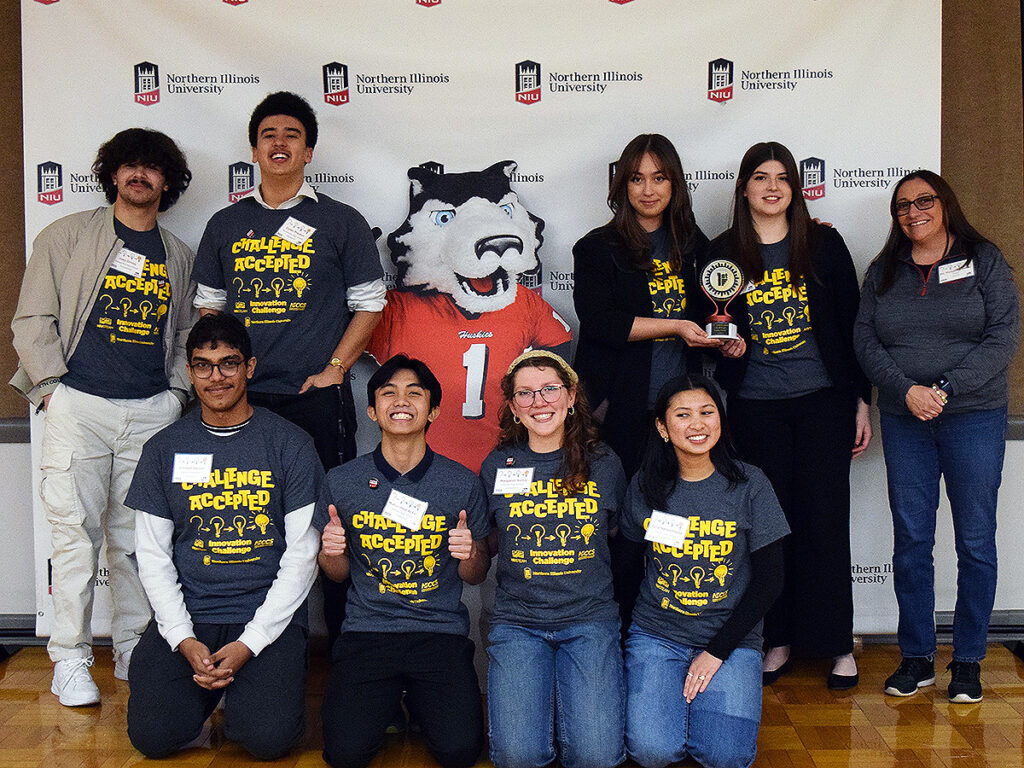
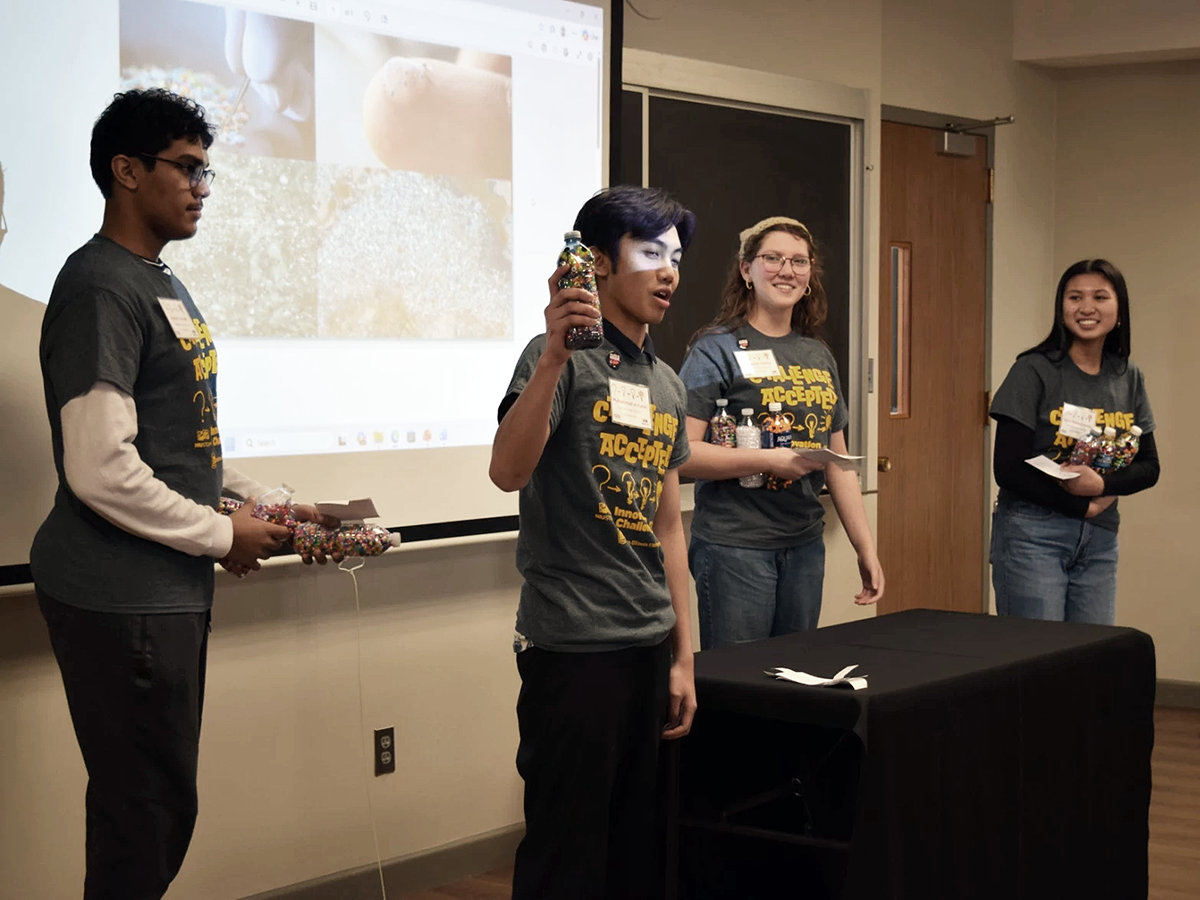
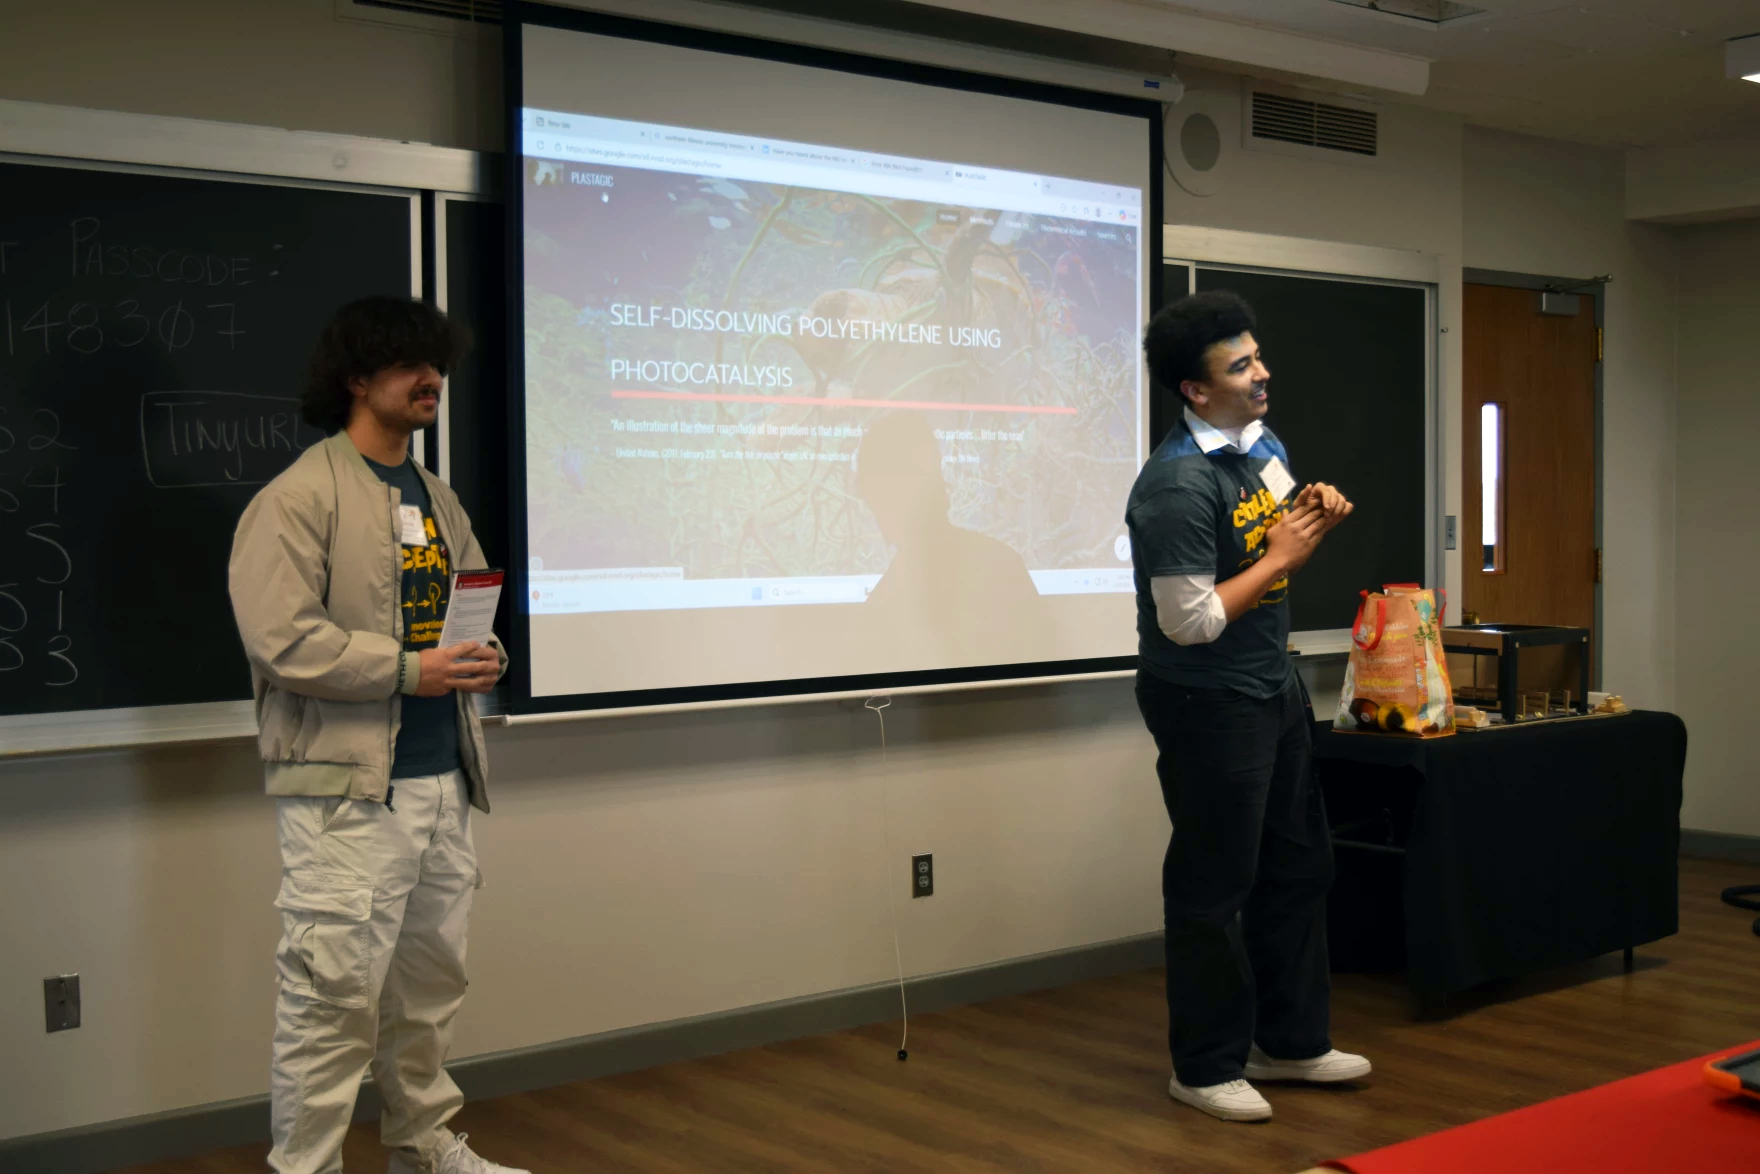
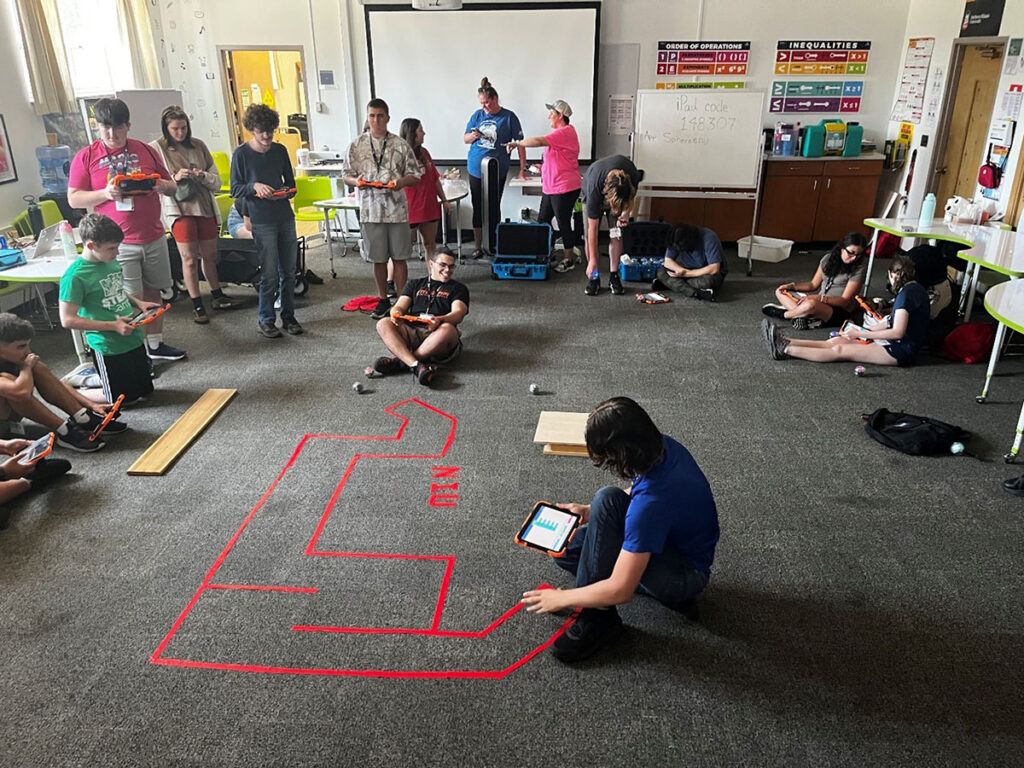
This past fall NIU STEAM and the Northern Illinois Center for Community Sustainability (NICCS) launched the 2026 Innovation Challenge for high school students who are looking for an opportunity to get creative and solve a real-life problem. Our goal was to provide a team-based challenge where teams of students could choose from two food system problems and collaborate to design a new and innovative solution to problems currently being researched by NICCS. Along with the generous sponsorship and support from Molex, we were able to welcome five teams of students to campus this past February 28th, and it was a great success!
As a former high school teacher, it was so wonderful to be in the presence of these teenagers who have been working for months to learn about the multiple facets of these problems and come up with viable solutions. They interacted with industry partners, NIU faculty, staff and current students with ease and enthusiasm. Our friends in the College of Business also facilitated a fun workshop in the morning where the groups were challenged to further consider human-centered solutions and make a change to their solution. It was so great to see their wheels turning while considering feedback from the mentors and judges throughout the competition. Such professionalism from our future thinkers and leaders!
This year our winning teams were from Romeoville and DeKalb High Schools, where the top three teams each earned a cash prize to use at school to support their club or classroom. We want to send our sincerest thanks to our partners at Molex, NICCS, the College of Business, our industry partners and mentors, as well as the teachers and students who made this event possible. As we look ahead to the 2027 Innovation Challenge, we have hopes and aspirations to get even more teams of students involved! And who knows…one of the solutions they come up with could be our next big innovation!
Check out this story about the NIU Innovation challenge by WNIJ’s Education Reporter Peter Medlin to learn about more of the projects in this year’s challenge!
For the fourth consecutive year, NIU STEAM is partnering with faculty and students in the NIU Department of Rehabilitation Counseling to offer Huskies BELONG, a comprehensive college-prep program for high school students with disabilities. Each year, the program kicks off with a week-long residential camp on NIU’s DeKalb campus. Then, camp counselors follow up with college-application support throughout the year.
Here are some of the many success stories from students who have participated!
Reyna: Finding Strengths and Direction Before College
Before enrolling in Huskies BELONG, Reyna was a high school senior thinking ahead about college and her future. She chose the program “in preparation for college, to help make college decisions” and to better understand her own strengths.
Through Huskies BELONG, Reyna says she gained clarity and confidence in what she does well. “I am grateful to have been able to explore my strengths through this program. I have learned that I am good at science and analysis.”
The program’s career exploration and preparation activities also helped her identify areas for growth. “The evaluations and career prep have helped me realize my strengths and some weaknesses that I need to work on, like public speaking, to better prepare for my future.”
Huskies BELONG also expanded Reyna’s view of possible career paths. “The program helped me to explore other areas of STEM careers. I really liked the camp.”
Today, Reyna is already gaining hands-on experience as a part-time home care aide to a disabled veteran and is working toward her CNA certification. Looking ahead, she plans to attend a four-year university in Illinois and pursue a degree in nursing.
For Reyna, Huskies BELONG provided space to explore, reflect, and plan—helping her move into college with a clearer sense of direction and confidence in her abilities.
Harry: Learning to Live on Campus—and Prove He Could Do It
Harry entered Huskies BELONG right after high school with a clear personal goal: to show himself and his family that he could handle college life on his own. “I wanted to prove I can be self-sufficient,” he says, adding that he is interested in pursuing a future in STEAM.
For Harry, the most meaningful parts of the program weren’t just academic. They were about learning how to live independently in a college environment. “I learned how to live with a roommate and how to talk to professors,” he explains.
That day-to-day experience made college feel real, and achievable. “I was able to show my parents that I was able to be self-sufficient and survive in a college setting on my own. I was able to experience what life will be like in college.”
Just as importantly, Harry says Huskies BELONG helped him feel at home on campus.
“I felt very comfortable on campus and can see myself at NIU.”
Beyond independence, the program also offered chances to explore interests and build community. “You will make friends and memories in the program. You will learn from lots of different fields – from STEAM programming to cooking to horseback riding.”
Looking ahead, Harry plans to attend college and pursue mechanical engineering. For him, Huskies BELONG wasn’t just preparation, it was proof that college life is something he can successfully navigate on his own.
Howie: Becoming More Comfortable With the Idea of College
Howard “Howie” Tisdale joined Huskies BELONG as he was entering his senior year of high school. The program was recommended by his high school counselor, and after visiting the website, Howie and his family felt it sounded like a good fit.
One aspect of the program Howie appreciated was the opportunity to spend time with other students with neurodivergent backgrounds in a college setting. Participating in campus activities helped him better understand what college life might be like.
Reflecting on his experience, Howie shared that the program changed how he feels about college. “It made me less afraid of college. The program let me see that others like me can succeed in college.”
After completing Huskies BELONG, Howie plans to continue his education at Illinois Central College to complete prerequisite coursework before transferring to Bradley University or Northern Illinois University. He is interested in pursuing studies in technology as well as orchestral music.
For Howie, Huskies BELONG provided a chance to experience college firsthand and to think more clearly about his next steps after high school.
Katelyn: Discovering Interests Through Hands-On College Experiences
Katelyn joined Huskies BELONG while finishing her junior year of high school. Before the program, she had never spent time on a college campus or participated in a residential college experience.
During Huskies BELONG, Katelyn explored campus spaces, academic settings and extracurricular activities. “I loved all things tech,” she shared, adding that it was helpful to see “all of the extracurricular things you can do.”
The program gave her opportunities to try new experiences and learn what different college environments feel like. “The program made me step outside of my comfort zone and try new things. I had never been to a campus, and it was so much fun.”
Katelyn also valued learning alongside other students and seeing how technology is used in classrooms and activities. “It was nice to see all of the technology in the classrooms.”
Reflecting on the experience, she said, “This program was so much more than I expected.”
After participating in Huskies BELONG, Katelyn is planning to enroll in college and is interested in future paths that involve technology and helping others, including assistive technology and working with individuals with special needs.
Marko: Learning What College Responsibility Looks Like
Marko joined Huskies BELONG as a junior in high school. He was interested in seeing what college education looks like up close and experiencing time away from home with more responsibility for himself.
During the program, Marko practiced managing daily routines that are part of college life. This included planning his schedule, keeping up with studies and handling everyday responsibilities. According to his family, the experience helped him better understand what is expected of college students.
Reflecting on the program, Marko shared that it gave him clarity about what lies ahead. “Now I know what to expect and what to be ready for, and that’s awesome.”
He also valued working with others in a shared environment. “I understand that I’m capable of productively working in a team.”
Marko appreciated the continued guidance from the Huskies BELONG staff as he thinks about his next steps after high school. He plans to begin at a community college in a computer science or IT program, with the goal of later transferring to a four-year institution.
When asked what he would say to students considering the program, Marko was clear: “If there’s a chance to join—don’t miss it!”
Tilman: Connecting Interests to Real College Experiences
Tilman joined Huskies BELONG as he was entering his senior year of high school, hoping to better understand college and the resources available to students.
During the program, Tilman had opportunities to explore academic interests through hands-on activities and direct interaction with instructors. One highlight for him was learning more about finance by talking with a faculty member about his degree goals. He also participated in technology-focused activities that introduced him to tools used in college learning environments, including working with a 3D printer – an experience he later continued on his own after the program.
Alongside these activities, Tilman learned more about how college expectations differ from high school, including how students communicate their needs and access support services. He also valued the chance to socialize and work with other students and staff during the overnight program.
After completing Huskies BELONG, Tilman plans to begin college at Kishwaukee College and later transfer to Northern Illinois University, where he intends to pursue a B.S. in Finance.
Reflecting on the experience, Tilman shared that the program helped him prepare for college in practical ways and explore his interests through real activities rather than descriptions alone. “I would recommend this program to anyone considering college to help them be successful.”
Linus: Thinking About Majors, Jobs and College Life for the First Time
Linus participated in Huskies BELONG as a rising high school senior. He joined the program to learn more about what college is like, including attending classes, spending time in a residence hall and understanding daily college routines.
For Linus, the program was the first time he was asked to seriously think about what he might want to study in college and how that connects to future work. Huskies BELONG provided structured opportunities to explore majors and practice job-related skills, including interviewing.
One part of the experience that stood out was meeting other students with similar backgrounds and spending time together in a group setting. It was Linus’s first opportunity to experience college life alongside peers in this way.
Reflecting on the program, Linus shared, “It was able to give me some more experience with college life, which will help me better adjust to college.”
Looking ahead, Linus plans to attend college in Fall 2026, with hopes of enrolling at Northern Illinois University. While he has not yet decided on a major, the program helped him begin thinking about possible directions and next steps.
For students considering Huskies BELONG, Linus offered simple advice: “Go into it with an open mind and be open to new experiences.”
By Ricky (Shem) Ogutu, NIU M.S.ED in Instructional Technology student and NIU STEAM graduate assistant
Ricky is one of our amazing graduate assistants here at NIU STEAM. We wanted to learn more about his experience at NIU and how his work with NIU STEAM is preparing him for a career in instructional technology. Here’s what Ricky shared with us.
I arrived in the U.S. from Kenya in January 2024, excited but nervous because adjusting to American English and a new academic culture was not easy at first. What made that transition smoother was how warmly I was welcomed at NIU STEAM, where I continue to work and grow.
Why NIU
I chose NIU because, as a high school teacher in Kenya, I saw a real need for better use of technology in education. I wanted to learn how to design learning experiences that solve instructional problems. That is why I am pursuing a Master’s in Instructional Technology to gain skills I can apply both locally and globally.
Finding Community at NIU STEAM
From my first days, I felt supported. Dr. Kristin Brynteson welcomed me and introduced me to the NIU STEAM afterschool program, where I met Jasmine and Christine (NIU STEAM instructors). They immediately made me feel like part of the team. I was also introduced to other NIU STEAM staff members who were genuinely happy to have me join.
Within a short time, I built strong friendships with fellow graduate assistants DP and Vish, and NIU STEAM quickly became a place where I felt I belonged not just as a student, but as a contributor.
Learning by Doing
NIU STEAM allows me to connect coursework to real practice. One of my class projects involved a usability test, which I completed using NIU STEAM afterschool learners. I also assist with STEAM Cafés, where I interact with community members and NIU staff, helping me build confidence, professional connections and a deeper appreciation for community-based learning.
I continue developing new skills through NIU STEAM through different tasks like lab assistance, video editing and production. While I am not an expert yet, I genuinely enjoy these projects and learn something new with each one. I like being challenged and growing through hands-on work.
I continue to be inspired by the encouragement I receive from the NIU STEAM team, including the former STEAM Coordinator, Russ, who motivates me to give my best in every task. I am especially grateful that NIU STEAM granted me an assistantship regardless of my background, an opportunity that has made a huge difference in my journey.
From NIU STEAM to CTA
My work at NIU STEAM directly supports my professional growth. After a conversation with Jasmine about gaining experience, I began applying for internships and was fortunate to receive three offers. I chose to intern at the Chicago Transit Authority (CTA) because some of the roles align with what I learn through NIU STEAM and my ETRA coursework. The skills I use at CTA, like instructional design, usability, troubleshooting and media-based learning, are the same skills I continue to build here.
For me, NIU STEAM is not just where I work, it’s where I learn, grow, and feel that I truly belong as an aspiring instructional designer.
I am a third year Anthropology and Theatre Studies student. I first joined NIU STEAM as a camp counselor last summer and now work as a student worker with the team. I was drawn to NIU STEAM because I love outreach, hands‑on learning and teaching outside the traditional classroom. Science, education and creative thinking have always been passions of mine, so this role has been a perfect fit.
Before joining NIU STEAM, I worked primarily with elementary school students. Getting the chance to work with middle and high school students during the summer camps was a wonderful experience. I love that our camps give youth the opportunity to explore STEAM topics through engaging, hands‑on activities right here on a college campus.
Currently, I support NIU STEAM behind the scenes, helping with the facility and various programs. Working with students in informal learning environments has strengthened my love for outreach and education. I enjoy guiding young people through activities that help them build new skills and broaden their perspectives.
In the future, I hope to work in museum education and lead programming that inspires curiosity and creativity. My time with NIU STEAM is giving me valuable experience as I work toward that goal.
My Internship
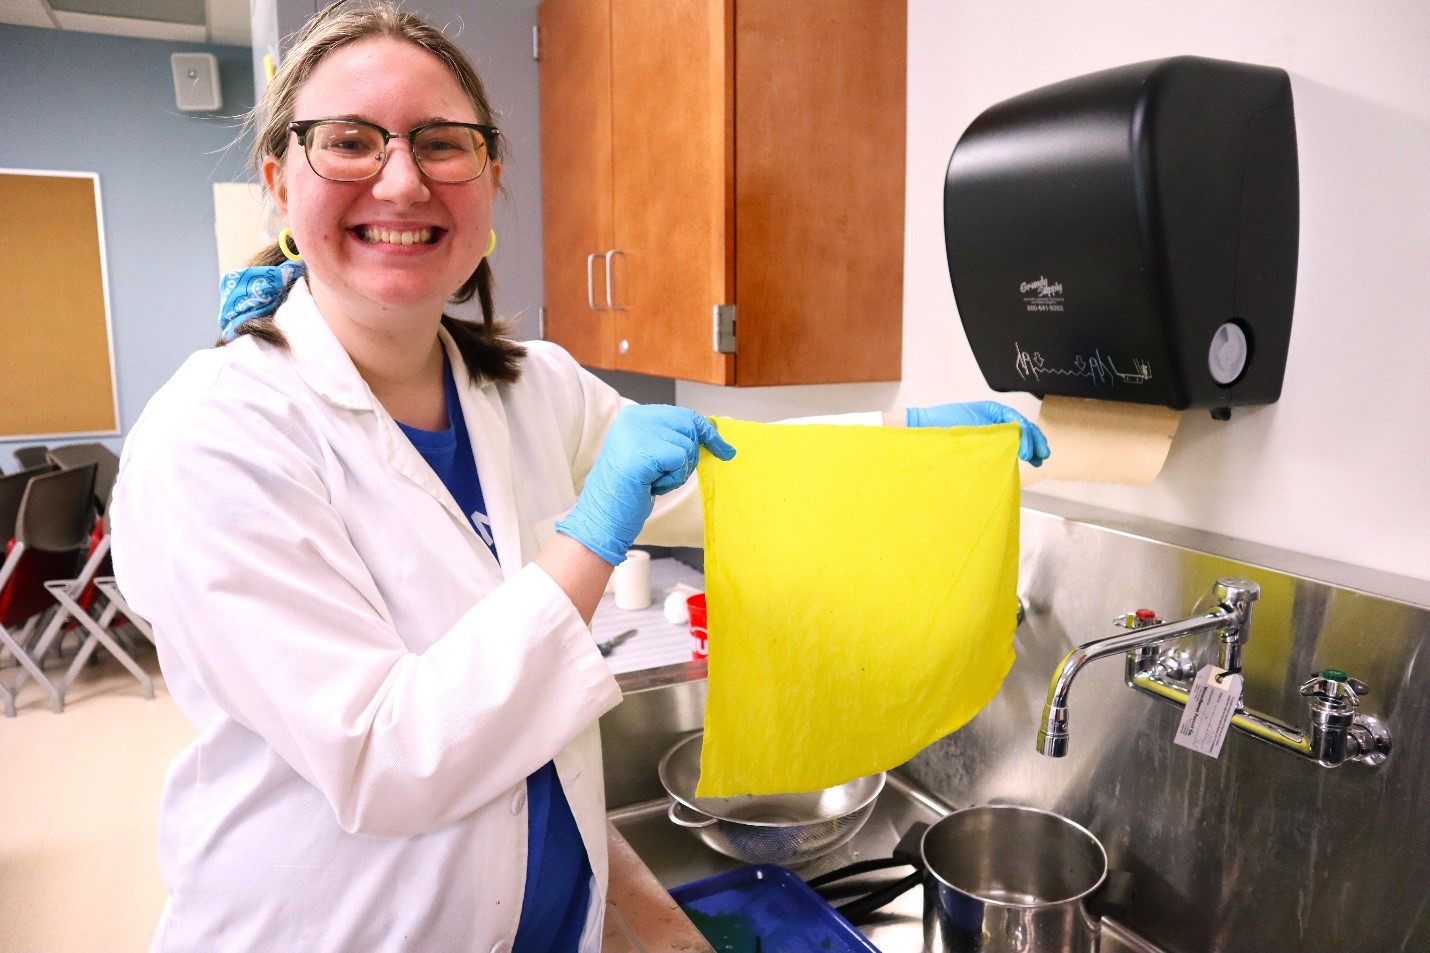
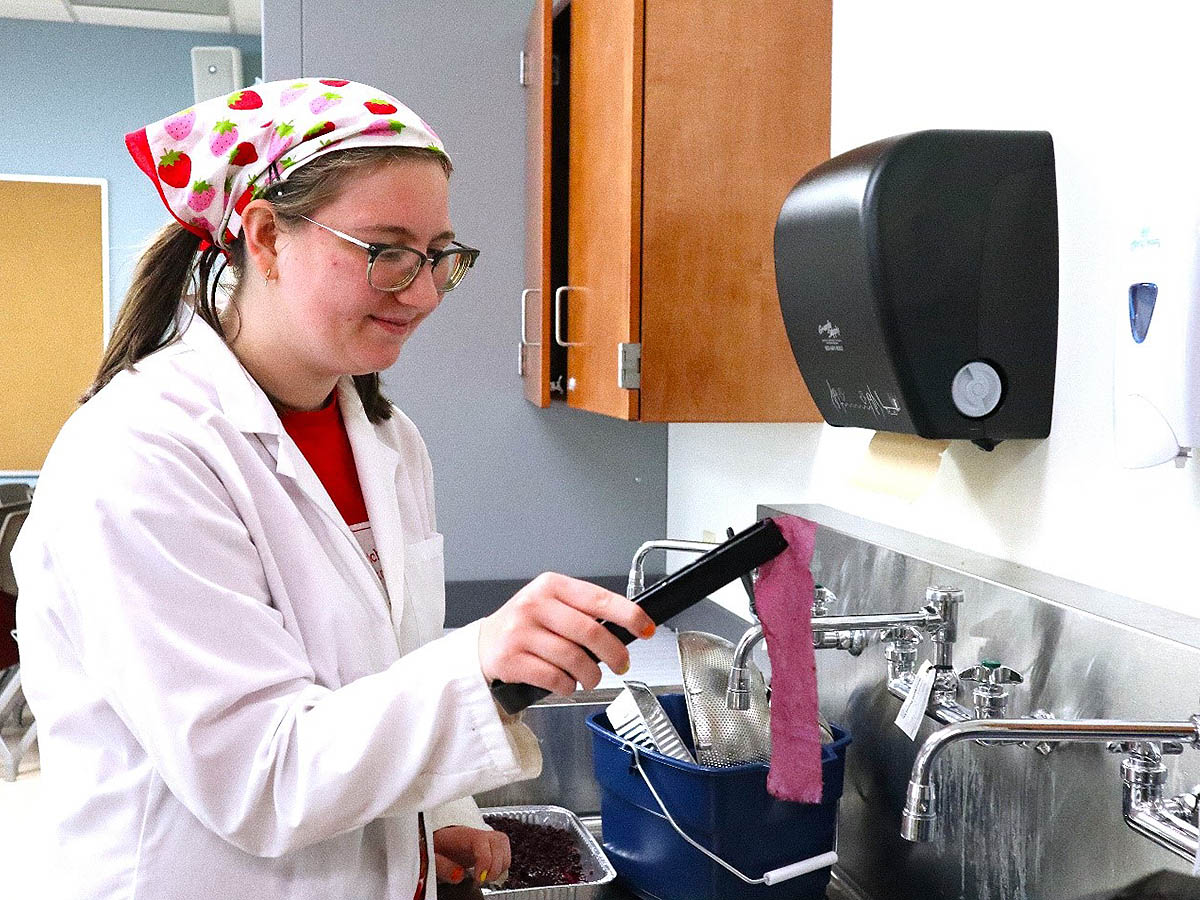
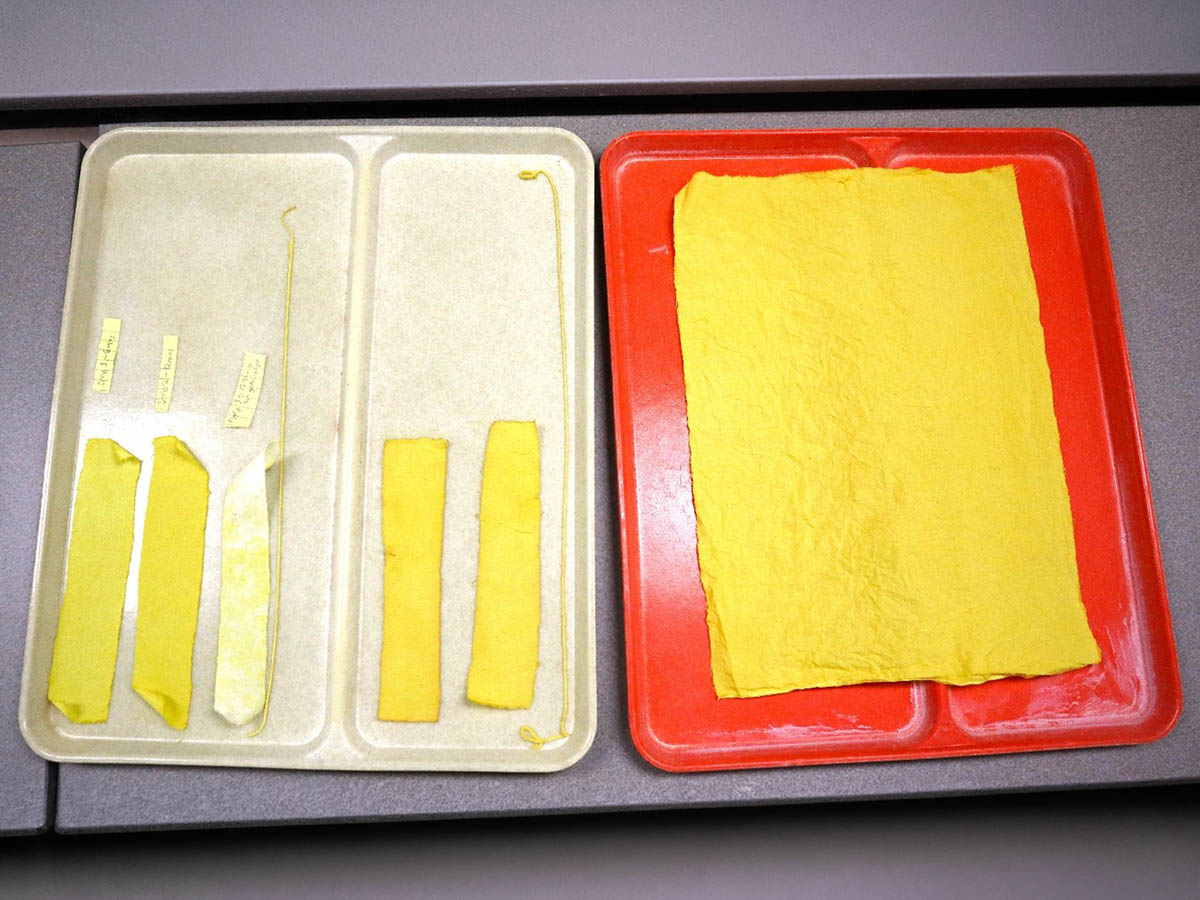
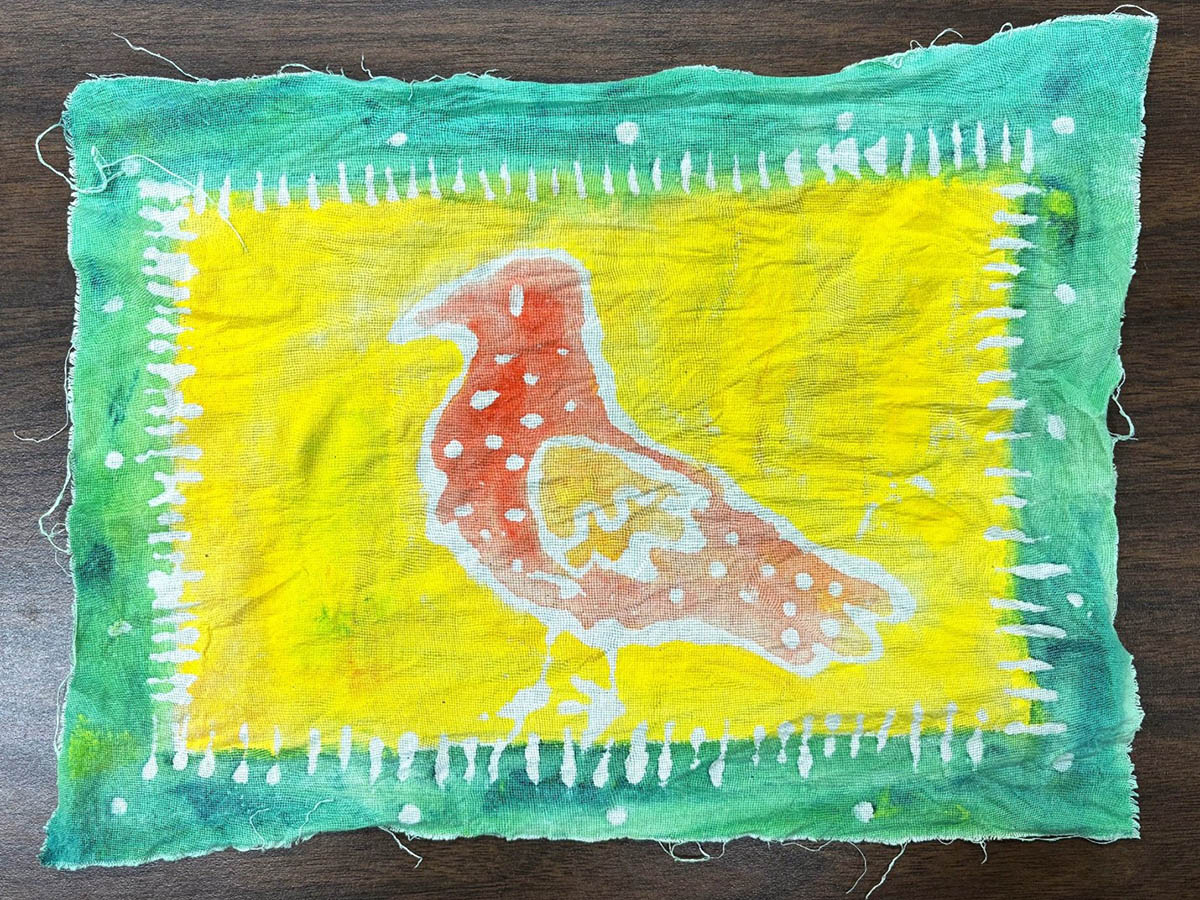
Over the Fall 2025 semester, I interned at the James B. and Rosalyn L. Pick Museum of Anthropology. The internship combined my passion for education with my love for museum work. For my internship, I created an educational toolkit about dyeing processes for offsite programs. The toolkit is a portable collection of educational materials geared towards grades four to eight. The toolkit includes an instructional packet for the educator, a slideshow about dyeing processes, instructions for two hands on activities, an infographic of Midwest and Indonesian plants and the colors they can provide, physical samples of batiks and physical samples of fabric naturally dyed with native plants. My daily tasks included experimenting with educational materials and activities, researching dye techniques, creating digital educational materials and working with the collection of batiks. In addition to working on my project, I learned about the process of processing collections, different ways to store objects, and potential career options. I am grateful for the hands-on experience I received working with the Pick Museum.
The Work
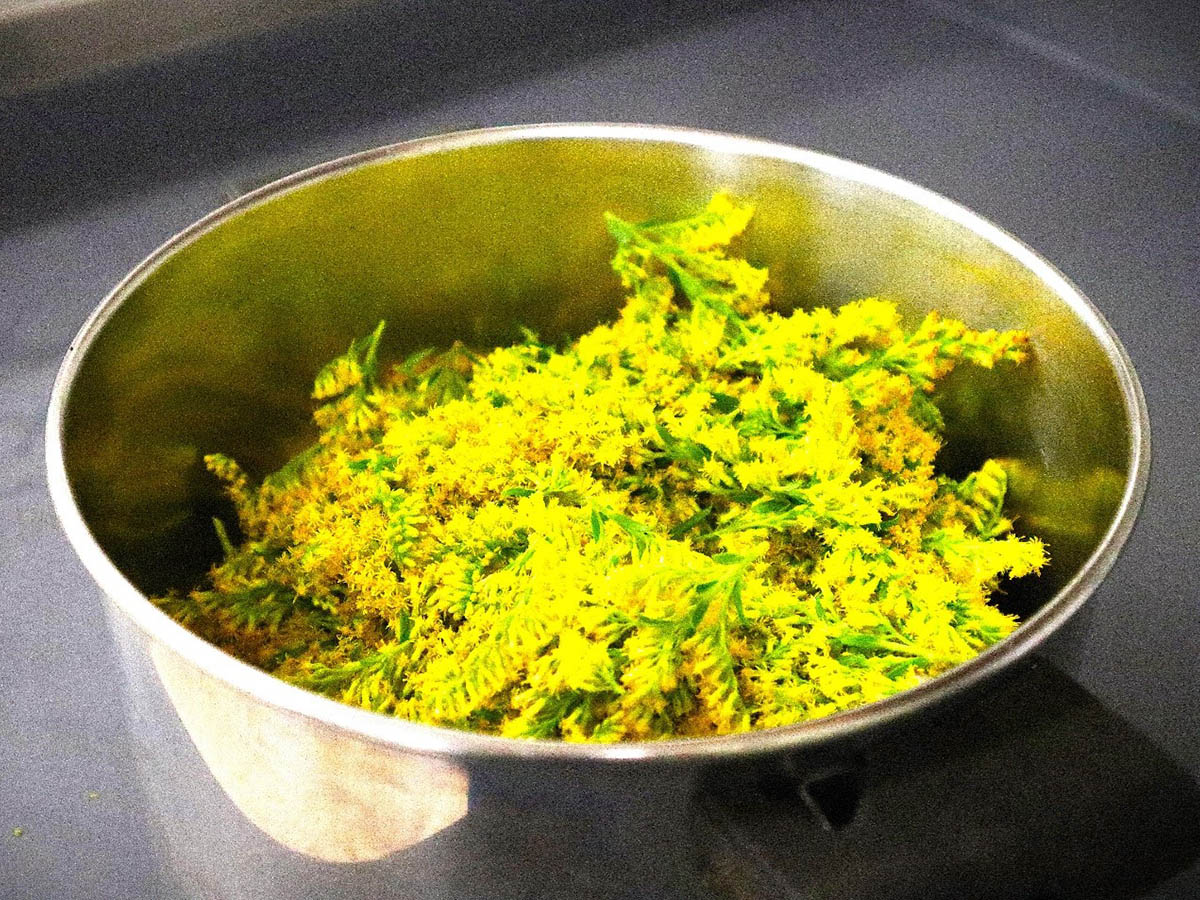
One part of my internship that stood out was my hands-on dye experiments. To create dye recipes and gain a better understanding of the dye making processes, I made my own dyes with native plants. I collected black walnuts, elderberries and goldenrod. After researching how to boil the materials to make dye, I wrote out my own instructions, tested the processes and modified it. The result was swatches of dyed fabric and original recipes for making natural dye with plants native to the Midwest. Students, educators and the public can use my recipes to make their own natural dyes. My dye experiment is comparable to experimental archaeology, which replicates ancient tasks. My project is currently featured in the museum’s gallery.
The Pick Museum
The James B. and Rosalyn L. Pick Museum of Anthropology is located in Cole Hall 114. The museum is free to visit, and open Tuesdays-Fridays from 10:00 a.m. to 4:00 p.m., and Saturdays 10:00 a.m. to 3:00 p.m. The Pick Museum’s mission is to “To inspire activism for social justice and promote understanding of human diversity through engagement with museum collections, exhibitions and programs.”
After completing my internship, I have a better understanding of collections work. Before the internship, I knew I liked designing educational materials and wanted experience working within a museum. My goal was to get museum experience, which was achieved by the internship. This internship solidified my passion for outreach, education, research and museum work. I would like to pursue museum education as a career. Because of this internship, I am looking into museum education graduate programs to continue doing outreach and education for natural history museums.
Acknowledgements
I would like to thank Christy DeLair, Ph.D., Director of the Pick Museum, Margaret Alway, Curator of Collections and Abigail Deeward, Graduate Assistant, for their support.
January is National Hobby Month, and we have a Maker Fair Event coming up on Friday, February 27. That made for a great opportunity to celebrate some of the hobbies that provide us with a creative outlet and keep us happier and healthier.
Keep reading for an exploration of hobbies and the joys of making from several of our STEAM team staff!
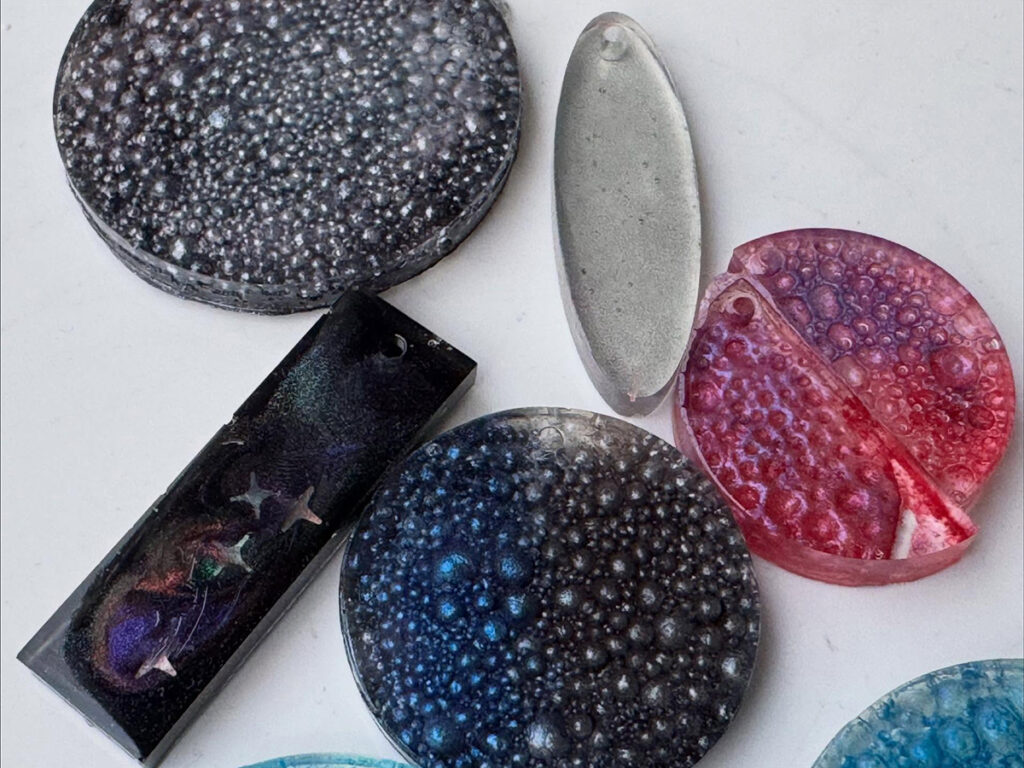
Making UV Resin Art Kristin Brynteson, Ed.D. NIU STEAM Director
According to a study published in Nature Medicine in 2023, having a hobby can help us be happier and healthier. It’s good for your mood, your health and overall life satisfaction. I know from my own anecdotal evidence, it’s true for me! Exploring new creative endeavors has always been something I enjoy. From crocheting to digital design to jewelry making and my new favorite hobby, working with UV resin, there is something thrilling about creating a piece of art with your own hands and brain. It helps unplug my mind from stressful things while still giving me a challenge or problem to solve.
For example, back in September, I decided to try working with UV resin on a whim. A few late nights scrolling on social media and seeing some of the items other resin artists made had me inspired and curious. I decided to dive in and to give it a try. Spending less than $40 on a starter kit and the proper protective gear was all it took to get hooked.
My favorite part about working with UV resin are the endless possibilities of what I can create and the quick reward of seeing the final product. Every time I put on my mask and gloves, and open my mica powders and glitter, I start experimenting with color and shape, ideas and creativity. How the resin may flow or react to different inclusions is always a surprise. I can’t control the resin but rather I guide it and make suggestions. The most exciting part is when I unmold a piece to see the results. Sometimes it is beautiful while other times… a complete and utter failure. But each piece leads me to ask, “What if I…” and try again.
For us makers, the design cycle is our process. We ask, plan, create, evaluate and try again. For me, no matter what the hobby, that is what drives me to make and to push and strengthen my creative muscle.
I’m not alone. As you may have guessed, the STEAM Team is filled with creative makers. I asked a few to share their favorite hobbies and why they create.
STEAM Team Hobbies
Jess Winn, NIU STEAM Instructor and Program Coordinator
What do you make or what is your creative outlet? I make many things, allowing my neurodivergence to guide my passions and interests. Currently, my obsessions are sewing practical items, hand stitching beaded earrings and pendants, and baking as much as possible.
I find that I enjoy making things that pull my full attention and don’t allow me to get sidetracked. Because my brain is always running at 100 miles an hour, making things like beaded jewelry and sewing requires me to focus. I also enjoy seeing the things I make get used. I love seeing people wear my earrings, use the keychains or enjoy the food I make.
My mom taught me how to sew and bake, and that was one of the things we always spent time together doing. It brought us closer. My mom and I are very different people, but when we were sewing or baking, we were connected. With beading, my best friend and I spent a lot of time in Alaska’s back country wilderness. I learned how to identify edible plants and hunt. She learned how to bead and stitch. When we both left Alaska to different parts of the country, we wanted to connect. Now we spend at least two nights a month on zoom beading, looking at new adventures and reminiscing about our shared past. I take what she taught me to design and develop creative beaded masterpieces. If you’d like to try beading at home, this video will help you get started.
I 100 percent encourage you pick up something new to try! Beading and sewing opens a world of clothing repair, upcycling, and tiny masterpieces that bring you and others joy. With baking and cooking, you will find that you then want to garden to grow your own food and make more creative things. That urge leads to a very fulfilling, sustainable life!
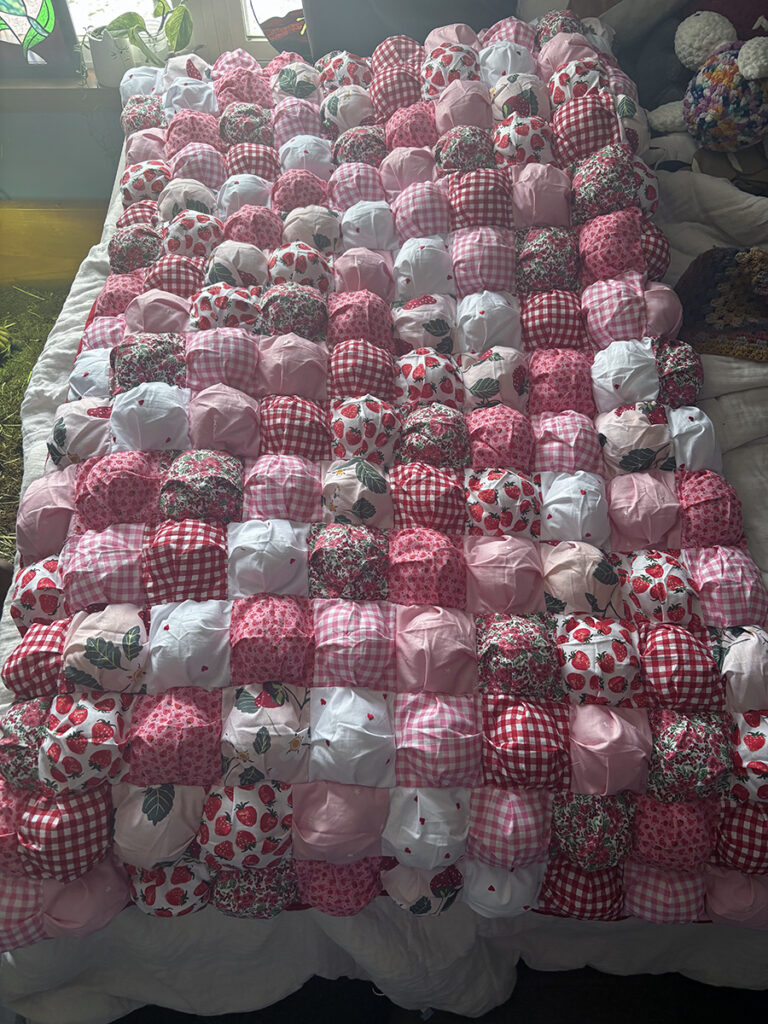
Sewing Kylie Hall, NIU STEAM Student Instructor
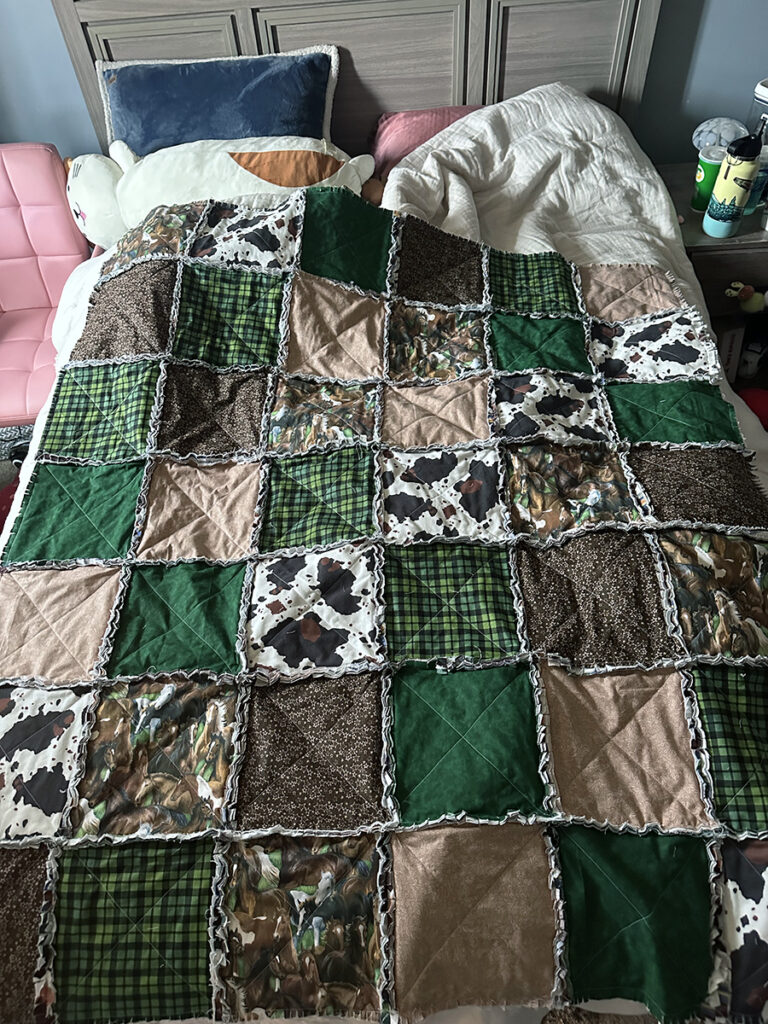
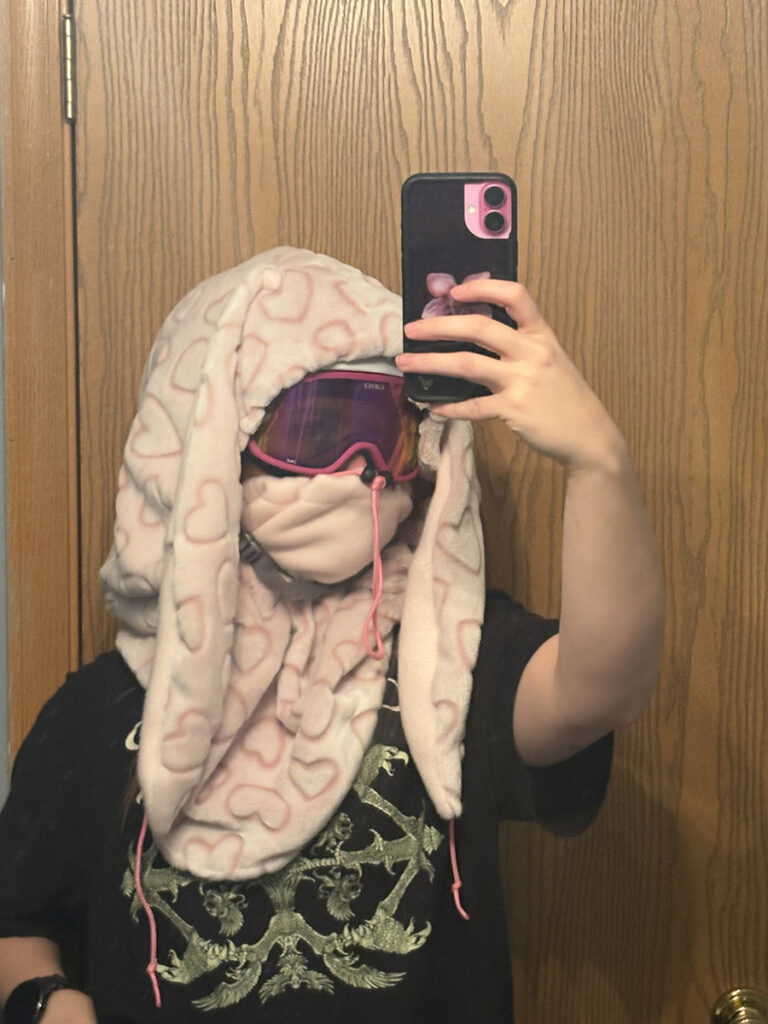
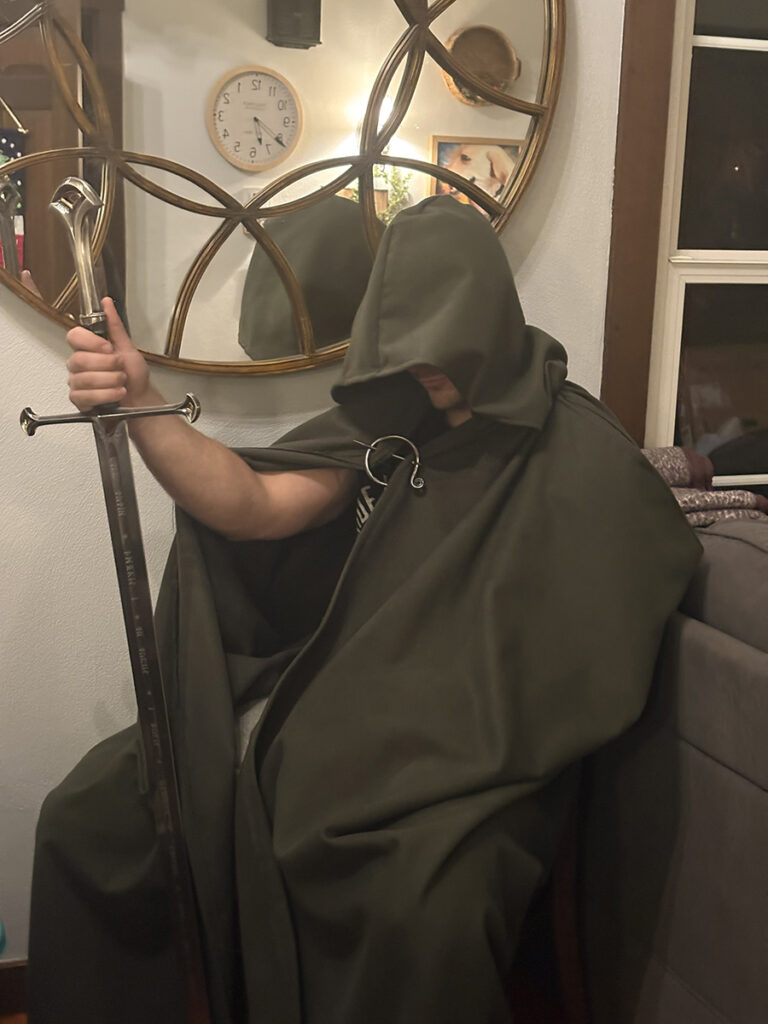
Lately I’ve been getting more into sewing. Sewing is something I’ve known how to do since I was little, but I really wanted to get better at it. Over winter break I made three quilts with hand embroidery details, two purses, a cloak, three pillows and a hood for my snowboarding helmet.
Sewing has allowed for me to create gifts for my friends and family that are very personal. Sewing also allows me to do something that challenges my brain and helps my mental health a lot.
I got interested in this hobby becauseI had a lot of items I wanted or needed, but they weren’t necessarily something I could buy, so I learned how to make them myself! I also wanted to know how to repair my own clothes to keep myself from buying more than I need.
Sewing is a great skill to have. You can create things for yourself and others that can be used every day. Often you can create items that are better quality than what you’d buy in the store. Lastly, in a world where we are constantly buying into trends, sewing can help you appreciate the craftsmanship that goes into textile making.
Here are some pictures of my favorite things I’ve made!
Embroidery Elizabeth Nowak, NIU STEAM Student Employee
I’m a crafter currently fixated on embroidery. I use felt, scrap fabric and thrifted embroidery thread to make small colorful art pieces. I love embroidery because it encourages me to slow down and enjoy the process. I enjoy working with my hands and experimenting with color, which makes embroidery a fit. Over the summer I learned the Bayeux Tapestry stitch at an event led by the Barony of Carraig Ban of the Society for Creative Anachronism. Being reintroduced to embroidery encouraged me to practice and teach myself other stitches and techniques. Since then, I have created embroidered pins, a felt doll and other pieces. I encourage others to challenge their patience and try out a fiber art.
Novel Writing Charles Lundsberg, NIU STEAM Community Engagement Coordinator
Within the past few years, I have begun writing novels as a creative outlet. I enjoy it as a way of creative expression, but also as a record of my particular thoughts or ideas at a given point in my life. I often intertwine my dreams into the stories, which is a round-about way of documenting as in a journal. I have always had ideas floating around in my head, but in the early 2000s, I became bored with the cinematic offerings. I decided to write something that I would like to see in the theater or as part of a series on television. In a sense, I was filling a personal niche that I felt was lacking. The nice thing about writing is that it is very personal (usually) and, aside from poor grammar, there is no wrong method for creating it. There are so many people that are willing to read your work or help mold a story; there are classes to help refine your talents, but, like art, it can be done without training as long as it makes you happy. There is also a satisfaction from publishing (self or otherwise) and pride if you go through the copyright process.
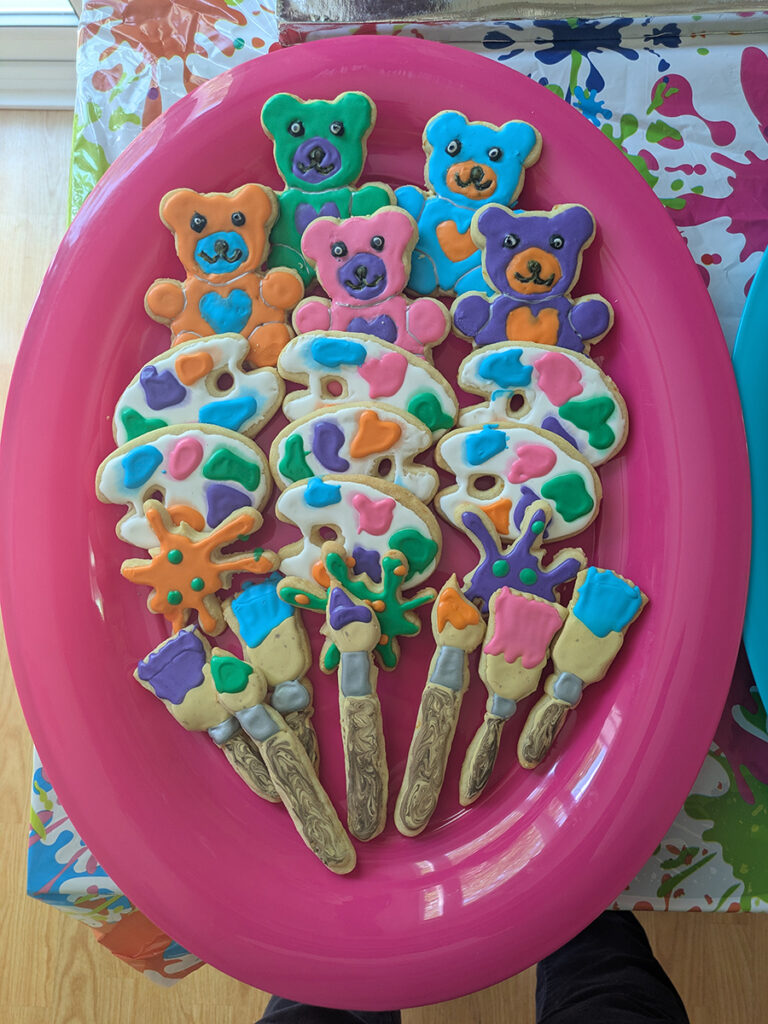
Baking Becky Swiontek, NIU STEAM Instructor and Program Coordinator
One of my hobbies is baking delicious desserts that are also decorated nicely. I enjoy it because it allows me to use some of my artistic skills that I don’t get to use all of the time and also because the products also usually bring people some enjoyment.
I started getting interested in baking and decorating in high school. One of my good friends and I wore togas for our Halloween costumes, and for her birthday I decided to try making her a cake with a girl dressed in a toga. Since then, with all of the baking shows on tv, I’ve learned a lot of new techniques which have fueled the enthusiasm for trying new techniques.
If someone has any inclination, I would suggest they give it a try. I’m not good at freehand drawing, but with decorating tools, I’m able to be successful. I ran a workshop once when I was a Jaycee where I taught members how to decorate cupcakes. A few of the participants pre-made frosting, and I baked the cupcakes. We made a few different designs, such as Cookie Monster, which had an easy piping technique. As an added bonus, we baked them for a charity fundraiser taking place at one of the local schools. People were surprised at how successful they could be on their first try. I’ve even been able to teach my five-year-old niece how to help me make Swiss meringue buttercream!
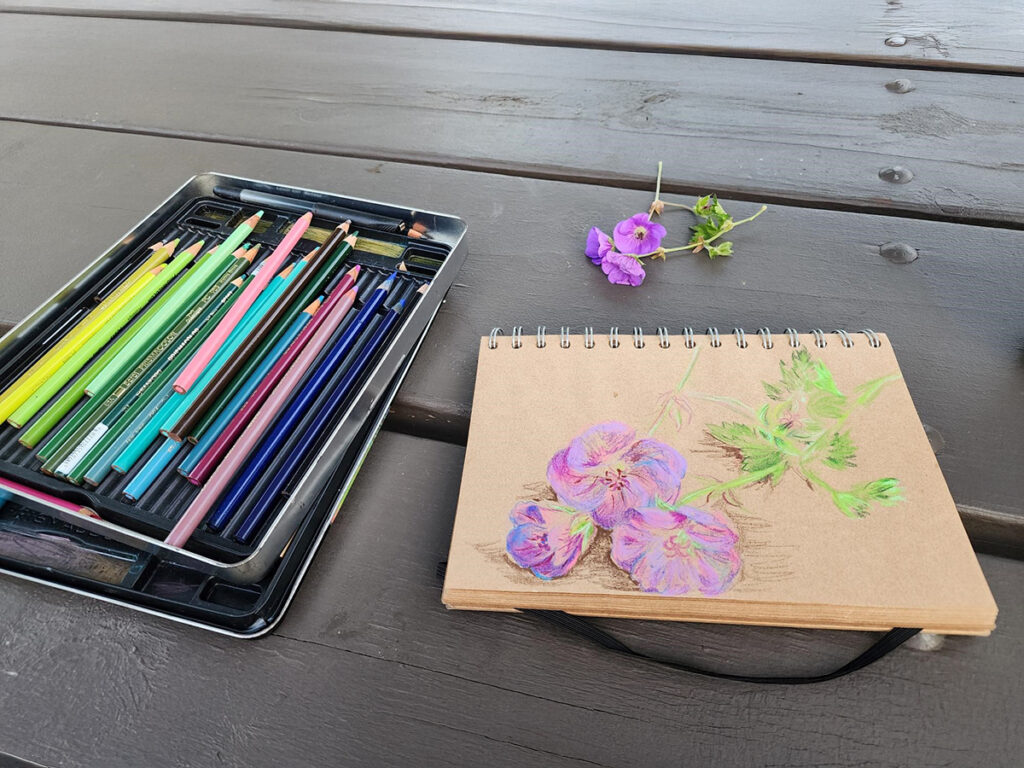
Sketching Plants and Seeds April Startzel, NIU STEAM Program Coordinator
I enjoy sketching plants and seeds found in my garden or out on hikes and in parks using colored pencils, pens and recycled paper. I enjoy it because I utilize a plant identification app to learn interesting facts about the plant life in my everyday environment, and I can practice my skills as a professional artist without the pressure of producing something that requires an artist statement or thesis.
I became interested in sketching plants to deepen my bond with my son, who is very curious about plant life – if a plant is poisonous or not, what it’s called, can he eat it, etc. I also very much enjoy hiking and natural beauty, so sketching small parts of nature allows me to prolong small moments of beauty and really appreciate natural plant structures.
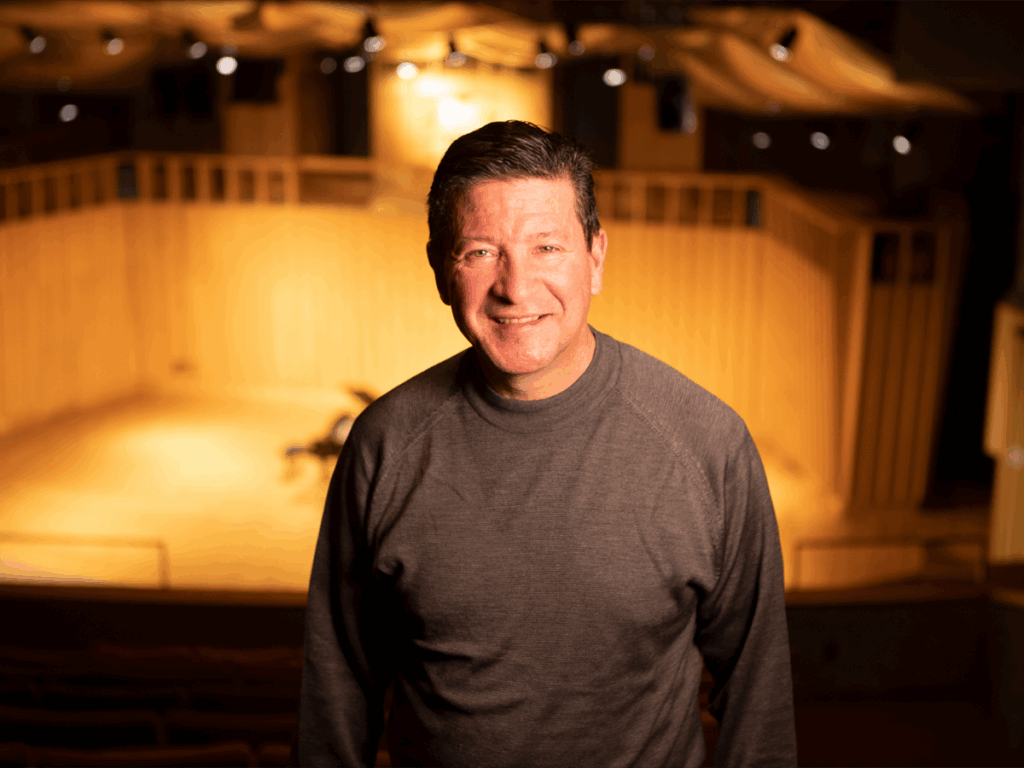
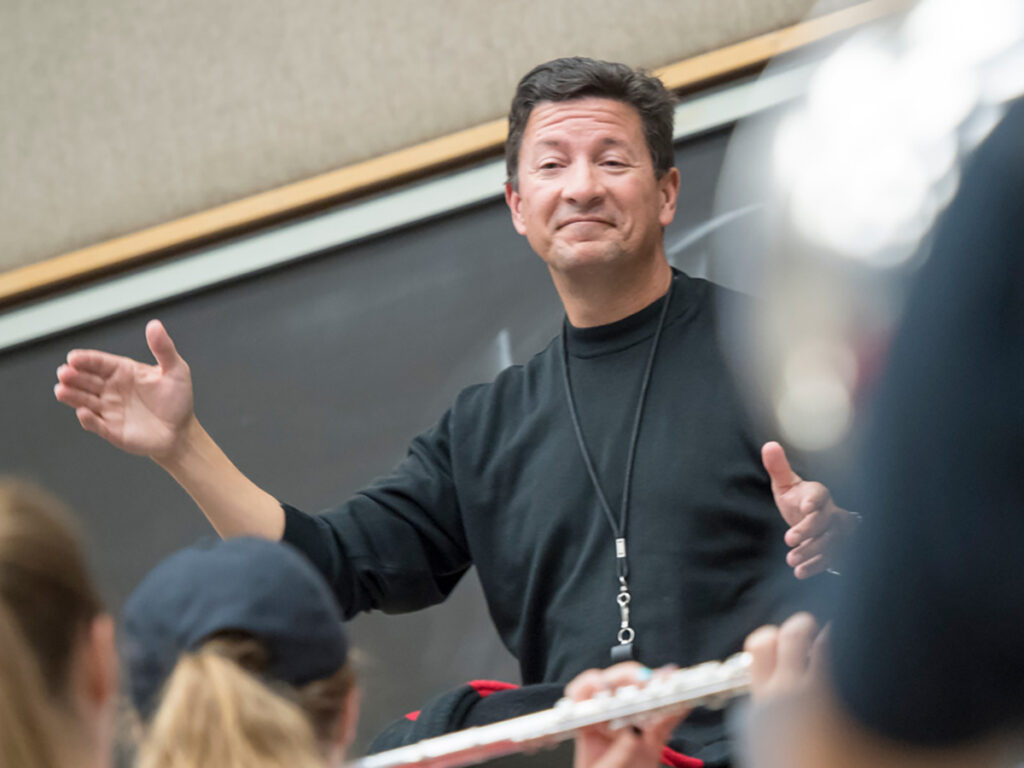
A college marching band is such a unique element of a university — bright uniforms, the thunderous sound of the drumline, and the precise formations on the football field. And while the Huskie Marching Band is all of that and more, the heart of the program beats to a much deeper, more personal rhythm.
In our latest episode of the STEAM Studio Spotlight podcast, we had the absolute pleasure of sitting down with the man who literally lives and breathes that rhythm: Thomas Bough.
Now, let’s be honest, sometimes you meet someone whose passion is so genuine it’s contagious. That’s Bough. Within minutes of our conversation, it was clear that we weren’t just talking to an administrator or a conductor; we were talking to a lifelong “band kid” who has the best job on campus.
He calls it that himself. “I literally do band stuff all day,” he says with a laugh that tells you he still can’t believe his luck.
But this conversation goes far beyond the halftime show. We dive into one of the most beautiful and often overlooked aspects of NIU’s music program: it’s a home for every student. Did you know that 60-70% of the Huskie Marching Band is made up of non-music majors? We’re talking about future engineers, journalists, scientists, and teachers who simply don’t want to give up the joy of making music.
Bough shines when he talks about these students. He shares the incredible story of this year’s Lincoln Laureate, the university’s top academic award winner, who also happens to be a four-year member of the trumpet section. And he’s not the first. It turns out that the discipline, collaboration, and creativity fostered in the band are a powerful recipe for academic success.
Of course, we had to ask the question: How does someone turn this passion into a career? Bough’s own journey is a story in itself, from a small-town kid in rural Missouri (who, believe it or not, was a freshman linebacker) to sleeping in Huskie Stadium as a drum corps performer long before he ever dreamed of working here. His path was anything but a straight line, and his story about trying to please his PhD biochemist father by taking calculus as a freshman music major is both relatable and hilarious.
We also get a glimpse into the creative mind of a composer. Bough opens up about how he fell into writing and arranging music, first out of necessity for his high school students and later for his own tuba performances. He even teases the upcoming premiere of a piece he composed during his recent sabbatical—a project that forced him to conquer a steep technological learning curve with new software.
This episode is a powerful reminder that the arts are not a separate entity from education; they are woven into its very fabric. It’s for anyone who ever played an instrument, for the parents who cried with pride at their kid’s marching band show, and for anyone who believes that the best parts of college happen outside the classroom.
So, if you’re ready to feel a surge of Huskie pride and be inspired by an educator who truly loves his students and his craft, you need to hear this conversation.
Listen to the full episode of the STEAM Studio Spotlight podcast now, and discover the music, the people, and the passion that make NIU’s band program so much more than just the sound on the field.
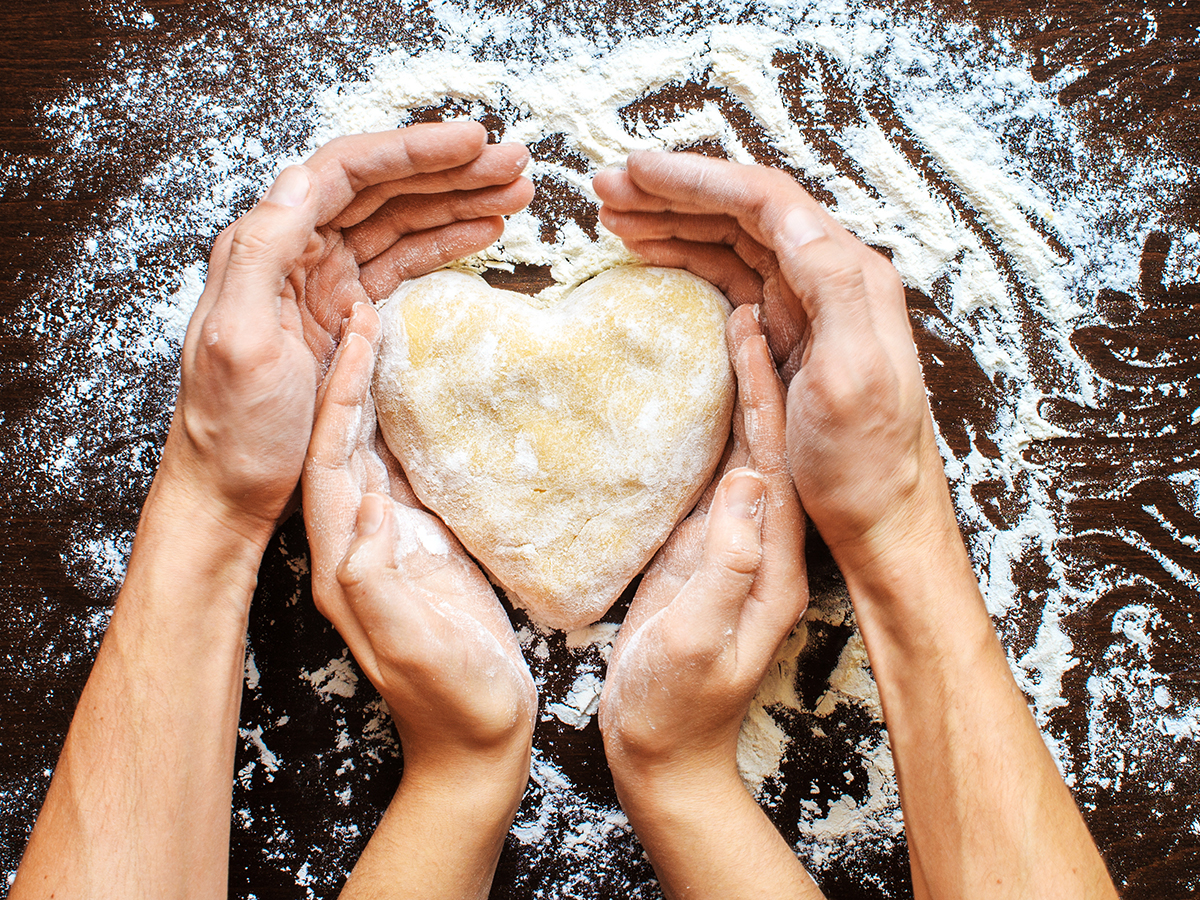
Food is deeply connected to holiday traditions and family memories. With so many winter holidays coming up, we decided to share some of NIU STEAM’s favorite holiday recipes.
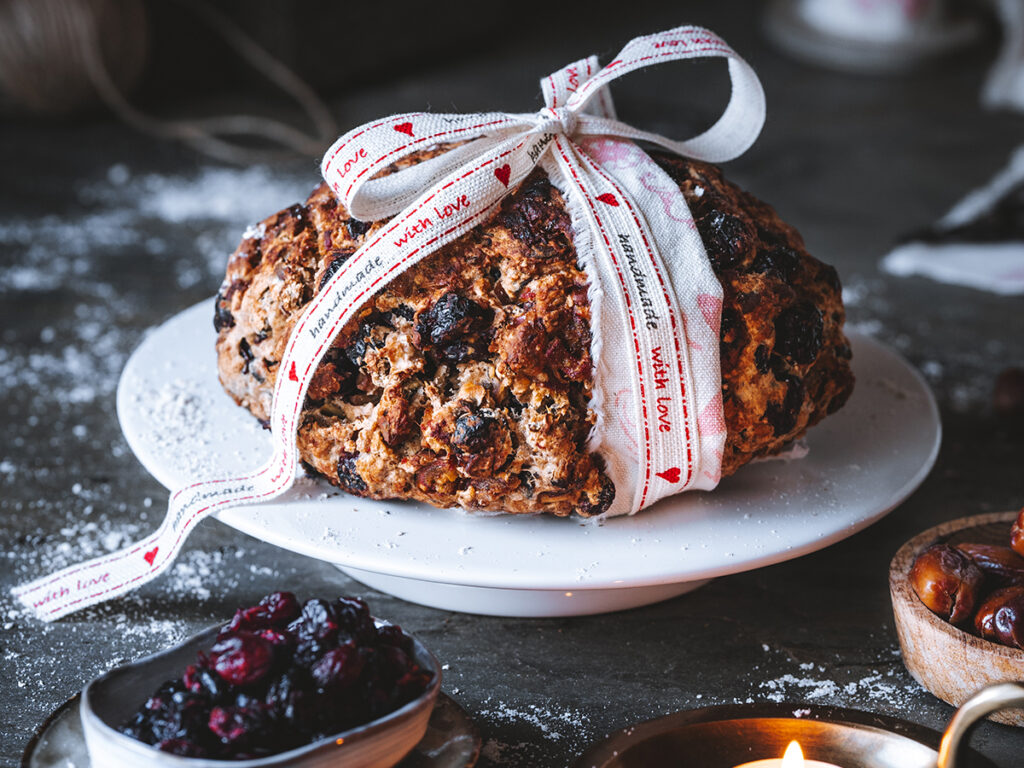
Shared by Kristin Brynteson, NIU STEAM Director
Julekake was a Christmas staple when I was growing up. I remember watching both my Grandma Gustafson (my Dad’s mom) and my mom making it every year. My favorite way to eat it was lightly toasted with lots of butter!
Recipe information
Yield: 2 loaves
Ingredients
1 stick plus 2 ½ Tbsp. (150 g) butter
2 cups plus 2 Tbsp. (500 ml) milk
50 g fresh yeast
4½ cups (650 g) flour, plus extra for dusting
⅔ cup plus 1 Tbsp. (140 g) sugar
½ tsp. salt
2 tsp. ground cardamom
1¼ cups (150 g) raisins or other dried or candied fruits
Egg wash (see note at top)
Preparation
Melt the butter slowly in a medium pan. Pour in the milk and warm very gently to a temperature of about 98.6ºF. Add the yeast and stir to dissolve.
Pour the mixture into the bowl of a stand mixer. Add the flour, sugar, salt and cardamon. Knead with the dough hook until the dough is shiny and smooth and comes away from the sides of the bowl. Cover the bowl with a clean dish towel and leave to rise for 30 minutes, or until almost doubled in size.
Line 2 baking sheets with parchment paper. Place the dough on a lightly floured work counter and add the dried fruits. Work the dough by hand until the fruits are evenly incorporated. Divide the dough in half and shape into 2 large round buns. Place them on the prepared baking sheets. Cover with a clean dish towel and leave to rise for about 20 minutes, or until doubled in size.
Preheat the oven to 345ºF. Brush the buns lightly with the egg wash and bake for 30–40 minutes. They should have a nice golden color to them when ready.
My favorite holiday recipe is a modified Lebanese recipe. It came with my grandma from Lebanon when they immigrated here from the old country. My mom, her sisters and all my cousins would spend days cooking all sorts of Lebanese food together. We would laugh and share memories, and the whole idea was just being together. As time has gone on and all my cousins have moved on or away, we haven’t spent the holidays cooking like this in a long time. But the joy, friendship, love and sense of belonging still remain every time I make a batch of Fatayer or a dish of Kibee. The recipe below is just as it was written by my grandma and then modified by my mom. I will always hold the memories with me, and I hope you find ways to share the moments and joys with your family, too.
Fatayer Yield: 3 dozen
Ingredients
2 pkg. Bridgford White Rolls (18 frozen white rolls in a pkg. – let thaw and rise)
4 C. (1 1/4 lbs.) ground beef
4 C. shredded, squeezed potatoes – (squeeze out as much water as possible to equal 4 cups)
2 C. chopped onion – (only used 1 C. last time we made them)
2 T. butter, softened
1 T. lemon juice
1 T. salt
1/3 tsp. pepper
1 mint leaf
Instructions
Use one raised white roll and pat or roll thin into a round shape (or use small ball of dough, golf ball size)
Place 1/4 cup mixture in each
Pinch edges
Place on cookie sheet, sprayed with Pam
Bake 15 min. @ 375º or until bottom is golden
Flip fatayer to brown other side -or- Broil 1 min. until top is golden
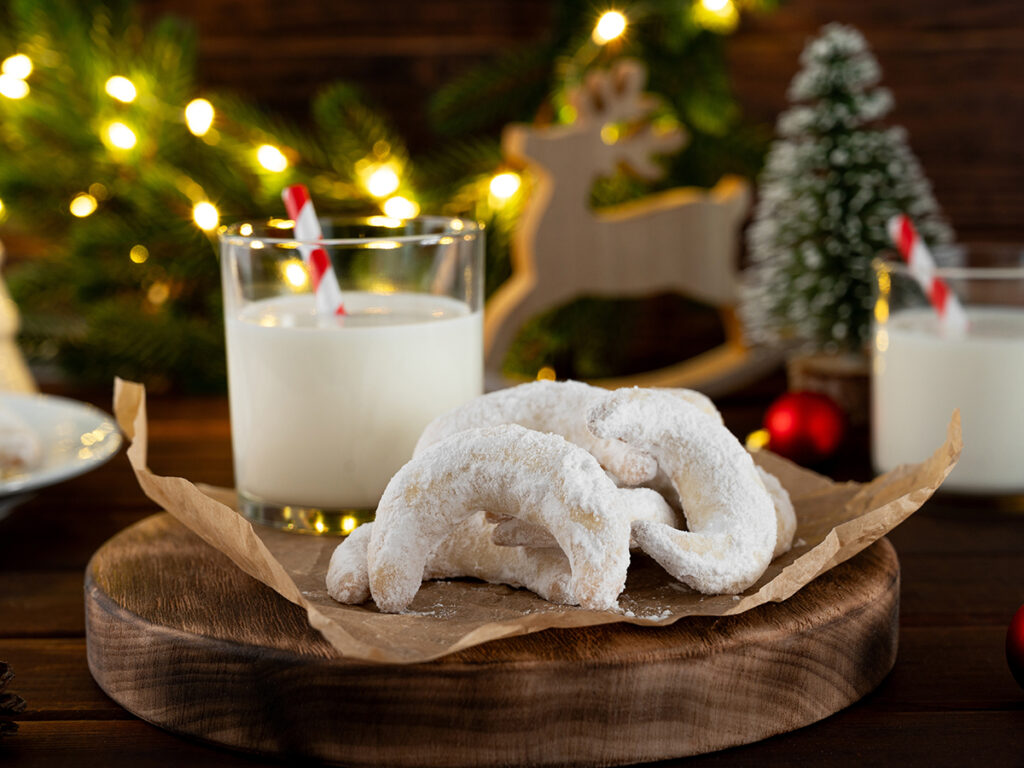
Shared by NIU STEAM Educator Becky Swiontek
When I was growing up, my great grandma would make these almond crescent cookies every Christmas, and in her passing I have kept the tradition going. Our family looks forward to them every year! One year I was pressed for time, and I made almond “not crescents” (circular shape), and my mom was not happy with me. So now I make sure to have enough time to form the crescent shapes! One of my favorite memories is when my college roommate’s one-and-a-half year old son put one of them in his mouth. He closed his eyes, smiled, and said, “Delicious!”
Ingredients
⅔ cup almonds
½ cup softened, unsalted butter
½ cup vegetable shortening
⅓ cup granulated sugar
1 ⅔ cups sifted flour
¼ tsp. salt
¼ cup powdered sugar
1 tsp. ground cinnamon
Instructions
Use a small food processor or other tool to chop your almonds into smaller pieces.
Toast the chopped almonds until the develop a light to medium brown color. One way to do this is to heat them in a sauté pan. Keep a close eye on them as they can burn quickly.
Transfer the toasted almonds to another container to cool down.
Use a hand mixer on low speed to cream together the butter, shortening, sugar, and toasted almonds.
Slowly mix in the sifted flour and salt.
Transfer your dough to a piping bag, and cut the tip so the dough comes out approximately the size of a pencil.
Pipe the dough into crescent shapes that are about 2 ½ inches long. They will spread during baking, so include space between the cookies when piping. If you have parchment paper to line your pans, this makes for an easy cleanup.
Place your pans in the refrigerator to let the dough chill for approximately 15 minutes.
While the dough is chilling, preheat your oven to 315°F.
Bake the cookies for 14-16 minutes until the dough is set. The cookies should not turn brown.
While the cookies are baking, combine the powdered sugar and cinnamon together.
Allow the cookies to cool until they are warm to the touch (approximately 5 minutes). If the cookies are still warm but not hot, the powdered sugar will adhere better to the cookies.
Use a fine mesh strainer to sprinkle the powdered sugar & cinnamon the cookies.
Use a small spatula to transfer the cookies to an airtight storage container.
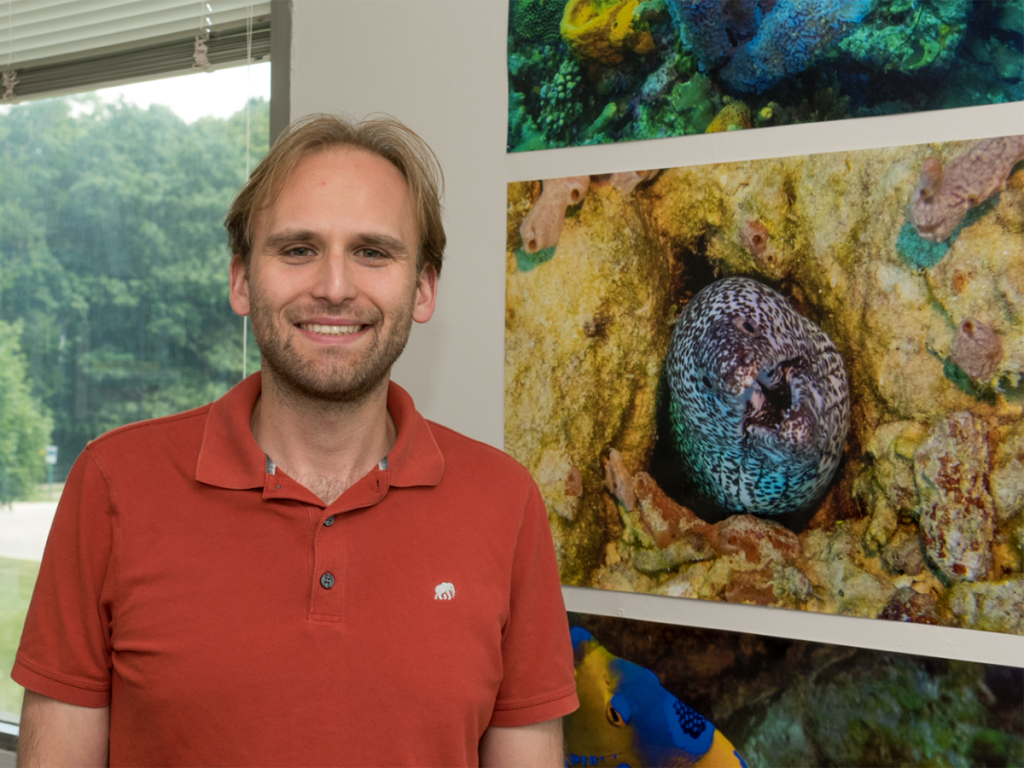
Of all the tools in a physicist’s arsenal, perhaps the most humbling is a hot piece of glass. Just ask Professor Jahred Adelman Ph.D.
In the latest episode of the STEAM Studio Spotlight podcast, the NIU physics professor recounts his early academic detour into chemistry—a path that ended abruptly in an organic chemistry lab. The assignment was simple: heat a glass pipette over a flame and pull it into a fine point. The problem? Glass, as the aspiring physicist soon learned the hard way, is a terrible conductor of heat.
“I wasn’t having any success,” Jahred recalls with a laugh. “The professor came over and said, ‘Can I take a look? Is it hot?’ I said, ‘No,’ because the part I was holding wasn’t hot. I gave it to him. He touched it, screamed, and dropped it.”
It was a pivotal, if slightly painful, moment of clarity. Chemistry wasn’t for him. But a casual invitation from a professor to do some undergraduate work on a particle physics experiment at Fermilab? That clicked. He was hooked by the blend of profound questions and the computers used to answer them. “I sort of never looked back,” he says.
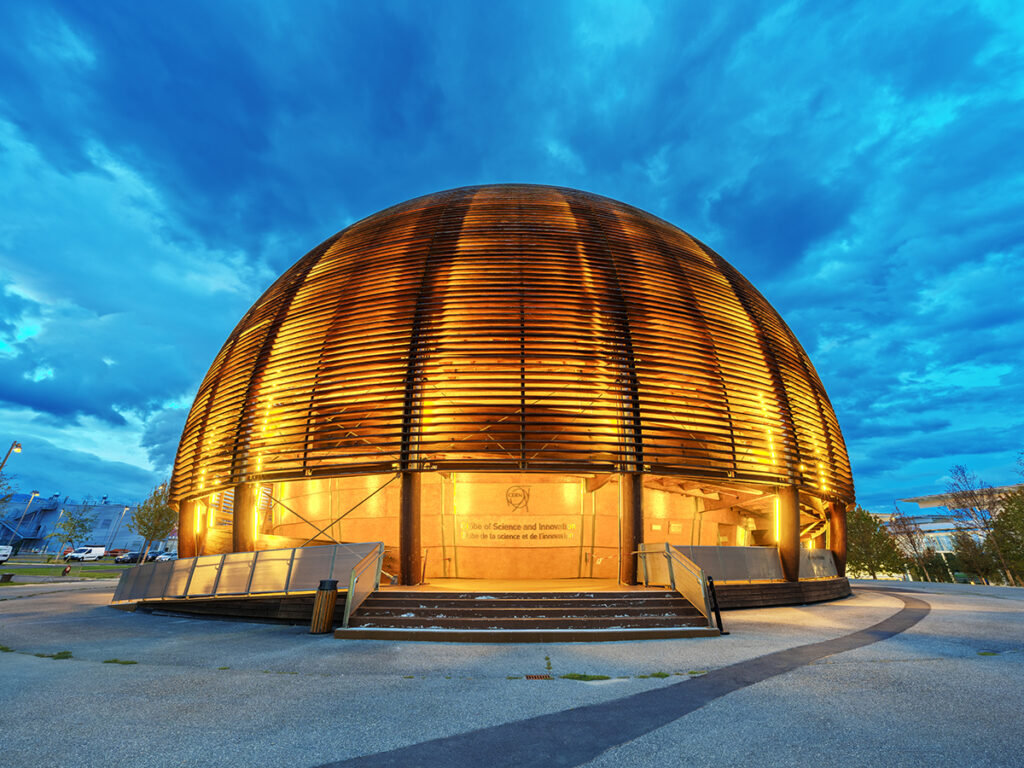
That winding road led Jahred to where he is today: a professor for over a decade, deeply embedded in one of humanity’s most ambitious scientific endeavors. His primary research home is the ATLAS experiment at CERN, the European particle physics laboratory that houses the Large Hadron Collider. ATLAS is, in his words, a “giant digital camera” surrounding a point where protons scream into each other 40 million times per second. The goal is to capture what flashes into existence in those collisions, testing our fundamental understanding of the universe.
The conversation is a refreshing departure from the stereotype of the lone scientist toiling in isolation. Jahred paints a picture of modern science that is vast, collaborative, and deeply human. The ATLAS collaboration, for instance, publishes papers with thousands of authors. This is big science in every sense: big teams, big data, and very big machines (the collider itself is a 17-mile ring).
But what does the day-to-day of a particle physicist look like? Far less time staring at equations on a chalkboard than you might think. A huge portion of the work, Jahred explains, is computational sifting through “insane amounts of data.” Particle physicists were among the original “big data” scientists, and the skills cultivated in the field—data analysis, machine learning, software development—are directly transferable to countless industries. “That’s basically what our analyses are,” he notes, “sorting through huge amounts of data to understand what we see.”
The episode gets wonderfully meta when the discussion turns to communication. Jahred highlights the critical, often underappreciated, skill of translating complex ideas for different audiences. Talking to a fellow physicist is one thing; explaining the nuances of mass versus weight to an intro physics student, or the wonder of particle collisions to the public, is another challenge entirely. It’s a skill he’s actively honing for an upcoming STEAM Cafe talk where he’ll use the physics of Olympic sports—like the angular momentum of a figure skater’s spin—to make foundational concepts accessible and exciting.
Perhaps the most relatable moments come when Jahred pulls back the curtain on the unglamorous, universal truths of a career in research. No one warned him, he admits, about the sudden, vital need for organizational skills and to-do lists as a grad student. And as his career has progressed, he spends more time on the necessary logistics of science: writing grants, managing budgets, and yes, wrestling with spreadsheets. “The further you progress,” he says, “the further you get away from the actual science sometimes… I still can do [analysis], but every year I do less and less of that and more and more of writing grants and dealing with spreadsheets.”
It’s an honest and humanizing look at a field often shrouded in abstraction. This episode isn’t just about the Higgs boson or the mysteries of the quantum realm. It’s about finding your path through trial and error (and hot glass). It’s about the collaborative heart of modern discovery. It’s about how the quest to understand the smallest bits of the universe teaches you skills that shape the wider world.
So, if you’ve ever wondered how someone ends up working on a mega-experiment in Switzerland, or what particle physicists actually do all day, or you just enjoy a good story about a career path that began with a failed bicycle brake assignment, give this conversation a listen. You’ll come away with a new appreciation for the scale, the teamwork, and the very human stories behind our biggest questions.
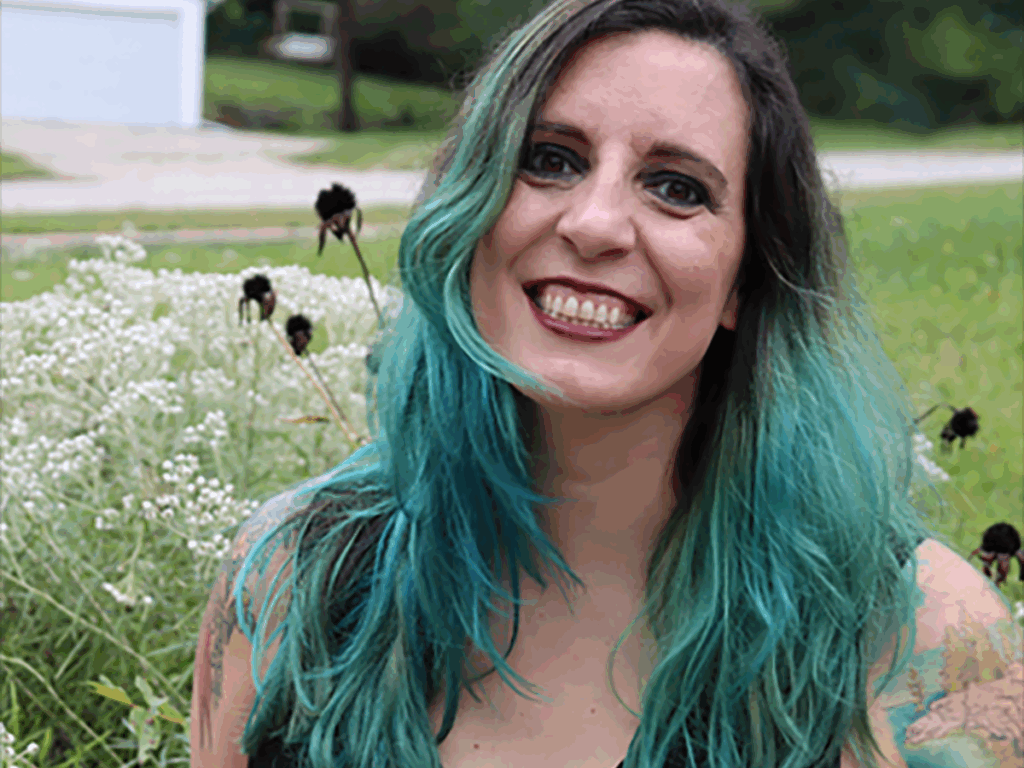
What do you picture when you think of a physicist? If your mind goes straight to lab coats and complex equations, you’re in for a welcome surprise. Our latest guest on the STEAM Studio Spotlight podcast shatters every stereotype, and her story is a masterclass in building a vibrant, multidimensional life.
We sat down with Elizabeth Holden—an NIU alum who seamlessly weaves together the seemingly disparate threads of physics teacher, young adult novelist, small business owner, and roller derby athlete. If that list alone doesn’t pique your curiosity, the way she connects these passions certainly will.
Liz’s journey began, as many great stories do, with a pivot. She started college as a journalism major, but a single astronomy class lit a fuse that led her to change her entire academic trajectory, eventually earning both her bachelor’s and master’s degrees in physics from NIU. But here’s the twist: that early love for writing never left. It just waited patiently in the wings.
In a moment of profound self-reflection, Liz realized that while she loved teaching physics, the accolade she thought she wanted—a PhD—was more about ego than passion. The real, lingering regret she would have, she confessed, was never taking a serious shot at getting a novel published.
What followed wasn’t an overnight success story, but a years-long exercise in resilience. She calls it an “iterative process,” a term any scientist or engineer will appreciate. Liz wrote a novel in grad school (“It wasn’t that great, but it existed”), penned countless short stories, and navigated the tumultuous world of literary agents with a spreadsheet-wielder’s precision. She even signed with an agent, only to have the courage to walk away when the partnership wasn’t right—a brave move in an industry where any representation can feel like a golden ticket.
Her breakthrough came from a place of longing. During the COVID lockdown, with her roller derby league on hiatus, she poured her energy into a new idea: a young adult novel about an anxious, queer teenage girl who finds her strength and community in a roller derby team. The result was Mighty Millie Novak, her debut novel published in the summer of 2024.
In our conversation, Liz gets refreshingly real about what happens after you achieve a lifelong goal. Spoiler alert: you don’t suddenly become an “enlightened” person. The drive for the next achievement, the next validation, remains. She talks about the importance of community—whether it’s the friends who got her through grueling physics problem sets at NIU or the writer friends she meets for weekly coffee to stay on track—in keeping her grounded and motivated.
This is more than just a conversation about a fascinating career path. It’s about the hidden connections between the scientific method and the creative process. It’s about the courage to pursue multiple callings without feeling the need to choose just one. And it’s a powerful reminder that the most interesting lives are often built in the spaces between disciplines.
So, if you’ve ever felt boxed in by a single title or wondered how to blend your own diverse interests, Liz Holden’s story is for you. Press play and get ready to be inspired by a life lived in full, vibrant color.