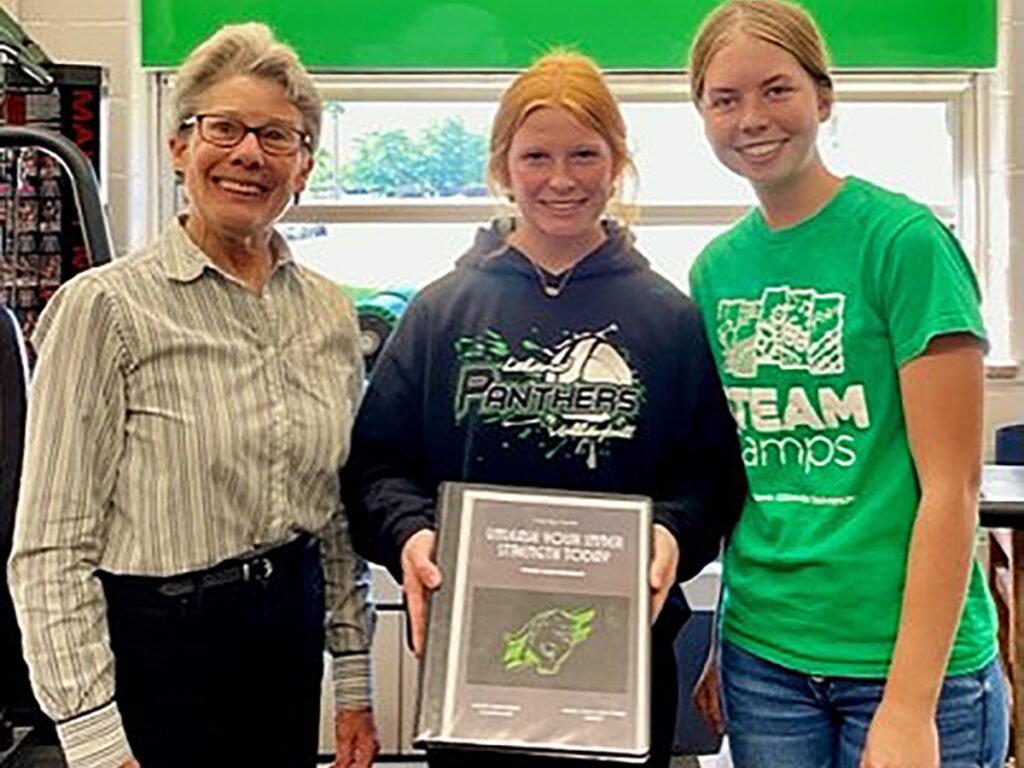
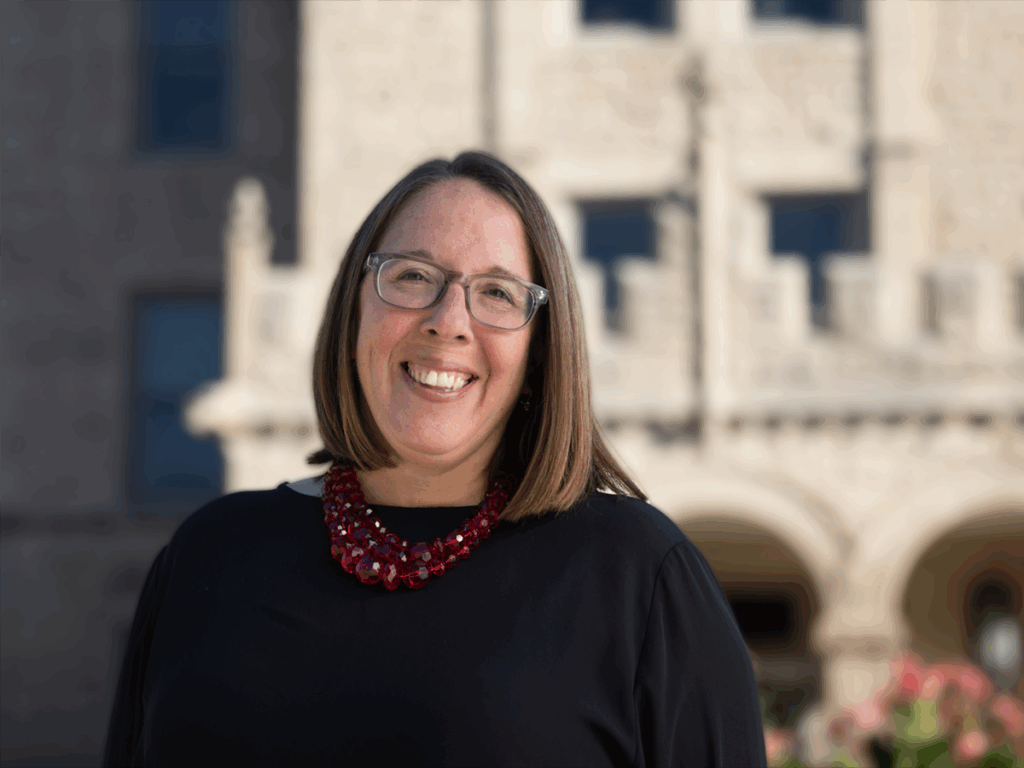
Jan Half, Lilly Martin and the Story of How One Former Teacher’s Donation is Making a Big Difference in a Small Town
Jan Half (left) with Lilly Martin (center) and Lilly’s friend and fellow camper Maxine.
In 2019, Northern Illinois University and Leland CUSD #1, a K-12 public school in Leland, Illinois, began a mutually beneficial partnership based on the generosity of one former Leland teacher, Jan Half. Half taught at Leland in the late 1970s before returning to school to complete her master’s degree at NIU. Even when she moved onto other places, Half’s ties with Leland and NIU remained strong.
When Half approached the NIU foundation with the intention of making a donation to support Leland students, a bold new partnership began focused on advancing STEAM education for Leland students, both within their school and through campus connections. NIU STEAM, in the Division of Outreach, Engagement and Regional Development, has offered teacher professional development and STEAM programming within Leland School. Half’s donation also supports Leland students to attend NIU STEAM summer camps, where they learn from NIU faculty and staff, complete hands-on STEAM projects, and get a chance to explore college and career pathways with mentorship from NIU student counselors.
One student who has benefitted from this partnership is Lilly Martin, a sophomore at Leland High School who has attended NIU STEAM summer camps for the past three years. This year, Lilly has paid forward Jan’s investment in her education by bringing what she learned at NIU STEAM Sports Camp back to Leland School. Leland’s student athletes now benefit from a book of specially designed weightlifting lessons Lilly creating targeting each sport’s unique needs.
We spoke with Lilly to learn more about her experiences at STEAM Camp, her goals for the future and how Jan Half’s generosity is making a difference in her life.
Can you start out by sharing a little bit about yourself, your year in school and your interests?
I’m a sophomore at Leland High School, and I’ve played sports my whole life. I’m very active. I enjoy school, sports and friends, and I really enjoy learning about the body and how it works. I’m taking an anatomy class right now, and I really enjoy it. So when I saw there was a STEAM Sports Camp this past summer, I was very interested.
Had you attended STEAM summer camps previously?
This was my third or fourth year. In previous years I attended middle school camp at the NIU Lorado Taft outdoor campus. There were still sports at those camps, but the main focus was nature and forensics.
This year, we were on the main NIU campus in DeKalb. It was really cool to see all the facilities the athletes get to use throughout the week, to see the fields where they play, and to learn about nutrition, strength training and everything involved in helping them play their best.
Were there some things you learned about that were brand new to you?
Yes! One thing that really stuck out is a body mass testing system. You basically sit in this little cage, and you go underwater, and it records your body mass, and it’s totally accurate. It’s extremely cool to use for athletes to know exactly the amount of muscle and fat in your body.
I have so many questions I’m trying to decide what to ask next! Can you share a little bit about your career goals and ideas?
I have a couple of career options, but they very scattered still. (I’m just a sophomore!) I love hands-on, so I definitely cannot see myself sitting down all day working on tech. I enjoy the engineering side a lot, where you’re working hands-on to solve problems. And I’m also interested in sports medicine because I’m taking anatomy, and it’s super fun to learn, and I feel like it’s really sticking in my brain! So right now I’m thinking of a medical field or some type of engineering.
Can you tell me about the weight room project you ended up doing back at Leland?
Yes! I actually have the binder with me right here. It has weekly schedules for all the sports. They all have each day on a page, with a plan for your weightlifting that day.
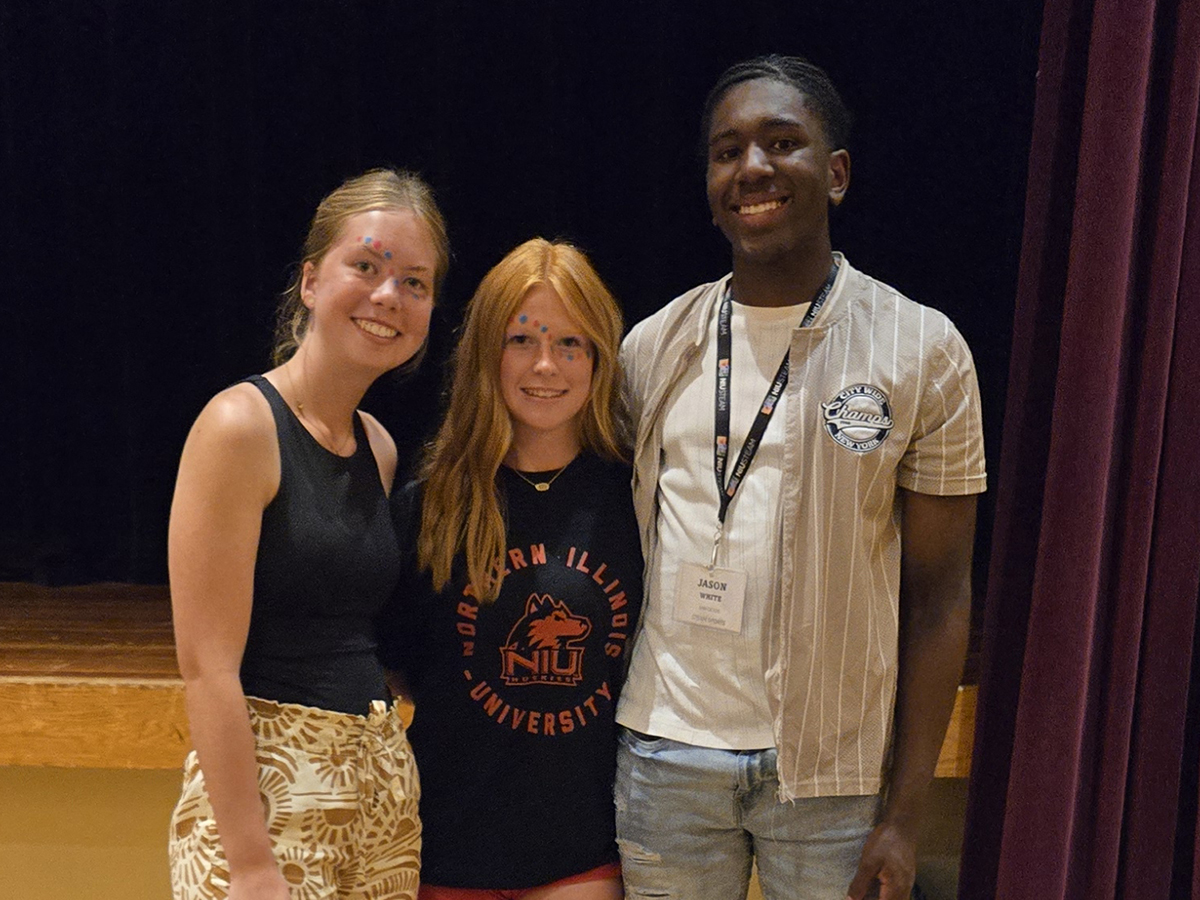
When we were at NIU STEAM Sports Camp, we had to make our own sports team. I was in a group of three, including my best friend, and we made a soccer club. We then got to research what NIU does for their workout plan. I thought that was so cool because they have designated workout plans for their athletes to choose from.
I also follow a lot of Division I athletes on social media, and many of them have their workout plans listed. So we looked at those for inspiration as well.
I didn’t think of actually using the plans back at Leland, though – that was Principal Bickel’s idea. He said, it would be cool if you made a workout plan for our athletes, and I realized – I have all the materials I need to do it!
So I made a template to use for every workout plan, then I looked at what plans athletes were using for each sport and plugged that in. Soccer, for instance, has lower body strength on Monday, and so on… so there’s a specific focus and purpose for the exercises each day.
What sports do you play?
I’m really big on soccer, and I play volleyball just for fun. I did basketball for a lot of years but decided not to this year – the seasons are very long in high school. I also take part in two seasons of trap shooting.
That’s very cool! Was there anything surprising about the differences in the way workout plans are tailored for different sports?
Yes. As I was looking at volleyball and soccer, volleyball had more focus on strength in your arms and your core, and soccer was mostly leg days. Which makes sense because you need to be more explosive on your legs. So those differences really stuck out. I feel like basketball was all of it because you need your arms and shoulders to shoot, but you also need that low stance with your legs.
Do you plan to go back to STEAM camp again?
Lilly (center) with her project partners at NIU STEAM Sports Camp.
My best friend and I would definitely love to go back next year, as long as we still have scholarship opportunities from Jan Half. I’m not sure if I’d like to do STEAM Sports Camp again because I think I’d like to try something different and learn about a different career field. There was a coding camp, I believe, and some engineering ones that look interesting because I’ve tried that kind of thing in my shop class, and it would be nice to try at NIU.
What do you enjoy about NIU STEAM Camps?
I love the camps because, number one, you get college students that are your counselors and helping to lead you. It’s also just fun to meet new people. I’m an extrovert, and I love meeting people. And I feel like I learn more – and the other high school students learn more – when we see these things done by a college student. They have lived this campus experience, and it’s great to learn from them.
Was there anything that surprised you about being on the college campus?
Definitely! The Student Center has a whole bowling alley and pool tables everywhere that you can use. And I’m not a video gamer, but when we went and saw the Esports Arena, I had never seen anything like it before. It was very cool.
Is there anything else that you think is important that I didn’t ask about?
This camp really allowed us to be active. We went and saw the rec center, and that was amazing. I also thought it was really fun to see the places where these Division I athletes get to train and to see how they have nutritionists planning their meals. I’ve never seen something like that, so it was very interesting!
Did that change how you plan your workouts, and how you meal plan for yourself as an athlete?
It definitely made me think about what I’m eating and try to be a better athlete. As I’m only a sophomore, I plan to be my best when I’m a senior and possibly get offers for Division I schools if I can. So the camp really made me think, would I rather eat a brownie or a protein bowl? Now I stop to think about how it affects my body in the long run.
What do you think about when you imagine fitting together college, career planning and athletics?
I think I could do it because when I was at NIU summer camp, one of our counselors was a Division I soccer player – she was the NIU goalie. She told me about her schedule because we just got to talking about it. I don’t think it would be too hard to manage as long as you take responsibility and realize – you can’t just pick one or the other. You have to work hard at both school and your sport.
Do you have a message you’d like Jan Half to know about what a difference her support has made to you and your classmates?
She has opened up things I’ve never even thought about – careers I never even knew existed. I think it’s awesome that one person has changed these high schoolers’ lives. If I do go into this career, it would be because of Jan Half because I didn’t even know what a nutritionist was, I didn’t know about these lab specialists and other jobs just for sports. I think it’s cool that I had the opportunity to visit the NIU campus and to see what there is other than just what my little school offers.
Ever have one of those days where you just feel… out of spoons?
If that sentence made you pause, you’re about to discover a powerful new way to understand the students in your classroom, your colleagues, and maybe even yourself. It’s a concept that came to life in our latest STEAM Studio Spotlight episode, and it’s one of the many game-changing insights our guests, Tim Yoder and Joy Young, shared from their wonderful new book, The Neurodiversity Connection.
We often hear the term “neurodiversity,” but what does it truly mean for the day-to-day reality of a teacher? Is it just another buzzword, or is it a fundamental shift in how we see our students? In this conversation, we move beyond the theory and dive straight into the heart of what makes a classroom work: human connection.
Tim and Joy aren’t just authors; they’re veteran educators with a combined lifetime of experience. Joy brings a deeply personal perspective, not only as a teacher and administrator but as a mother to neurodivergent children and the partner of a husband who discovered his own neurodivergence later in life. Tim, her longtime friend and mentor, is the teacher every one of us wishes we had—the kind who believes so fiercely in the power of relationships that he was able to guide his inclusion math classes to outperform the regular ed classes. Yes, you read that right.
So, how do they do it?
The conversation starts with a simple but profound reframing. Neurodiversity isn’t a synonym for autism or ADHD. As Joy explains, it’s the radical idea that “there is no one right way to think or to learn or to behave.” It’s the understanding that every single brain is as unique as a fingerprint. There is no “normal” brain in a vat at the Smithsonian. This is about all of us.
From this foundation, Tim shares the teaching philosophy that became the title of their book: connection. He recounts the incredible story of his inclusion math classes, where his principal’s only instruction was to “keep doing what you’re doing.” That “thing” wasn’t a magic curriculum; it was the deliberate, daily practice of building genuine relationships. He talks about closing his laptop to make eye contact, greeting every student at the door, and being a “real person” who makes mistakes and apologizes for them. It’s the “oil that makes the whole machine work.”
But what about the practicalities? We get into the nitty-gritty. Tim challenges us to take a sensory tour of our classrooms—to notice the distracting click of the clock, the glare of laminated posters, the buzz of a flickering fluorescent light, even the strong smell of a tuna sandwich at lunch. These aren’t minor annoyances; for some students, they are spoons being taken from a very limited daily supply.
Ah, the spoons. This is where the conversation becomes truly enlightening. Tim beautifully illustrates the “Spoon Theory,” a metaphor for finite daily energy. He walks us through a day in the life of a student where every sensory input, social challenge, and academic demand costs a spoon. By lunchtime, they might be running on empty. Understanding this, he says, is the first step toward compassion. It’s about being “a little kinder than necessary.”
The episode is packed with these kinds of actionable insights. Joy introduces the concept of the “spiky profile,” explaining that a student’s incredible strength in one area is often paired with a significant challenge in another. Our job isn’t to penalize the trough but to support it, so the peak can soar. They also touch on the power of “body doubling”—the simple idea that we can achieve more together than alone—and why this is a crucial skill for the modern, collaborative world.
This isn’t an episode about lowering standards. It’s about the exact opposite. As Joy says so powerfully, “You can be compassionate and hold kids to high standards at the same time… I didn’t tell you it was going to be easy. I’m telling you it’s going to be worth it.”
If you’re looking for a dose of inspiration, practical strategies you can implement tomorrow, and a renewed belief in the transformative power of teaching, you need to hear this conversation. Tim and Yoder’s wisdom, warmth, and unwavering belief in every child’s potential is a reminder of why we got into this profession in the first place.
Ready to see your classroom in a whole new light? Listen to the full episode of STEAM Studio Spotlight wherever you get your podcasts.
We’re surrounded by big, complex problems. You see the headlines every day. It’s easy to feel like solutions are solely in the hands of established experts in faraway labs. But what if the next groundbreaking idea is already forming in the mind of a student in a local high school or community college?
In the latest episode of the STEAM Studio Spotlight, we’re pulling back the curtain on an exciting event that’s betting on exactly that: the NIU Innovation Challenge. If you’ve ever wondered how to translate classroom learning into real-world impact, or if you’re a student, teacher, or mentor looking for a truly meaningful project, this conversation is your starting point.
We have the privilege to sit down with the masterminds behind the challenge, Becky and Chrissy, to unpack what makes this competition different. Forget dry, hypothetical exercises. The Innovation Challenge presents student teams with two authentic, pressing problems currently being researched by the Northern Illinois Center for Community Sustainability (NICCS).
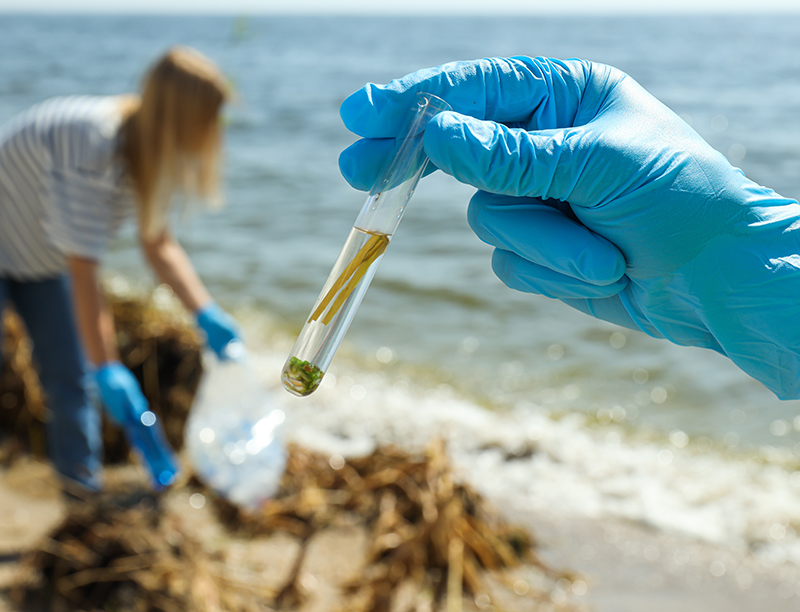
The first? The startling prevalence of microplastics in our seafood. The second? The growing threat of antibiotic-resistant bacteria entering our food systems. These aren’t simplified textbook cases; they are the real, messy issues that scientists are grappling with right now.
So, how do students even begin to approach problems of this scale? That’s where the magic of the challenge truly shines. Becky and Chrissy detail the incredible support system built around the teams. We’re talking about access to webinars with actual researchers, mentorship on everything from scientific writing to public speaking, and even a hands-on field trip to campus where students can use advanced lab equipment like PCR machines—gear they might not otherwise have access to.
But the Innovation Challenge isn’t just for the aspiring scientists. As Chrissy passionately explains, this is an interdisciplinary endeavor at its core. A successful team needs the puzzle-solver who loves research, the wordsmith who can craft a compelling written proposal, and the charismatic presenter who can sell the idea. It’s a perfect fit for students in debate, theater, or journalism, just as much as for those in biology or engineering.
The episode walks you through the entire journey—from forming a team and diving into research to the culminating “Pitch-a-thon” on February 28th. On that day, the campus comes alive as students receive professional coaching, refine their pitches, and finally present their solutions to a panel of judges. And yes, there are cash prizes on the line, but the real reward is the experience itself: the confidence that comes from tackling a massive problem and the skills that will serve these students no matter what career they pursue.
The spirit of the conversation is one of infectious optimism. It’s a powerful reminder that the capacity for innovation isn’t limited by age. By providing the right framework, resources, and encouragement, we can empower students to believe that they have the ability to solve the “insurmountable.”
If you’re looking for a dose of inspiration, if you want to hear about the future of hands-on education, or if you know a student who is ready to be challenged in the best way possible, you need to listen to this episode. Discover how the NIU Innovation Challenge is turning today’s students into tomorrow’s problem-solvers.
An Interview with Chrissy Swartz, NIU STEAM Educator
Can start out by sharing some highlights of the camps you taught this year?
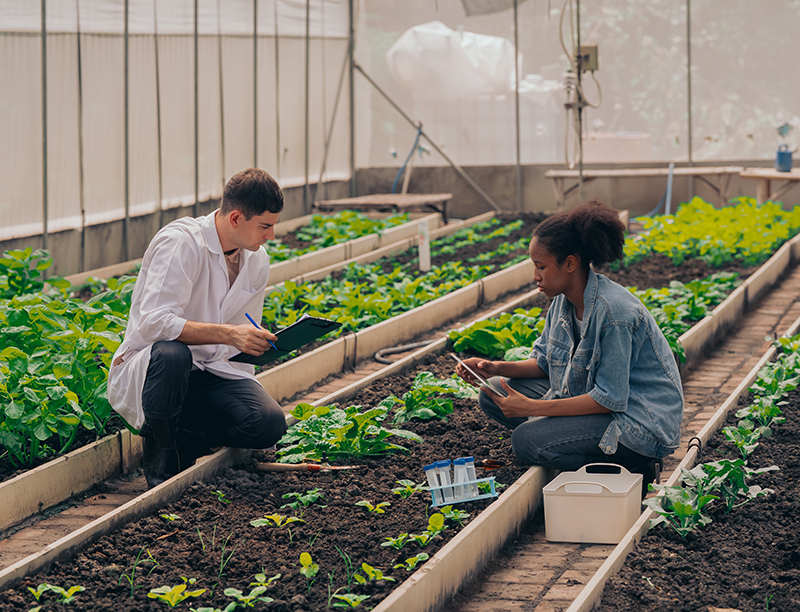
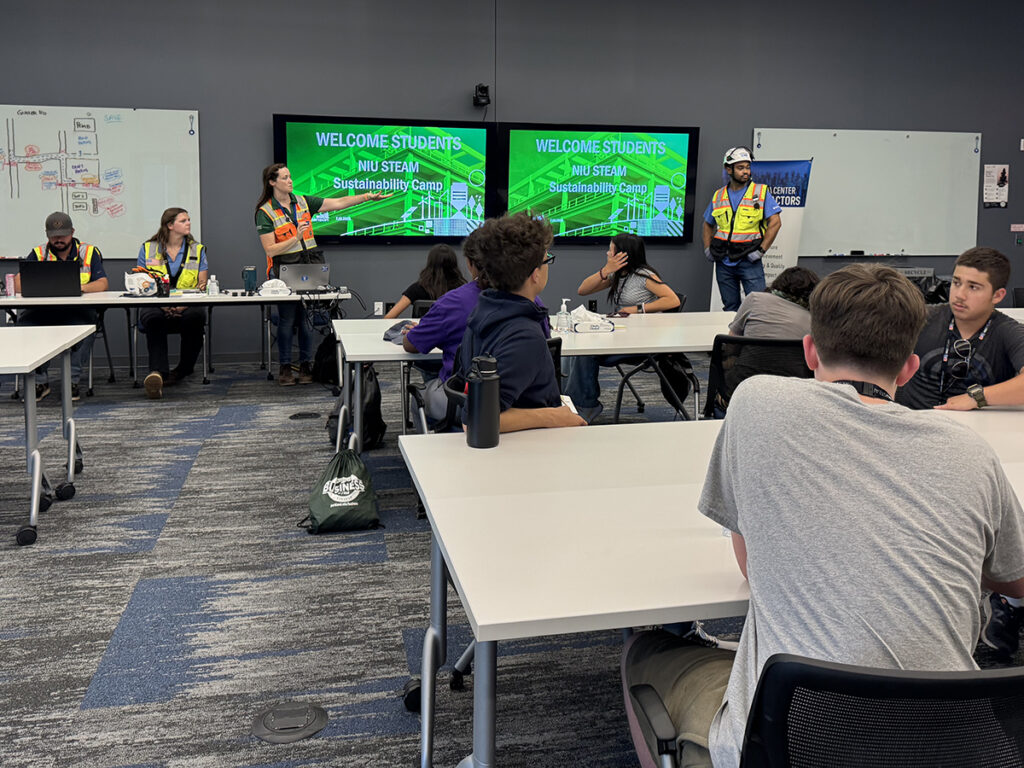
This is my second year of doing STEAM Summer Camps, and it was a great experience. The camps I directed this year were all sustainability related. One was a high school Sustainability Camp, one was a middle school Sustainability Camp and the final one was a high school Food Systems Camp. They all intertwined with one another and shared a lot of common themes.
Were those all residential camps?
Yes, all three were residential. The residential middle school camp is something we haven’t done for several years at NIU DeKalb, so that was a new experience we brought back this year. All the students stayed on campus in Neptune Hall and ate in the dining halls, so they had that full college experience.
Can you walk us through some of the activities you did with the students, as well as the campus and community partners that you worked with?
Yes! Those partnerships are so important to NIU STEAM because we want to make sure the students have a good college experience while they’re here on campus, and also a good STEAM experience, where they’re seeing different career pathways and working on hands-on, real-world projects.
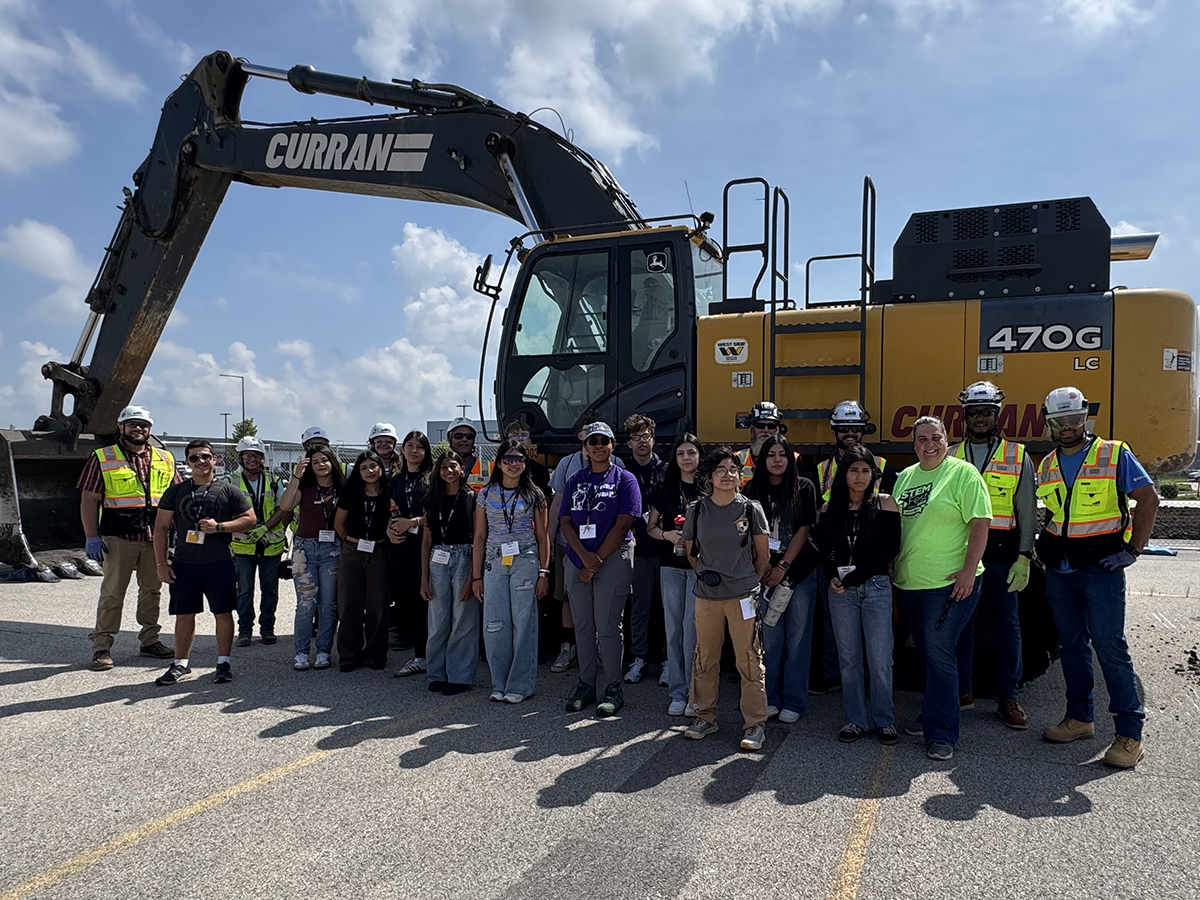
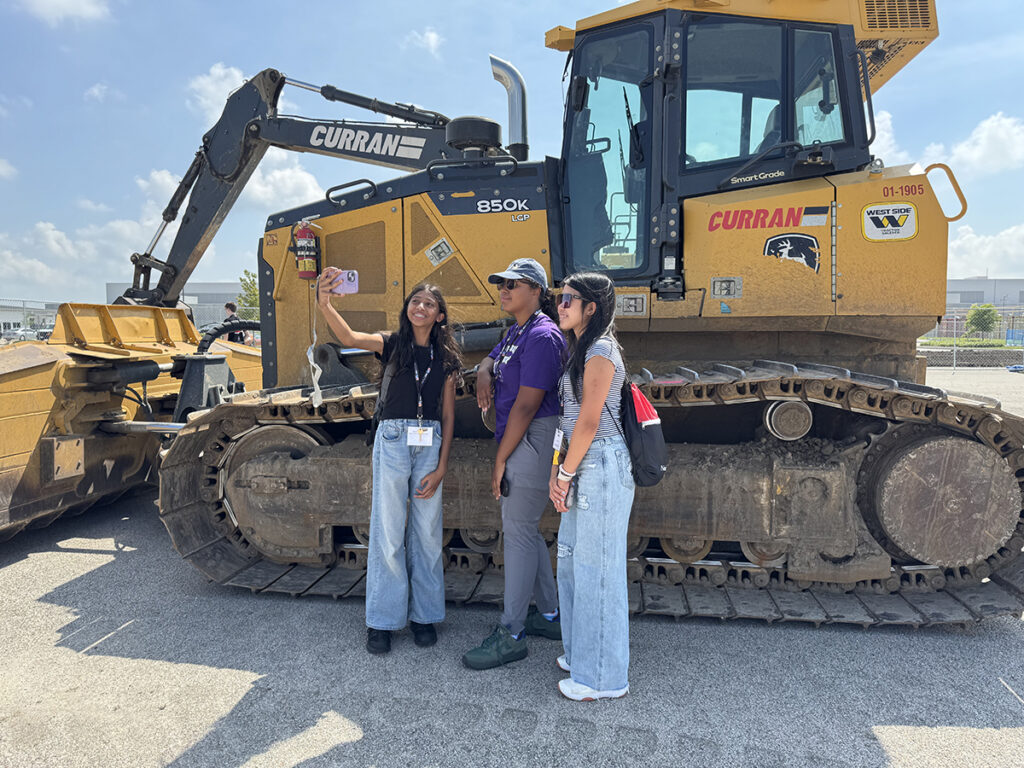
In the sustainability camps, for example, we had so many partners help us out. We got to meet with people from Mortenson, who designed and built the Meta DeKalb Data Center. We got to go and see the Meta Data Center site, the students got to climb in the back hoe and see what the construction site in person.
We also met with two employees from Meta who talked about their high school experience, what their dreams and aspirations were when they were in high school like our students, their education and career pathway, and now what they do in their jobs with the data center.
How did that career exploration relate to sustainability?
The folks from Mortenson and Meta did a great job centering the conversation around sustainability. Every one of our STEAM camps features one overarching project the students work on throughout the week. For Sustainability Camp, the students’ project was to design a community that featured five of the seven pillars of sustainability (transportation, water systems, green space, land use, community engagement, community development, and environment). The students spent the week thinking about – who were the stakeholders in their community, and which pillars of sustainability would be most important to each stakeholder?
When we met with the Mortenson and Meta folks, they talked about when they came into DeKalb, who were their stakeholders? How would the construction project and the ongoing operations of the data center affect those stakeholders? And what initiatives did they put in place to make sure everything was sustainable, not only ecologically, but also from a human (community engagement) and economic (community development) perspective, as well?
Who were some of your other community partners?
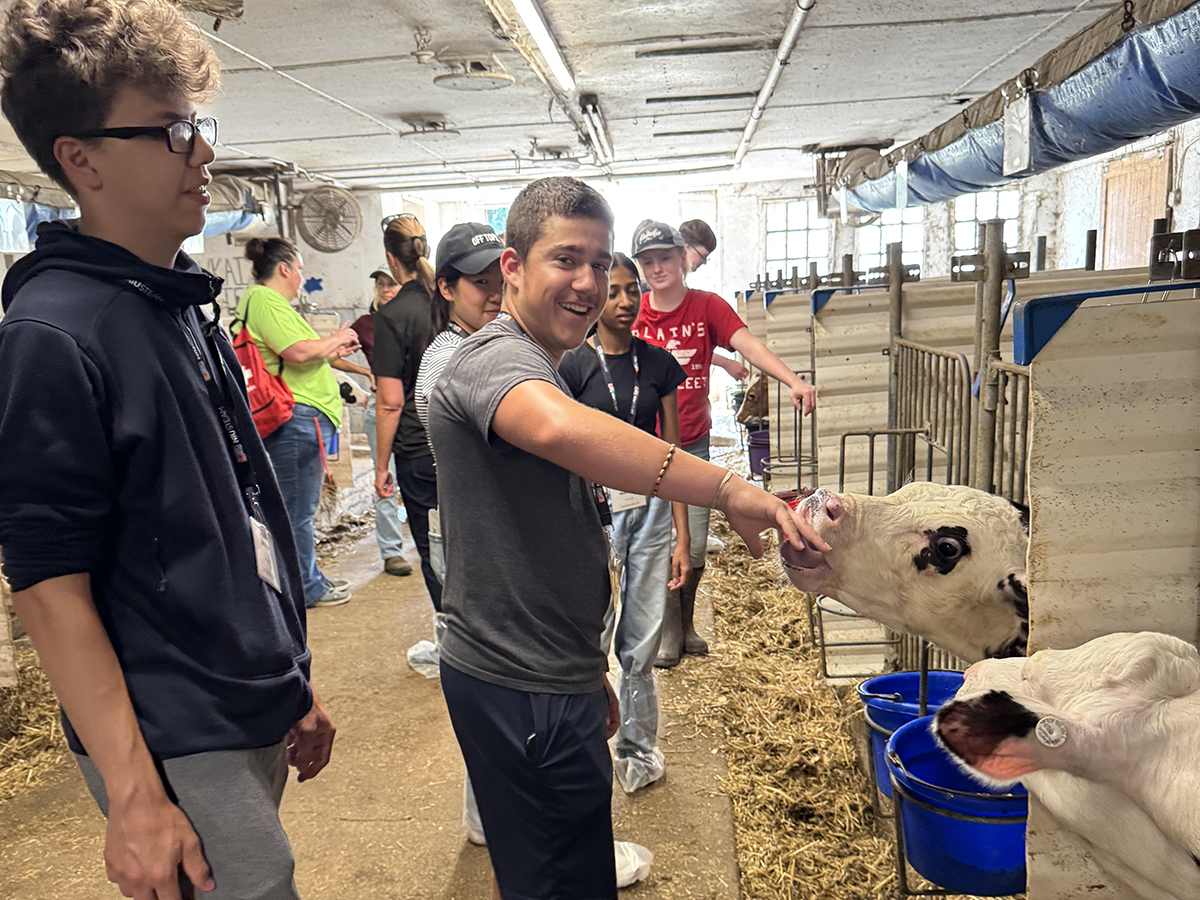
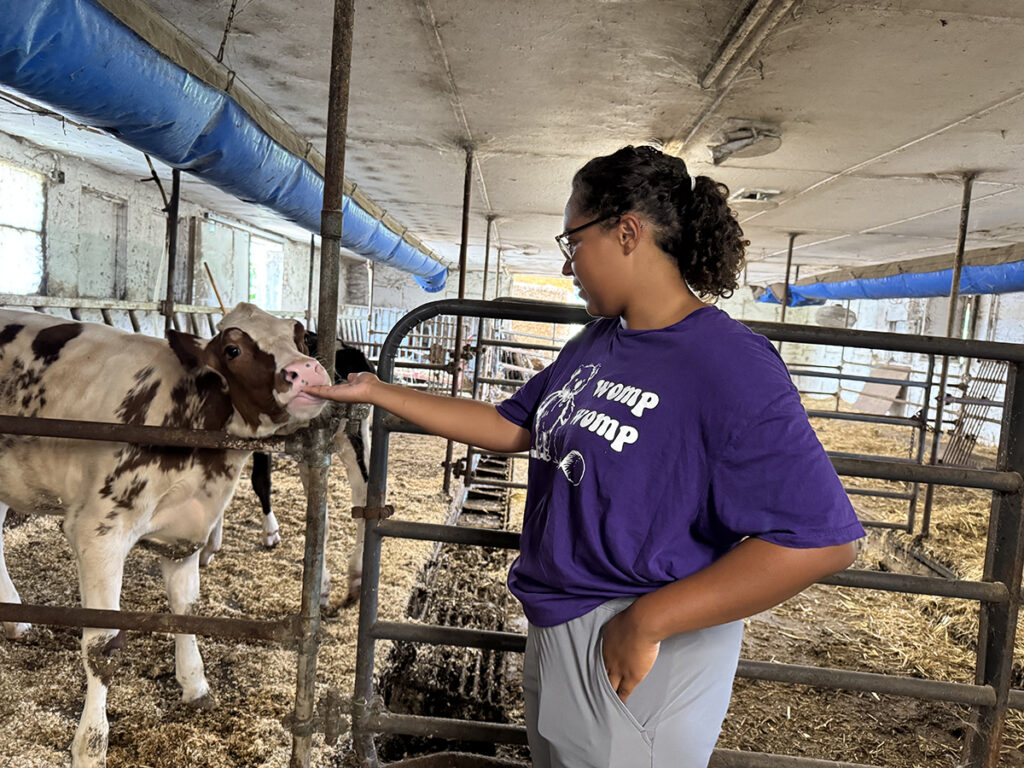
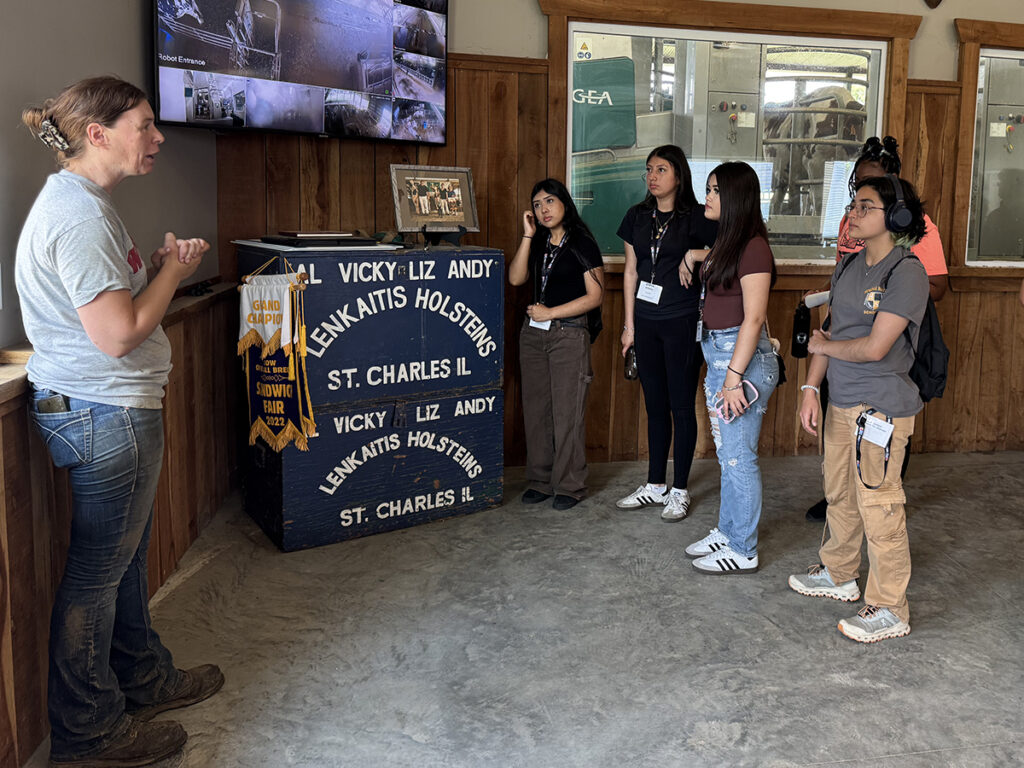
We also partnered with Midwest Dairy, who arranged and financially partnered with us to send campers to Lenkaitis Holstein Farm, in Saint Charles. The students got to physically go to a dairy farm and learn about how sustainability is implemented in that context.
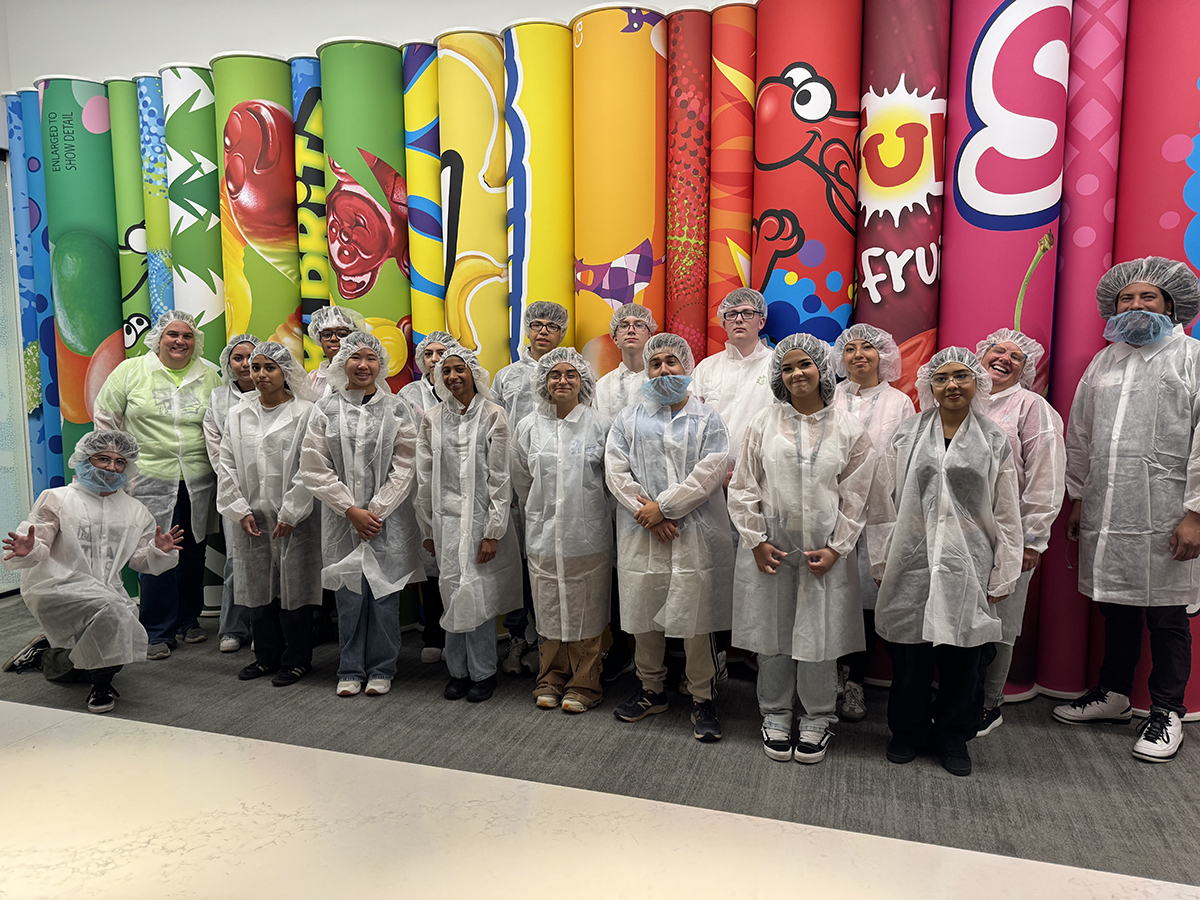
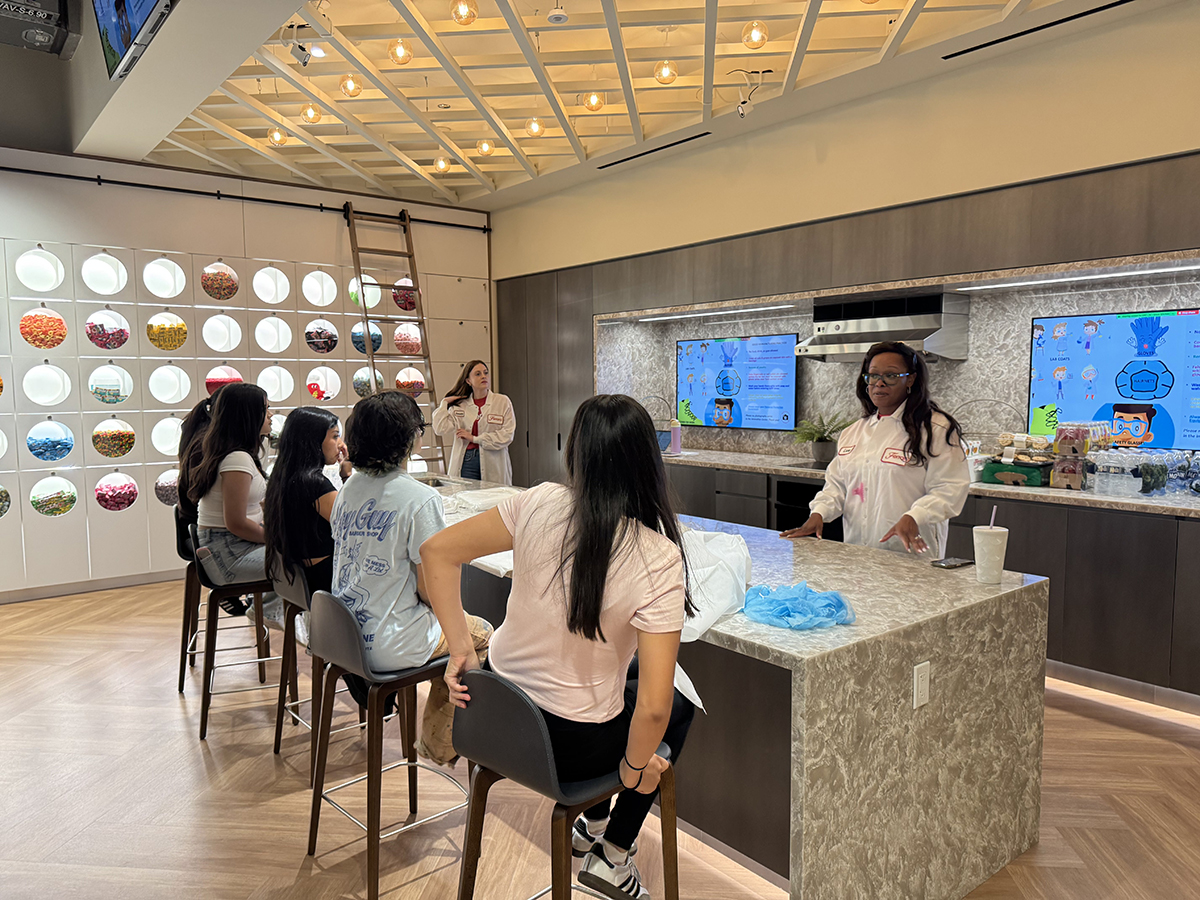
Ferrara Candy Company invited us to participate in their Annual Day of Giving, and bussed us to their offices and lab space in the old post office in downtown Chicago. We got to see how they refurbished that historic building into office space – which can be a practice in sustainability rather than building new – and we got to tour their labs and do some activities. They talked about their stakeholders as not only the consumers of their candy, but also the community and their employees. For them, sustainability involves food safety and equitable pay, equitable treatment of workers, and safe and healthy work conditions.
You mentioned virtual field trips, as well?
Yes! Another dairy farm that Midwest Dairy connected us with is Fair Oaks down in Indiana. It was too far for us to travel in person, but Brock Gorrell, Director of Museum and Tour Operations, led us on a virtual tour of their farm. The reason it was so important is that they are really pushing the envelope on new, more sustainable practices in dairy farming. In fact, they’re very close to net zero carbon emissions for their whole operation!
For the tour, they showed us their automated milking machines, how they grow corn sustainably for feed and even what they do with the manure. They’re able to capture some of the methane from cow manure through anaerobic digestion and use it to power some of the vehicles on their farm. Their goal is to create a very efficient, self-contained system where every biproduct of the operation serves a purpose and is not wasted.
Can you tell us more about the students’ week-long projects?
One of the most exciting parts of camp is the final project showcase. In the past, we’ve swapped rooms with other camps and looked at each other’s projects, so students could have a genuine audience. This year we took that even further and rented out the ballroom in the Holmes Student Center for a full showcase!
Each student or group set up their project and was there to answer questions. Their fellow campers came by, their parents and families were there, and even Representative Briel from Illinois House District 76 came by to see the projects and talk with the students.
Which NIU faculty members worked with you and the students?
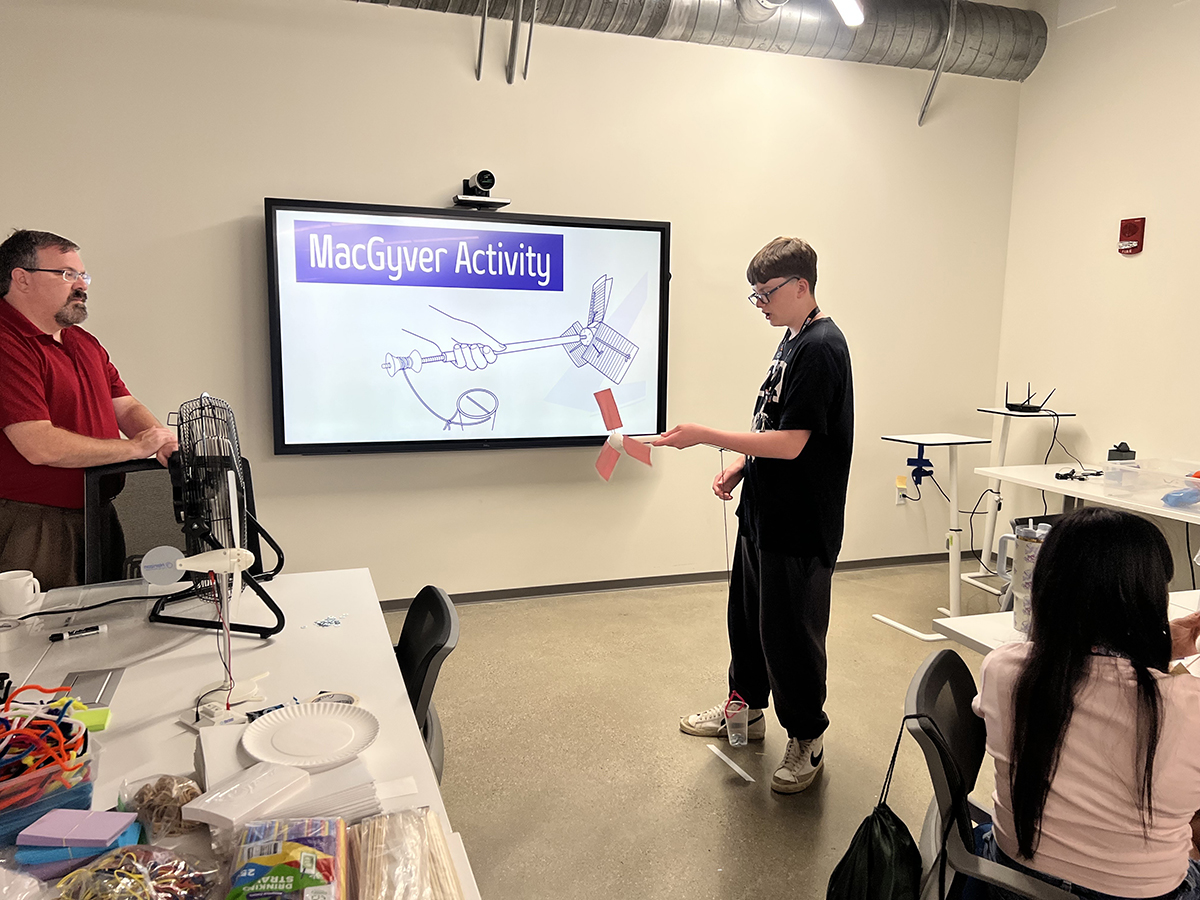
Engineering Professor Kevin Martin came out and did a wind experiment with the students where they built turbines. They had to figure out what shape to make the blades of the turbine and to what degree they needed to be tilted. The campers did an experiment to test the output of energy with the blades at different angles.
It was very cool because, not only were the kids learning about physics and engineering – they were also super competitive. One student kept falling short, and he kept going back to the drawing board, redesigning his wind turbine until it worked better. He was practicing resilience, work ethic, problem solving – so many employability skills. The students got to see the importance and the process of innovation in action.
Katie Davison, the director of State Relations for the University, also visited the campers. She empowered the high school students to become active within their communities as agents of change concerning the topics within sustainability about which they were passionate. She referred to the students as scholars, and illustrated that the common phrase, “One day, when you are older,” overlooked the fact that they are innovative and creative thinkers today who could actively identify problems and voice solutions to school, local, state and national policy makers.
What about the Food Systems Camp?
Professor Courtney Gallaher, who is director of sustainability for NIU, came out and to the students about how growing your own food can be empowering. She had the kids talk about some of their favorite foods and then trace those foods to their parent companies… and it turns out there are only a small handful of companies producing all the processed food that makes up most of our American diet. We toured the Edible Campus gardens to see what foods grow here in our area, what they look like when they’re growing, and what’s needed to help the plants thrive. This was her second trip out to the NIU Camps this summer as she visited our Middle School Sustainability camp along with Holly Hansen, assistant director of sustainability for NIU, to teach students creative ways to educate their community about sustainability topics that mattered to them.
We also visited Science On a Sphere in NIU’s Founders Memorial Library to see an animation showing how quickly the human population on earth is growing. We thought about the question – how will we be able to provide access to safe and nutritious food for such a large population?
What was something new you learned in the camps?
One of the things we talked about in Sustainability Camp is that for a community to be equitable and efficient, everything you need has to be within 15 minutes of your home. I’m working on my GIS certification, and I worked on a project last semester for one of my courses that’s very related. Together, those learning experiences changed the way I think about community and equitable access to food.
Last semester I mapped how far people are from grocery stores right here in our own region – in Cortland, Malta, and other towns near DeKalb. I learned how far away some of our neighbors are from healthy food. If it’s five, eight or 10 miles to the nearest grocery store, that might not sound like much. But what if you’re the parent of an infant, if you’re disabled, or if you don’t own a car? Especially in areas without reliable public transportation, it can take far longer than 15 minutes to access food.
Are there any other partnerships you haven’t gotten to mention yet?
One of the exciting partnerships was our work with Trane. All of us STEAM educators went through the NC3 decarbonization certification with Trane, and I used the information from that certification a lot in my middle school sustainability camp.
What I would love to do next year is extend the partnership so the campers can actually complete that certification during their week on campus. For a middle school or high school student to be able to complete an industry certification is a game-changer, both putting them ahead of their classmates on a possible career path and also helping them to see the bigger picture, to recognize themselves as career bound and understand how their education relates to real-world careers.
Why do you think meeting with NIU faculty and industry partners makes a difference for the campers?
I would say a transformation happens where the campers start to see themselves as colleagues and equals rather than students who are just passive receivers of information.
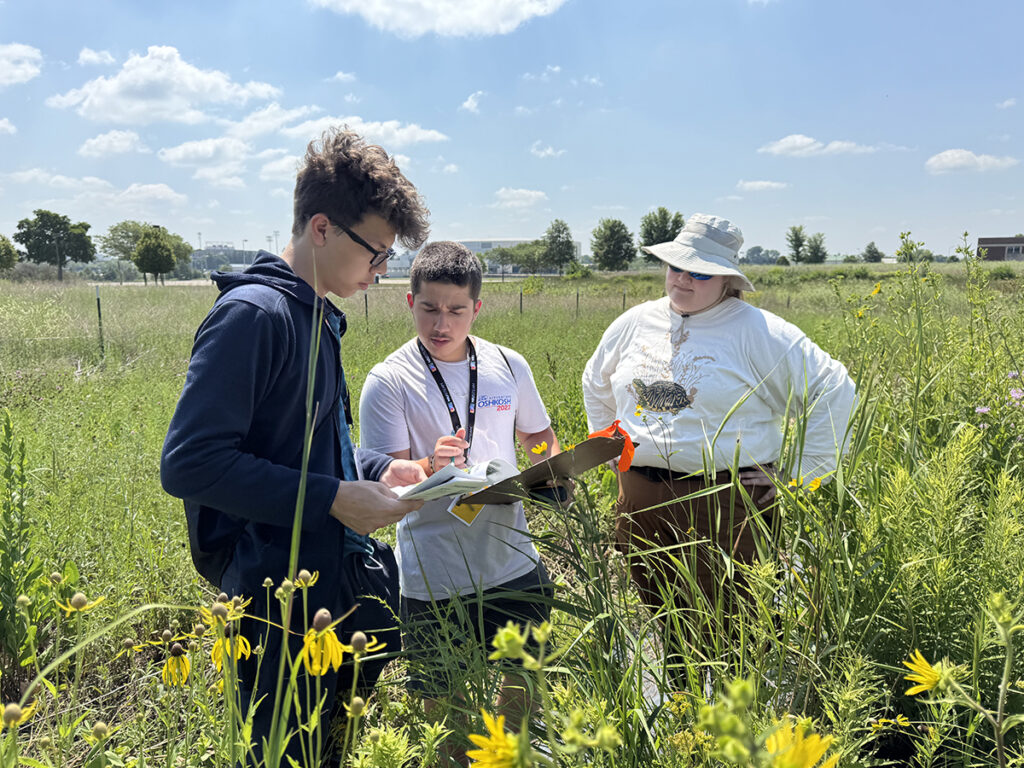
When I first started doing these camps, I wasn’t sure what the kids would find interesting. When we originally set up a visit to a prairie restoration project with NIU Biology Professor Holly Jones, for example, I was a little afraid the students might be bored in the prairie and not really engage. Instead, the students were amazed to see the prairie flowers and learn about the plants and animals. They asked great questions, and Holly and her graduate students answered the questions as though they were talking to colleagues. Our campers were also able to respond to one another’s questions and develop ongoing conversations.
There is a lot of power in “near peer” mentoring, so interacting with the NIU students who were the teaching assistants and counselors at summer camps was also really valuable for our campers. There are amazing moments of learning where the campers feel comfortable enough with the NIU students to ask their genuine questions, to not be afraid to nerd out a little bit!
Is there anything else you’d like to share that I didn’t ask about?
One of the things I often reflect on is the differences between working as an NIU STEAM educator and my previous experiences as a high school classroom teacher. Though I believed that skills were extremely important, in the K-12 classroom, we were very content driven because we wanted the students to do well on tests and be prepared for college with a solid basis of content knowledge.
Now, as a STEAM educator, I’m able to focus less on specific content and more on building skills and relationships. No matter what the content of the camp is, I get to build connections with NIU faculty and industry partners and let students get involved in conversations with experts in that area. We start with real-world application of skills, and the content knowledge follows. The campers have a good reason for wanting to find out that knowledge, so they can better understand and solve the real-world problems they’re exploring!
Showing the knowledge in action with our campus and community partners has a much bigger impact than just looking at it separately without that real-world context. The students walk away from our camps knowing that STEAM is a real thing, not just a fun after-school hobby. If you want to do anything connected to science, technology, engineering, arts or math, we’re connecting you with industry partners that can show you how to make a career out of that interest, and that’s huge.
Ever feel like your career path is anything but a straight line? That the person you are today is a collection of unexpected twists, tapped shoulders, and chances you took even when you had no idea what you were doing?
If so, then you’re going to see a bit of yourself in our latest guest on the STEAM Studio Spotlight.
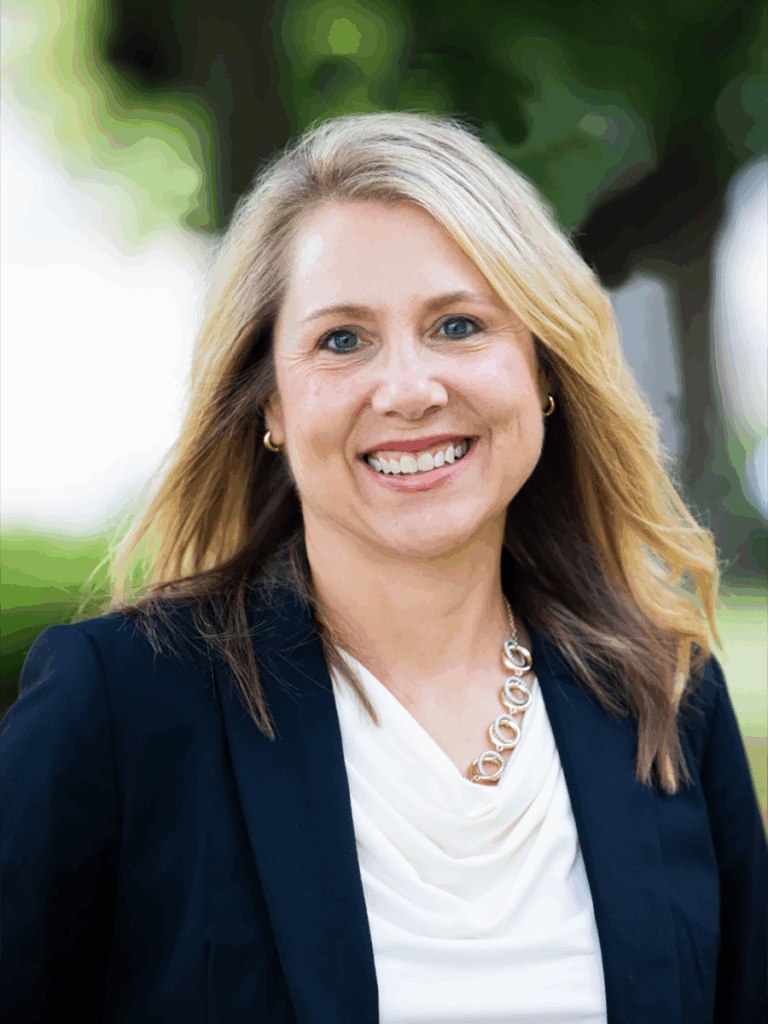
We sat down with Jennifer Groce, NIU’s Director of Community Engaged Partnerships, and let me tell you, the conversation was nothing short of delightful. We went in expecting to talk about university-community relations (and we did!), but we came away with a powerful story about transformation, listening, and the courage to say “yes” to things that scare you.
It all starts with a simple, haunting question from Alice in Wonderland: “Who are you?”
For Jennifer, that question isn’t just philosophical—it’s personal. She once played the Caterpillar in a children’s theater production, a role that has become a surprisingly fitting metaphor for her entire life. She’s been constantly evolving, emerging from one cocoon after another into new and unexpected forms.
So, how does a self-proclaimed Caterpillar from Decatur end up as a key connector between a major university and its community? It involves a near-miss with a military career in charge of toilet paper (“a powerful position,” she jokes), a pivot away from law school, a decade leading a downtown revitalization, a foray into deep data research, and even a run for mayor.
Each step was guided not by a rigid plan, but by a willingness to step far outside her comfort zone when someone saw potential in her. She embodies the idea that our careers aren’t found in a catalog; they are built through a series of meaningful, sometimes scary, conversations and connections.
But this episode is so much more than a career retrospective. We dive deep into the heart of what it truly means for a university to be “community engaged.” Jennifer breaks it down with beautiful simplicity. It’s not about the university just inviting the community to its party. It’s about sitting down together and asking, “Should we even have a party? What kind of music should we play? My house or yours?”
This philosophy of reciprocity and mutual voice is revolutionary in a world that often defaults to an “us vs. them” mentality. Jennifer shares how the simple, profound act of listening—of truly seeking to understand before being understood—is the superpower that builds bridges and creates lasting change.
If you’ve ever wondered how to make a real impact, no matter your field, this conversation is packed with wisdom. Jennifer offers heartfelt advice for students, educators, and anyone feeling like a caterpillar on a mushroom, unsure of which way to go. Her insights on finding your passion, getting around people who inspire you, and the transformative power of community-engaged learning are worth the listen alone.
So, if you’re ready for a dose of inspiration and a masterclass in building belonging, we highly recommend you press play. Join us for a conversation that is as insightful as it is warm, and discover how one person’s unlikely journey is helping to weave a stronger, more connected community for everyone.
Ever meet someone who just seems to radiate passion for learning? The kind of person whose curiosity is contagious and makes you see the world in a new way? In our latest STEAM Studio Spotlight episode, we had the absolute pleasure of sitting down with one of those people: Khalil Barahaoua.
If you’ve been around our STEAM programs, you might already know Khalil. We certainly do—and as we say in the episode, calling him a “student worker” doesn’t even begin to cover it. He’s a student leader, a campus guide, and what we like to call a STEAM rock star.
But this conversation is about more than just his resume. It is a deep dive into the experiences and philosophy of a future educator who is thoughtfully building a bridge between the humanities and the sciences.
Khalil is studying Spanish and French at NIU, with the goal of becoming either a world language or a bilingual ESL educator. What makes his journey so compelling is how he’s actively weaving together every thread of his life to shape his teaching philosophy. He comes from a deeply multicultural and multilingual family, where languages weren’t just subjects, but essential tools for life. This foundation has given him a unique lens through which he views education.
So, how does a future language teacher become a cornerstone of our STEAM team? For Khalil, it’s all about context. He passionately believes that we learn language best not by memorizing verb charts, but by experiencing it in a rich, meaningful context. And what provides a richer context than the hands-on, problem-solving world of STEAM? He shared incredible insights on how art, technology, science, and social-emotional learning create the perfect environment for language acquisition, allowing students to show what they know, even when words fail them.
We got to hear about his “aha” moments in our camps, like the time he led a multilingual greeting activity that initially had one student feeling too shy to present. The story of what happened next—and how that student carried that lesson with him all day—is a powerful testament to the importance of creating a safe and joyful learning environment. It’s a moment that perfectly illustrates the kind of reflective and student-centered educator Khalil is becoming.
His learning hasn’t been confined to our studio or his NIU classrooms, either. Khalil opened up about his transformative study abroad experiences, from a 10-day trip to Panama that opened his eyes to a new culture, to a two-month Fulbright-Hayes program in the Philippines, where he learned language through the context of agriculture. He saved the most life-changing for last: a full semester in Mérida, Mexico, that took his Spanish from academic to truly fluent. These stories aren’t just travel logs; they are the building blocks of his global perspective, which he is determined to bring into his own classroom.
This episode is for anyone who believes in the power of interdisciplinary learning, for anyone curious about the future of education, and for anyone who just loves hearing a genuine, inspiring story about a passionate person finding their path.
You’ll come away feeling like you’ve had a conversation with a future teacher who is not just prepared to educate, but to truly connect. Listen to the full conversation to be inspired by Khalil’s journey and to hear, in his own words, why he believes that all knowledge is additive, and that every passion can find a place in a modern classroom.
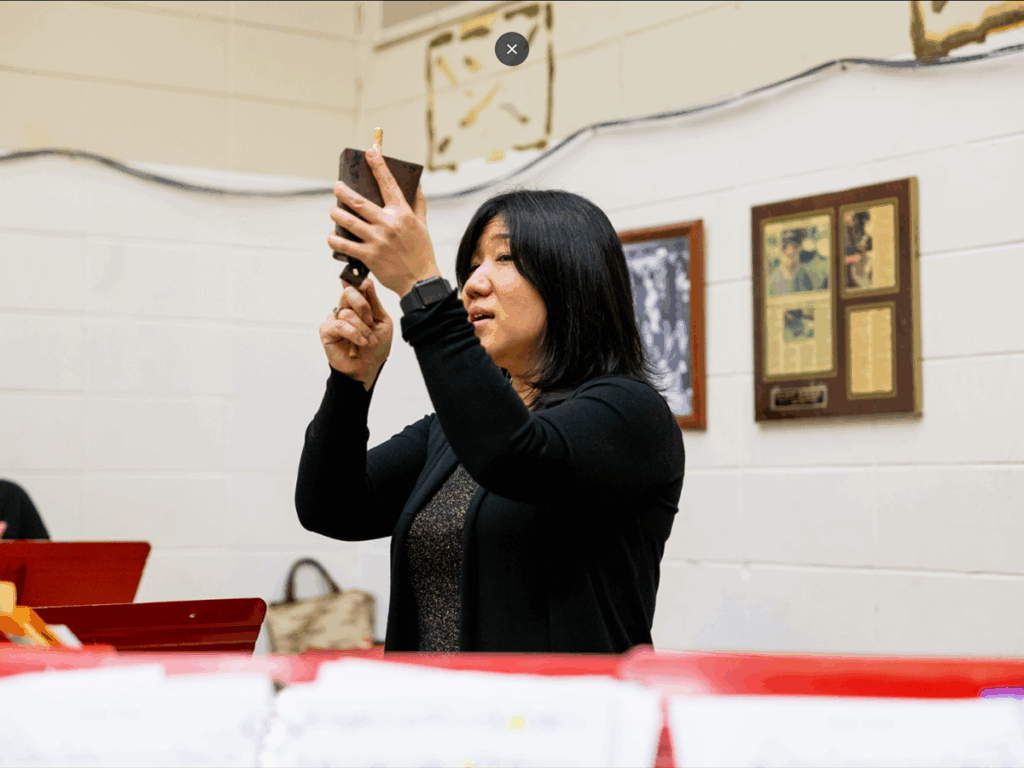
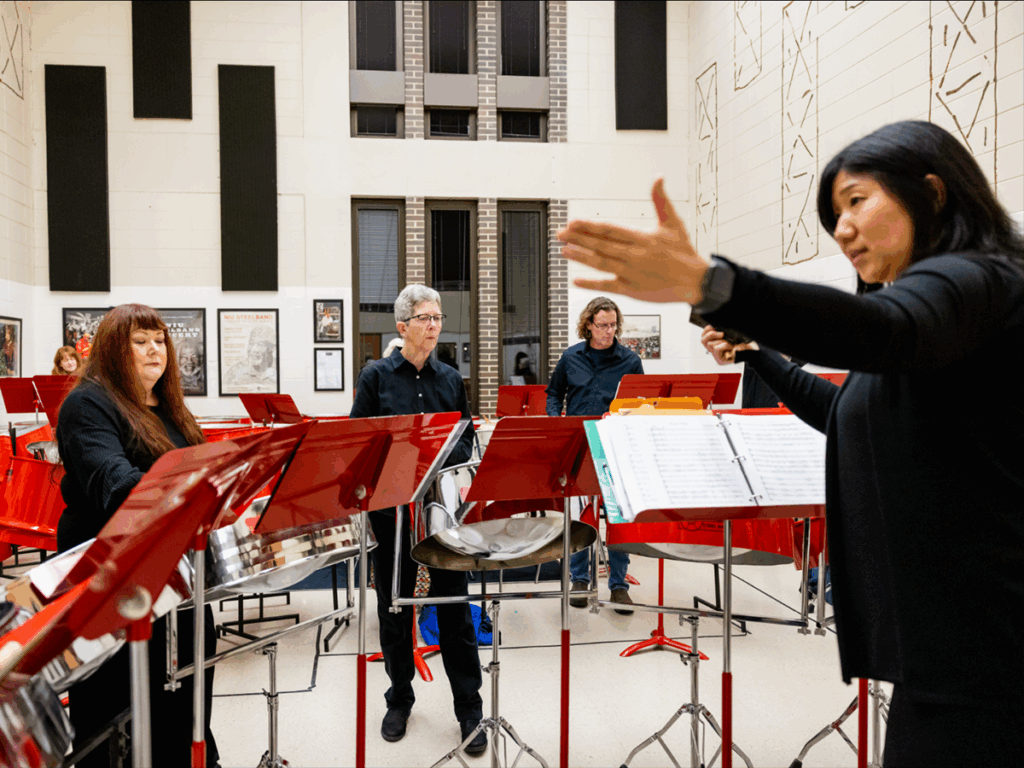
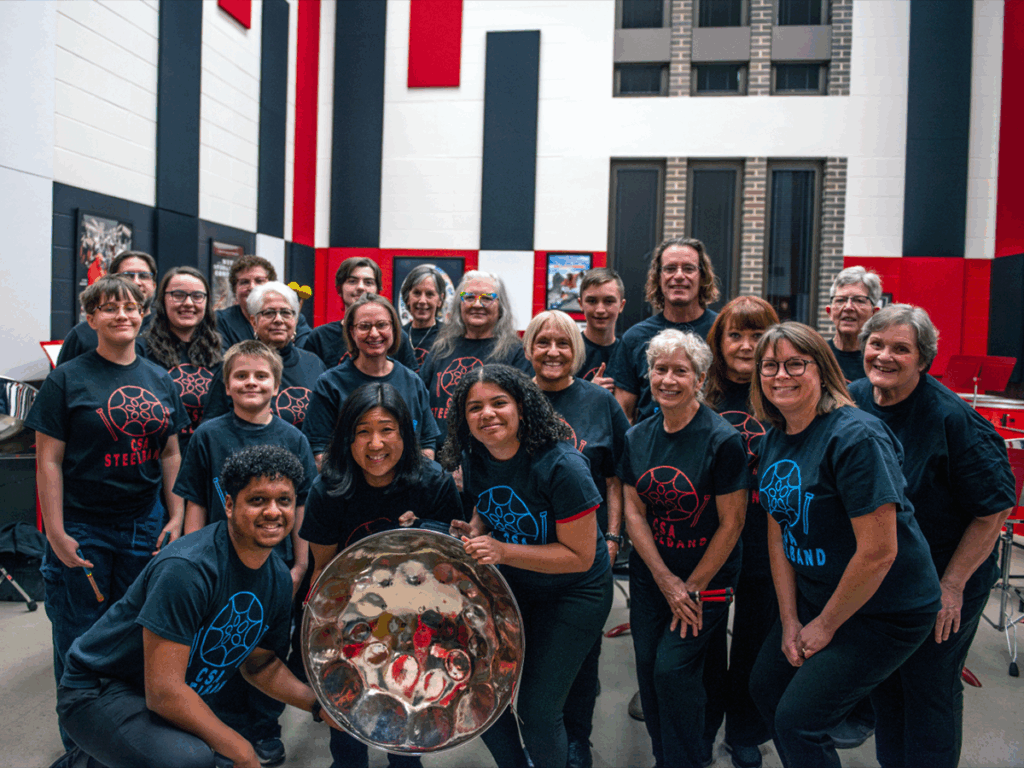
If you close your eyes and listen to a steel pan, you might picture a sunny beach or a vibrant carnival. It’s a sound that feels like instant joy. But have you ever stopped to wonder how that complex, melodic sound is made? How does a humble oil drum transform into an instrument that can sing?
In our latest episode of STEAM Studio Spotlight, we sit down with someone who has the answers—and whose own story is as fascinating as the instrument she dedicates her life to. Yuko Asada, is one of the world’s few steel pan builders and tuners.
Yuko’s journey is not what you might expect. It didn’t start in the Caribbean, but with classical piano training in Japan. Her path took a dramatic turn in the hills of West Virginia, where she first encountered the steel pan and, in her own words, “fell in love with the music.” That love affair sparked a pilgrimage to the heart of the steel pan’s culture: Trinidad and Tobago.
But Yuko didn’t just want to play the pan; she wanted to understand its soul. She made the rare leap from performer to creator, learning the physically demanding, deeply intuitive craft of building and tuning the instruments by hand. She shares incredible stories of her early days wielding a six-pound sledgehammer for hours on end, a labor of love that literally took a physical toll.
This is where her story becomes a powerful conversation about the future of a tradition. Yuko reveals a pressing crisis: there are far more steel pan players in the world than there are builders and tuners. The art form, so rich in culture, is at risk of being silenced simply for a lack of people who know how to give it a voice.
So, what is the solution? This is where our conversation gets truly exciting. Yuko is currently in Trinidad on a Fulbright award, not just to preserve the old ways, but to pioneer new ones. She’s exploring how modern technology—like robotics, hydroforming, and incremental sheet forming—can work in harmony with traditional craftsmanship to secure the future of the steel pan. She talks about meetings with engineering professors and the potential for automation, all while maintaining a profound respect for the instrument’s cultural roots.
This episode is more than just a talk about music. It’s a story about cultural bridges, from a piano in Japan to a pan yard in Trinidad, via the unexpected hub of steel pan excellence at Northern Illinois University. It’s about the physicality of art, the tension between tradition and innovation, and one person’s passionate quest to ensure a beautiful sound isn’t lost to time.
If you’re curious about how art and science collide, if you love stories of unique career paths forged by passion, or if you just want to be inspired by the sound of a steel drum with a new understanding, you need to hear this conversation.
Ready to dive into the rhythm? Listen to the full episode of STEAM Studio Spotlight with Yuko Asada wherever you get your podcasts.
You’ve probably heard the headlines: “Groundbreaking Study Reveals…” or “University Researchers Discover…” We celebrate the brilliant minds behind these discoveries, the professors and students in lab coats or archives, pushing the boundaries of human knowledge.
But what if I told you there’s an entire profession, a crucial layer of the research ecosystem, that most people—including many in academia—have never heard of?
In our latest episode of STEAM Studio Spotlight, we sit down with Dara Little, NIU’s Associate Vice President for Research, to explore this very world. And as it turns out, the story of how research actually gets done is just as fascinating as the discoveries themselves.
Dara is a research administrator. If your eyes glazed over for a second, you’re not alone. As she jokes, “nobody grows up thinking that they want to be a research administrator.” It’s a field that operates in the background, and yet, without it, the multi-million dollar machinery of university research would grind to a halt.
So, what exactly does a research administrator do?
Imagine a faculty member has a revolutionary idea. They find a potential funder, like a federal agency, and see a complex, 50-page application. That’s where Dara and her team come in. They are the navigators, the translators, and the guardians of compliance. They help ensure that the brilliant scientific idea is paired with a bulletproof budget, that every administrative box is checked, and that the proposal speaks the language the funder wants to hear.
But their work doesn’t stop when the grant is won. In fact, that’s when a new phase begins. They make sure the money is spent correctly, that ethical standards for human or animal subjects are met, and that the university is a good steward of taxpayer dollars—because, as you’ll learn, that’s exactly where a lot of this funding comes from.
In our conversation, Dara takes us on her own “accidental” path into this vital career and explains why it’s a perfect fit for critical thinkers, detail-oriented problem-solvers, and people who want to support big ideas without being in the spotlight.
We also dive into the high-stakes reality of modern research. Did you know that a typical federal research project represents a nine-year institutional commitment? Or that success rates for these highly competitive grants can be as low as 10-25%? Dara gives us a candid look at the immense pressure and commitment behind every headline-grabbing breakthrough.
This episode is for anyone curious about how things really work. It’s for students thinking about their career path, for faculty who want to better understand their support system, and for anyone who has ever wondered about the complex, human infrastructure that powers innovation.
If you’ve ever looked at a news story about a scientific discovery and thought, “There must be more to the story,” you’re right. There is. And it’s called research administration.
Ready to meet the people behind the research? Listen to the full conversation on STEAM Studio Spotlight, available now on your favorite podcast platform.
What if the secret to designing a better robot was hidden in the swirling dance of a fish school? Or the chaotic, humming cloud of a mosquito swarm? What if understanding these natural patterns could even help us design safer buildings and manage crowded spaces?
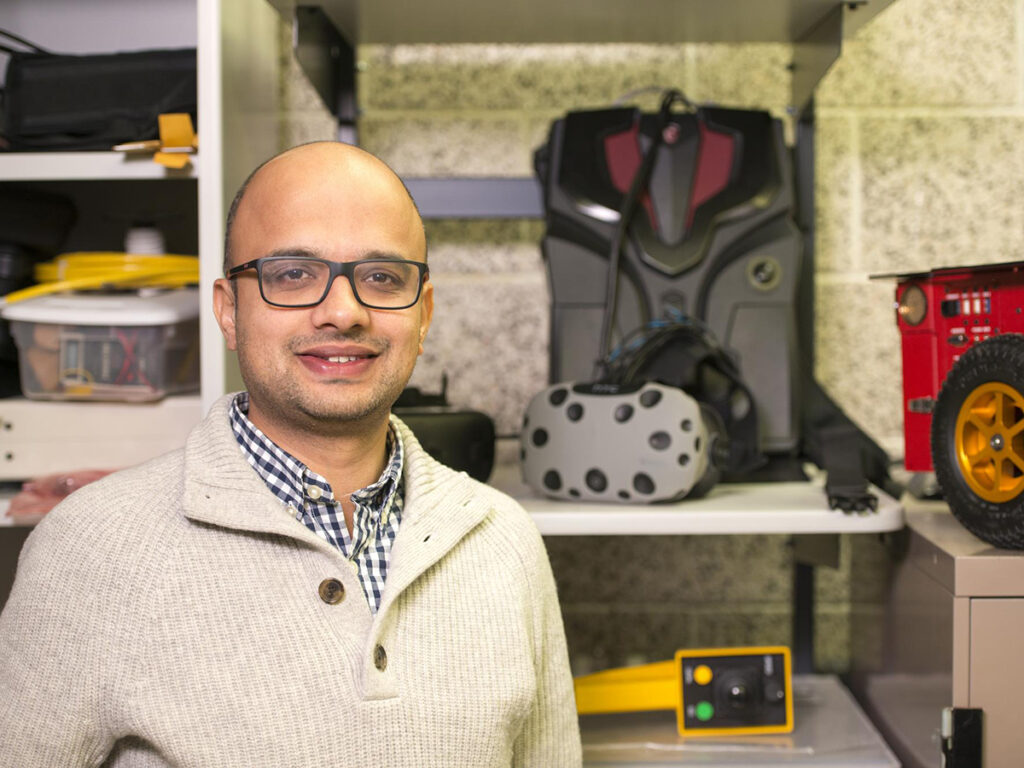
It sounds like the premise of a sci-fi novel, but for Sachit Butail, PhD. an Associate Professor of Mechanical Engineering at NIU, it’s just another day at the office.
On the latest episode of STEAM Studio Spotlight, we sit down with Professor Butail for a conversation that truly embodies the spirit of interdisciplinary discovery. If you’ve ever thought that engineering was all about gears and equations, this talk will open your eyes to a world where biology, psychology and robotics collide in the most fascinating ways.
Professor Butail’s journey is anything but linear. It’s a riveting tale that begins with a fascination for spacecraft formation flying and takes a sudden, deep dive into the underwater world. He found himself asking a simple but profound question: How do fish move with such incredible coordination and agility? And more importantly, could we ever program robots to do the same?
His quest for answers led him from tracking fish in massive tanks to a unexpected collaboration that sent him all the way to Africa to study the swarming behavior of malarial mosquitoes. The connection? The same mathematical models used to decode the movement of a fish school could be adapted to understand the complex patterns of a mosquito swarm. It’s a stunning example of how a tool developed in one field can unlock mysteries in another.
But the story doesn’t end there. When Professor Butail arrived at NIU, he changed his focus to a species even more complex and familiar: us.
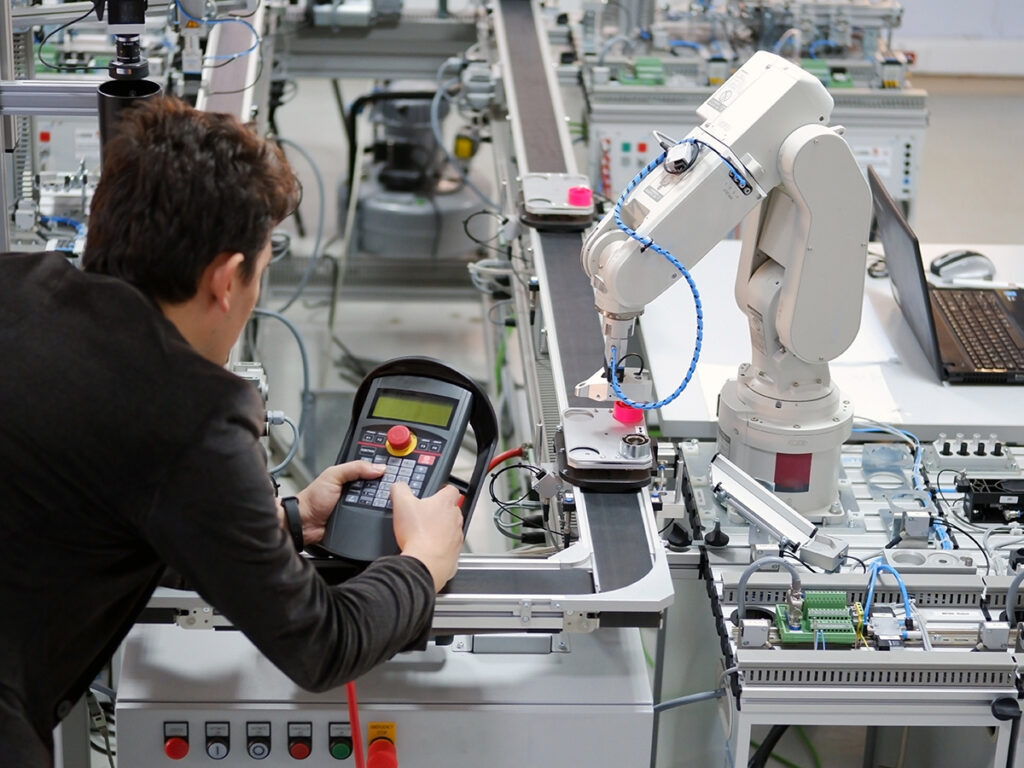
He now applies those same principles of collective behavior to human crowds. Using advanced virtual reality simulations and intricate mathematical models, his lab explores how we behave in crowded spaces, from a busy mall to a high-stress emergency evacuation. The goal is serious: to use this knowledge to design safer public spaces and more effective emergency protocols.
And then, of course, there are the robots. Professor Butail’s work comes full circle as he explores human-robot interaction. Imagine a future where a robot could detect stress in a crowd during an emergency and subtly help guide people to safety. Or where a swarm of search-and-rescue robots could assess a human operator’s awareness and decide to step in and help—all through non-verbal cues. This isn’t science fiction; it’s the cutting-edge research happening right now.
Professor Butail is a brilliant and wonderfully conversational guide into this complex world. He breaks down sophisticated concepts into engaging stories, reminding us that the most innovative ideas often come from connecting dots between seemingly unrelated fields.
This episode is a must-listen for anyone curious about the hidden patterns that govern our world, the future of robotics, or the simple power of asking, “What if?”
Listen to the full episode of STEAM Studio Spotlight with Professor Sachit Butail wherever you get your podcasts.