Oil pastels are a type of art medium that consists of pigment, a non-drying binder, and a non-toxic, non-yellowing wax. They are like soft pastels, but unlike traditional pastels, oil pastels are made with a non-drying mineral oil binder, which gives them a soft and buttery consistency. Let’s look at some key characteristics and features of oil pastels.
Oil pastels are composed of pigment, a non-drying binder (usually a mixture of mineral oil, a non-drying oil, and a wax binder), and additional additives for texture and color. They have a creamy and buttery texture that allows for smooth and easy application. The soft consistency makes them ideal for blending and layering. Oil pastels are known for their vibrant and intense colors. They can be applied with varying pressure to achieve different levels of color saturation. Oil pastels are a versatile medium that can be used on various surfaces, including paper, cardboard, canvas, wood, and fabric. Artists can layer and mix colors easily, allowing for a wide range of artistic expression. The ability to layer without the need for fixatives makes them convenient for quick and spontaneous work.
Oil pastels provide a unique and enjoyable drawing and coloring experience. They are a great choice for artists who want a portable and convenient medium that offers the ability to create expressive and colorful artworks.
Activity
Materials Needed:
Black Construction Paper
Oil Pastels
Paper Towel
Steps:
Collect your materials to create a wintery, night-time landscape.
Set aside the following oil pastel colors: white, brown, light green, dark green.
Using the brown oil pastel, draw a thick brown line for the trunk of the tree. Make sure to thicken the line by adding more than one line next to each other, and/or using the side of the oil pastel.
Add dark pine needles to your tree using the dark green oil pastel. This can be done by adding loose/non-linear lines in the rough shape of a triangle. Make sure to overlap the tree trunk.
Next, add light pine needles to your tree using the light green oil pastel. Overlap the light green oil pastel on top of the dark green and brown oil pastels to blend.
One technique to blend oil pastels is to continue to overlap colors. It is ok for your pastels to get dirty because you can use a paper towel to wipe off any unwanted colors.
Now it is time for snow! With the white oil pastel, add loose shapes around your tree to make the tree appear as if snow is falling and collecting on it.
Add a ground using the white oil pastel. Add a little brown and green to the ground snow. Snow is white and will reflect the colors around it.
Lastly, complete your masterpiece by adding snow fall in the sky. Use varying hand pressure to make smaller and larger snowflakes.
Remember to handle your drawing with care. The non-drying mineral oil binder prevents your art from ever really drying. Over time the topmost layer of your drawing may harden, but that does not mean the oil pastel is dry underneath.
In this episode of Winning Ideas, as the cold months of winter begin to set in and we are longing for fresh fruits and vegetables – this is a great time to harvest seeds, plan a garden, and get some green growing in our kitchen all winter long. Have you ever walked the aisles of your favorite grocery store and seen that bin with ugly almost over ripe fruits and veggies that they are selling for a dollar for the lot. They look sketchy, potentially gross, and you might think they have absolutely no purpose and should just be thrown out? What if I told you – a lot of those are perfect for quick recipes and fun treats that you might not be thinking about. They are an opportunity to explore, use your creativity, and even plan a garden for next year.
Before we begin, I want to acknowledge the importance of growers who harvest seeds for a living. They are working hard to ensure that the food we eat is nutritious and full of vitamins and minerals. There are several different types of seeds we will touch on here, open pollinated (which are ones we will discuss later), heirloom and hybrid seeds. Heirloom vegetable seeds are seeds that have been bred, generation by generation, to be true to the parent plant. Often they are bred for certain qualities and have had consistent breeding for over 50 years. They consistently grow fruits and vegetables that have the same qualities that the year prior had. Heirloom seeds can be open pollinated (where they are pollinated freely by bees, bugs etc.) or they can be hand pollinated by the grower. In either case, they are steadfast and consistent and will always produce fruits and vegetables that are hearty and flavorful. On the contrary, seeds from your grocery store tomatoes are likely hybrid seeds. Plants grown in the moment to get certain qualities from two or more different parent varieties. They are bright and well flavored, but the next generation of seed might not be as robust and might show up with different qualities than the parent fruit or vegetable it came from. They can either be viable (able to reproduce) or nonviable (not able to reproduce). The trick is finding out which they are once they are ready to grow!
One of my favorite trials was creating my own variety of marigolds. I spent years open pollinating certain colors, features, and sizes to get the perfect flowers for my garden. I started one year planting 12 different store-bought marigold plants in my garden. At the end of the season, I harvested the seeds (for marigolds – wait until the flower dies and dries then gently tug the centers out of the flower husks) drying them on paper towels and then storing them in a simple Ziploc bag. The next year I planned those seeds along with 10 new different varieties of marigolds – this year with larger flowers and only orange. The first year I got typical marigolds and had the seeds from the store-bought ones. I loved watching the bees happily pollinate my marigolds and apricot trees (I grew up in Southern California). The next year, I chose a smaller flower along with all of the seeds I had harvested from the previous year. This year, my plants were a little more unique but still like a short marigold variety. As the years went on, I ensured I was mixing a fun new variety of marigold from the store with the marigold seeds I had harvested from the year before. Eventually I got the ideal marigolds I wanted. They were tall, almost weedy in nature, but produced the most amazing smelling colorfully diverse flowers. That was the year, I stopped buying store marigolds. I was able to harvest my personal variety of marigolds every year – and every year I was treated to beautiful plants that filled my garden. I now generously spread my marigolds throughout my garden, sharing the seeds with others to encourage them to try their own varieties. The joy that comes from growing your own plants, flowers and foods is a lifelong, sustainable practice that I will continue to pass along to my children.
So how do you grow plants from the seeds living inside fruits and vegetables? It can be intimidating to have to harvest the seeds. Fear not! It is way easier than you think. For things like tomatoes, cucumbers, pumpkins, or lemons, remove the seeds, rinse them clean in water, pat them dry, then let them continue to dry on a paper towel in a cool dry place for several weeks. Once they are completely dry, cut that paper towel into small sections with multiple seeds per square and store them in a zipped-up bag in a cool dry area until growing season. For the grow in the moment, you can trim your lettuce, green onions or celery down to about an inch from the root, place them in shallow water and allow them to grow back. Keep in mind they need light and occasionally fertilizer. (Fertilizer made from banana peels in water offers a lot of good nutrients your growing plants need!)
For other things like those over soft avocados that need to be eaten immediately, rinse the seed under warm water, gently removing any of the avocado from pit. Wrap your pit in a damp paper towel and place it in an unsealed Ziploc bag. Check your bag every few days and re-moisten your avocado pit, ensuring it doesn’t dry out. After about a month you will start to notice germination – a seedling root popping out of the bottom of the pit. When that pit is at least 4 inches long, you are ready to pot it in soil! (Don’t get too excited – avocados, like lemons, take years to grow and produce!)
But what do you do with the fruits and vegetables you are gathering while you are trying to harvest seeds? THIS IS YOUR PERMISSION TO EXPLORE! Try making something new – look up a recipe on your favorite social media and give it a try. Make lemon bars with a shortbread cookie crust out of those lemons. Experiment in making your own pasta sauce out of sauteed and blended tomatoes, onions, carrots, zucchini and spinach (it’s a great way to hide veggies in your kids pasta sauce). Cut up white or rye bread, cucumbers, add cream cheese, and some everything bagel seasoning and make little cucumber sandwiches. Don’t limit yourself to what you know – trying new recipes, flexing your creativity, and experiment. Bring your kids into the kitchen! It can be an amazing and fun way to engage their brains, teach them skills and try things out together.
One final note – there is debate about the importance of heirloom vegetable seeds vs. hybrid seeds that typically come from the store. While I don’t contradict the importance of utilizing heirloom seeds, they aren’t always accessible nor are they inexpensive. For a family on a budget, harvesting seeds from the over ripe tomato from the dollar bin at the grocery store might be the route to go. I have grown many plants from hybrid seeds. Some have been successful; some haven’t produced anything. The fun was in exploring, testing and growing my own varieties, and – the joy of spending time outside, getting my hands in the dirt and seeing things that I grew come to life is immeasurable.
Don’t forget to share your projects with us! Tag #NIUSTEAM and @NIUSTEAM for a chance to be featured in our weekly newsletter. Do good things, be good people and make yourself better than the day before.
“But the bridge I like the best isn’t so grand. It connects me to you and you to me…through the simple holding of hands.” – Cheryl Keely
I rarely come across a book that can so easily be paired with an engineering design challenge that also promotes building community. A Book of Bridges: Here to There and Me to You by Cheryl Keely and beautifully illustrated by Ceia Krampien is one of those books.
This simple narrative is about the ways that bridges connect us to each other, our communities, and our world. Sprinkled throughout the book are fun facts about our most famous bridges. Have you ever wondered why the Golden Gate Bridge is Orange? Or why birds’ eggs were mixed with mortar to create South America’s Puente de Piedra in Lima, Peru? Kids will be fascinated by these facts as well as learn about different types of bridges, including “wildlife bridges” designed solely for the safe passage of animals over busy roads and highways.
Linking Picture Books with Early Design Thinking Skills
Using picture books as a catalyst for design thinking challenges is a great way to get students engaged in using the design cycle. Introducing design thinking skills early to children is important for several reasons including:
Promoting Creativity- Keva Plank engineering design challenges are great because they illustrate how there are multiple ways to solve a problem.
Encouraging Collaboration & Communication- Working in teams to complete a design challenge helps students learn positive communication and group decision-making skills.
Developing Critical Thinking Skills- In design challenges students learn how to break down problems into smaller parts and make plans for solving those problems.
Routinely incorporating quick design thinking challenges, like this one, helps students grow a fail forward mindset where they learn from challenges and are eager to try again instead of giving up.
Materials Preparation
Before the lesson, print out the building map on 11 x 17 or 11 x 14 paper and laminate. Divide Keva Planks into bins for each group. (Around 50 planks per bin.) This activity can also be done with Lego bricks or other building block materials you may have.
Procedure
If your students have never used Keva Planks before, offer opportunities prior to this lesson for free exploration with the planks.
Begin by reading the book. Have a discussion about the different types of bridges in the books. Ask students what they know about bridges. Did they notice any bridges in the book that weren’t man-made? Why are bridges important to us?
Introduce the Design Cycle to students. For younger students it is recommended to use a simplified version of the Design Cycle with Ask, Plan, Create, Evaluate, like NIU STEAM’s Design Cycle.
Divide students into groups of 3-4. Each group gets a building map and a bucket of Keva Planks.
Explain the design challenge:
Students will work in groups to design a bridge to go over the pond.
The blocks can’t touch the water.
Everyone on the team must be included in the design and building.
Model how to work in a team and what it looks like to make decisions as a group.
If students are struggling to get started, you can model some building strategies with the Keva Planks.
While students are building, continue to encourage collaboration and communication, making sure all voices are being heard and valued within the group.
After students have constructed their bridges, ask for groups to quickly share out their designs and one example of a way their group worked well together.
Assessment
You can visually assess students’ success by seeing if the bridge connects one side to the other and does not touch the water.
Additionally, you can add a strength component to the challenge by placing a toy car on the bridge and seeing if it will hold the weight of the car.
Greetings, fellow digital enthusiasts! I’m Durgaprasad Koppala, currently pursuing my master’s in Operations Management and Information Systems (OMIS) at NIU. As Computer Science Education Week approaches, I thought I would share my journey to the world of algorithms, codes and endless possibilities. Come with me on a stroll down memory lane as I unveil the inspirations that fueled my passion for computer science and explore why this captivating field is more crucial now than ever before.
In a world where technology orchestrates the symphony of our daily lives, my fascination with computer science was sparked by a simple question: How does this magic happen? Upon completing high school, I made the decision to learn a programming language and enrolled in a summer course institute. There, I faced a challenge: write a program to print a right-angled star pyramid (typically, with 5 stars as a base, then 4 stars, 3 stars, 2 stars, and finally 1 star at the top) as output. Despite struggling to write the program and experiencing multiple failed attempts, I persevered until I finally cracked the code. It required a significant amount of time to write and execute the code, but the moment I saw the output on the console, I was overwhelmed with joy. Boy-o-Boy, it felt like I was the Neo of the Matrix. Subsequently, my brother became a significant inspiration for me to pursue a career in computer science. He has been a torchbearer in our family, and my initial knowledge of computers was acquired through him. Following his path, even after three years of work experience, my quest for learning new technologies remained insatiable, leading me to pursue my master’s at NIU. The vibrant community at NIU goes beyond imparting knowledge; it also nurtures the spirit of innovation. Education here is not merely about acquiring skills; it’s about embracing a mindset that thrives on curiosity and resilience.
Why should one delve into the realms of computer science? The advantages are as profound as they are diverse. The world needs problem solvers, and computer science equips you with the tools to satiate that hunger. Whether it’s the thrill of creating cutting-edge software or the satisfaction of unraveling complex problems, the journey is as rewarding as the destination. In an era where technology takes center stage, learning computer science isn’t merely an option; it’s a necessity. It serves as the key that unlocks doors to a myriad of career paths – from cybersecurity guardians to data maestros, the possibilities are as vast as the digital landscape itself. As torchbearers of the present, we owe it to future generations to furnish them with the language of tomorrow – the language of code.
To the young minds out there, let me be your messenger of encouragement. Learn to code, not merely for the sake of acquiring a skill but to cultivate a mindset that thrives on curiosity, resilience, and the joy of perpetual learning. The world is changing, and you have the power to be the architects of that change. So, I invite parents, teachers and curious minds to come together on this journey. In the world of code, we discover the poetry of our shared future.
Here is a small activity-based binary lesson that teachers could use in their classroom to teach the language of computers.
Activity: Binary Bracelets
Objective: Understand the basic concept of binary code, the language computers use to communicate, through a creative and wearable activity.
Materials:
Beads in two different colors (representing 0 and 1)
String
Instructions:
Introduction:
Briefly explain to participants that computers communicate using a language called binary code, which consists of 0s and 1s.
Share a simple example of a binary code and its representation (e.g., ‘0101’ could represent the number 5).
Binary Code Chart:
Provide a binary code chart showing the binary representation of a few letters or numbers (A, B, 1, 2, etc.).
Explain how each letter or number can be represented by a unique combination of 0s and 1s.
Creating Binary Bracelets:
Instruct participants to choose a word or their initials that they want to encode in binary.
Provide beads of two different colors—one color for 0 and another for 1.
Have participants string the beads onto the string, following the binary representation of each letter or number in their chosen word.
As they add each bead, they are essentially creating a wearable representation of their chosen word in binary code.
Share and Reflect:
Once participants have finished creating their binary bracelets, encourage them to share their creations with each other.
Facilitate a discussion on the experience, asking questions like:
What did you find interesting or challenging about encoding your word in binary?
How does this activity relate to the binary code used by computers?
What other words or messages could you create using binary code?
Extension:
For a more advanced activity, participants can try encoding longer phrases or sentences using binary code.
Discuss the importance of precision in coding and how small changes in the code can lead to entirely different meanings.
This activity not only introduces the concept of binary code but also encourages creativity and engagement. Participants will have a tangible and personalized reminder of the fundamental language that powers computers.
By Jason Klein, Senior Director of Learning Partnerships, P20 Network
Less than ten years ago, computer science education became a hot topic in school districts throughout the United States. While many of the world’s leading information technology companies are based in the United States, there continues to be concern about the global shortage of electrical engineers, software developers, networking professionals, cybersecurity experts, and this concern is even more significant within the United States as immigration is necessary to fill these high-tech careers.
The reaction to the gaps in workforce needs and the careers that students are being prepared for through their school experiences are reminiscent of similar historical concerns about math and science education in the United States early in the Cold War during the mid-to-late 1950s and again in the 1990s with the birth of the world wide web and in the aftermath of the Third International Math and Science Study (TIMSS).
Over the past decade, school districts have addressed concerns about computer science education with solutions like The Hour of Code from CODE.org, working with online solutions that support block coding such as MIT’s Scratch, exploratory and elective classes, and formalizing computer science coursework in high schools through either Career and Technical Education or in the context of a Mathematics department. These high school offerings today often even include culminating coursework that offers dual credit with a postsecondary institution or The College Board’s Advanced Placement Computer Science.
Despite the growth of computer science in a variety of ways at elementary schools, middle schools, and high schools across Illinois, there remain huge gaps in access, notably for schools that are smaller in size and for school districts with lower levels of financial resources. While we definitely need to close these gaps, we also need to remember that computer science is a quickly moving target for all students and all schools, and this certainly complicates our efforts as educators.
Today, the future or Virtual Reality (VR) and Augmented Reality (AR) remains unclear. Today, Artificial Intelligence (AI), Machine Learning, and Large Language Models are the newest flavors of technology. In each case, we need true experts who are the innovators and developers of these technologies. Additionally, to be literate moving forward, everyone needs to have a foundational understanding of how these technologies work. Not only will this be critical for career success in tertiary sector information economy jobs, but understanding how these systems work is also critical to be fully participating members of our communities and individuals who can engage in voting and policy discussions at the local, state, national, and international levels.
What does all of this mean for computer science for our students? Ultimately, we need to support all teachers with embedding computer science-thinking throughout the school day and throughout the scholastic experiences of all students. This modern approach to computer science is taking shape in schools across Illinois already, and today, ECEP Illinois (Expanding Computer Education Pathways), the Illinois Effort that is part of the national ECEP Alliance, is laying the foundation for an expanded schoolwide approach that integrates computer science education across traditional academic disciplines and across grade levels. There are a range of K-12 and postsecondary organizations that comprise this group, and in July 2024, ECEP Illinois plans to release its report on our next step to make this reality about infusing computer science thinking for all students throughout their schooling experiences. Professional learning for teachers across Illinois will be critical to this. In the meantime, we can all begin thinking about how we can be more sophisticated users of technology ourselves, thinking about how it works and why its been constructed that way, engaging our students in these same lines of thinking, and considering how we may be able to incorporate computer science thinking into the units and lessons we already teach as we move forward, ranging from thinking about if/then structures to the incorporation of large datasets in work to writing well-structured prompts from modern LLMs such as ChatGPT and Bard.
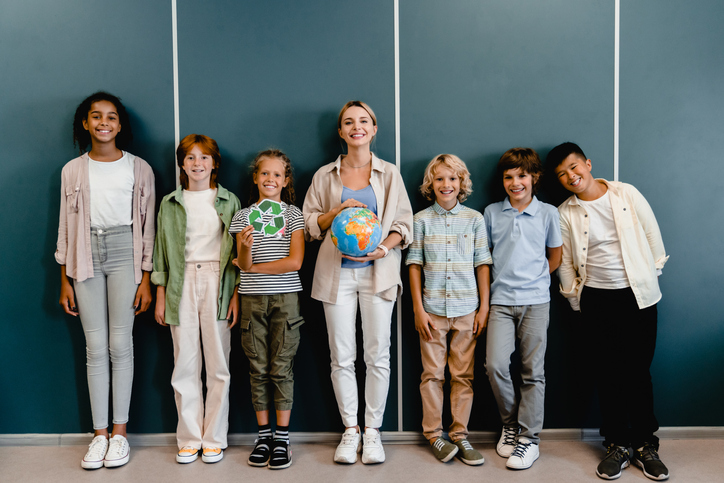
In this blog, Jess offers ideas for project-based learning for grades 6-12 to help students learn about the impact their school has on the environment – and practice making a positive difference. She includes ideas for science, math, history/civics or language arts.
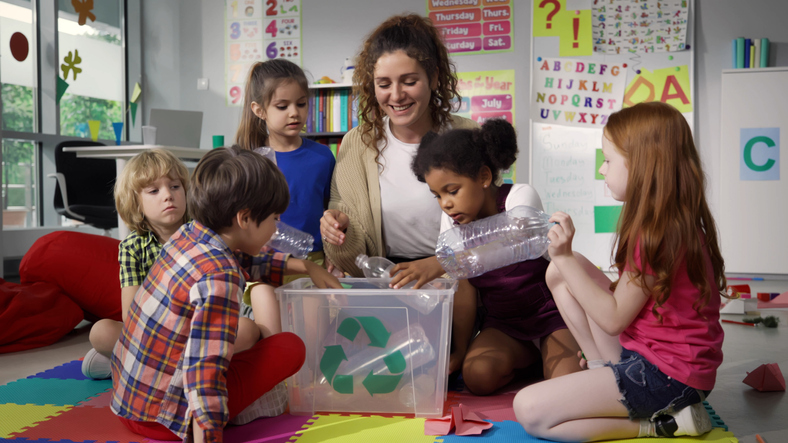
I’m Jess Winn, and I like to call my blog series “Winning Ideas” (get it?). In this episode of Winning Ideas: How often do we take time to really thank Mother Nature for what she provides us? In this month’s edition, where thankfulness is at the forefront, I’m exploring how we can design an environment for sustainability at our school.
How many times have you walked into your school and thought about the waste that surrounds the profession we are in? From paper assignments, to useless bathroom paper towels that never soak up anything, to the barrage of garbage that is inevitably produced each day at lunch…the waste produced by schools is significant. Multiply that by the number of schools across the country, and we have a relatively large impact. How can we as educators inspire our students to consider the number of resources we go through, and their impact on the overall total? How can we find ways to conserve these resources that truly are creating a larger scale issue on the planet?
Now this isn’t your average project – your students’ ideas, once generated, need to be shared to start actually impacting change! Send an invite to your school board members, your administration, city council, and other stakeholders in education. The more you build your project – the better solutions you will achieve.
So how do we start something this grandiose? Start with your goal as a teacher. Is this a history project where students are learning how to write and propose amendments to existing policies? Are you a science teacher looking for ways to have your students examine the human impact on the earth’s climate? Are you an English instructor looking at alternative technical writing assignments? Or maybe you’re a math teacher considering how much garbage is produced on any given day at your school. Whatever lens you approach this project through – be sure you have a clear outcome for your students. If they are going to present in front of stakeholders, they need to be prepared. Give them a lofty goal – you will be surprised at the outcomes they achieve. Give them the tools to be successful – show them how to do technical writing, how to research current policy and the process for suggesting changes, teach them the math they need to know to see how impactful the amount of waste actually is. Whatever you decide, be sure it’s based in fact, it has an actual outcome that can make a measurable difference – and be sure you give them enough time to complete the project.
Once you have your basis set up, start to generate a list of questions for students to think about. Don’t be surprised when they have their own questions, too – let them take ownership of that! If you foster a classroom environment of curiosity, your students will follow suit.
Some things I recommend you consider – does your school have an existing recycling program? Does it have a compost bin? Are there water saving methods in place? Energy efficiency? Is lunch served on reusable trays or in plastic and paper pre-packaged meal trays? Allow your students to select an area where they believe they can create a sustainable change. Be sure to remind them they are all a part of the problem until they are part of the solution. These changes can’t just be the responsibility of the school or district – students need to consider the social impact of change as well. How will the students, teachers and families be held accountable for the changes? How are they getting others involved and on the same page? How do they create a culture of gratefulness for the Mother we all depend on – Mother Earth?
Now just step back and give your students the reins – they need to feel responsible for this project. Allow them the confidence that they can influence others in an outlet other than social media. When they present their ideas that will, hopefully, find traction, take lots of photos, invite their families to share in their successes, and don’t hesitate to celebrate their learning!
Don’t forget to share your projects with us! Tag #NIUSTEAM and @NIUSTEAM for a chance to be featured in our weekly newsletter. Do good things, be good people, and make yourself better than the day before.
Have you ever wondered why there is so much buzz around name brand markers? What is the difference? With brand names like Crayola, Prisma, and Copic, let’s look at what is the difference in the chemistry, cost, and uses of alcohol-based and washable makers.
Ink Base:
Alcohol-Based Markers: These markers use alcohol-based ink, which typically contains pigments or dyes dissolved in alcohol. Alcohol-based ink provides vibrant, permanent, and non-water-soluble colors.
Washable Markers: Washable markers use water-based ink, which is designed to be easily washed out with water. This makes them less permanent and suitable for kids’ art projects.
Color Vibrancy:
Alcohol-Based Markers: Alcohol markers offer high color vibrancy and are known for their ability to blend and layer colors smoothly. They produce more intense and saturated colors.
Washable Markers: Washable markers tend to have less vibrant colors compared to alcohol markers. They are generally more suitable for simple coloring tasks.
Blending:
Alcohol-Based Markers: Alcohol markers are excellent for blending and shading. Artists can achieve gradients and smooth transitions between colors due to the alcohol ink’s properties.
Washable Markers: Washable markers are not designed for blending. They tend to create distinct color boundaries when used for coloring.
Permanence:
Alcohol-Based Markers: The colors from alcohol markers are permanent and resistant to water and smudging once they dry. They are commonly used for professional artwork and illustrations.
Washable Markers: The colors from washable markers can be easily washed out from fabrics and surfaces with water, making them ideal for kids’ art, school projects, and temporary designs.
Odor:
Alcohol Markers: Alcohol markers can have a strong odor due to the alcohol solvent used in the ink. It’s recommended to use them in well-ventilated areas.
Washable Markers: Washable markers typically have a milder or no noticeable odor, making them more suitable for kids and indoor use.
Washable Marker Activity
Materials Needed:
Coffee filters
Washable markers (various colors)
Water
Small spray bottle or dropper
String or yarn (optional, for hanging the finished art)
Steps:
Set up your workspace: Cover your work surface with a plastic or disposable tablecloth or a few layers of paper towels to protect it from marker ink and water.
Color the coffee filter: Lay a coffee filter flat on the table. Use washable markers to draw, color, and create your design on the coffee filter. You can make patterns, shapes, or just have fun with various colors. Be creative! The markers will bleed into each other when wet, so you can experiment with blending colors.
Add water: Once you are satisfied with your design, use a small spray bottle or dropper to add water to the coffee filter. Spritz or drop water onto the coffee filter, and watch the colors start to bleed and blend. You can add more water for more blending or less water for a more defined design.
Allow it to dry: Leave the coffee filter on a flat surface to dry. As it dries, the colors will continue to mix and create unique patterns. This may take some time, so be patient.
Last weekend I was cleaning out my attic. Like anyone who gets lost in a deep clean of an often-unused space, I rediscovered a ton of items I hadn’t thought about in a long time. Namely, a variety of art and crafting supplies from projects from long ago. There were jewelry making supplies, glass etching compound, polymer clay, my old soldering iron, and so many bits or pieces of projects and creative experiments. Searching through each box or digging into each bin was like opening a gift or reconnecting with an old friend. I started pulling out supplies and trying new things. Right there surrounded by me cleaning chaos. Instead of cleaning and organizing, my attic became a staging area for projects to be. I now have a long list of things to make and ideas to try. Have you been there? If you are reading this and nodding along then you get it. You recognize the signs of what’s happening. This is common behavior for a Maker, and you are or know someone who is a Maker. As you might have guessed, I am a Maker.
For those of you who may not be familiar with the mind of a Maker, and are still wondering why my attic is not yet cleaned, let me explain. Makers create. We tinker and hack, invent and try, do and dream. Makers have a certain mindset or approach to life. We have a driving need to create and little fear of failing in our creative endeavors. In fact, a failed project can be just as exciting as a successful one. We want to work with our hands to explore ideas through tools and supplies and are happiest when our hands are involved in building. But, creating alone does not a Maker make. We Makers also love to share, give and learn. If you have a Maker in your life, I am positive, you have something they made. We find joy not only in the process of building but also in sharing what we make and how we made it. Projects, ideas and skills are the currency of the Maker community. We give what we make freely and love to teach others how to do it so they can also enjoy the process of making.
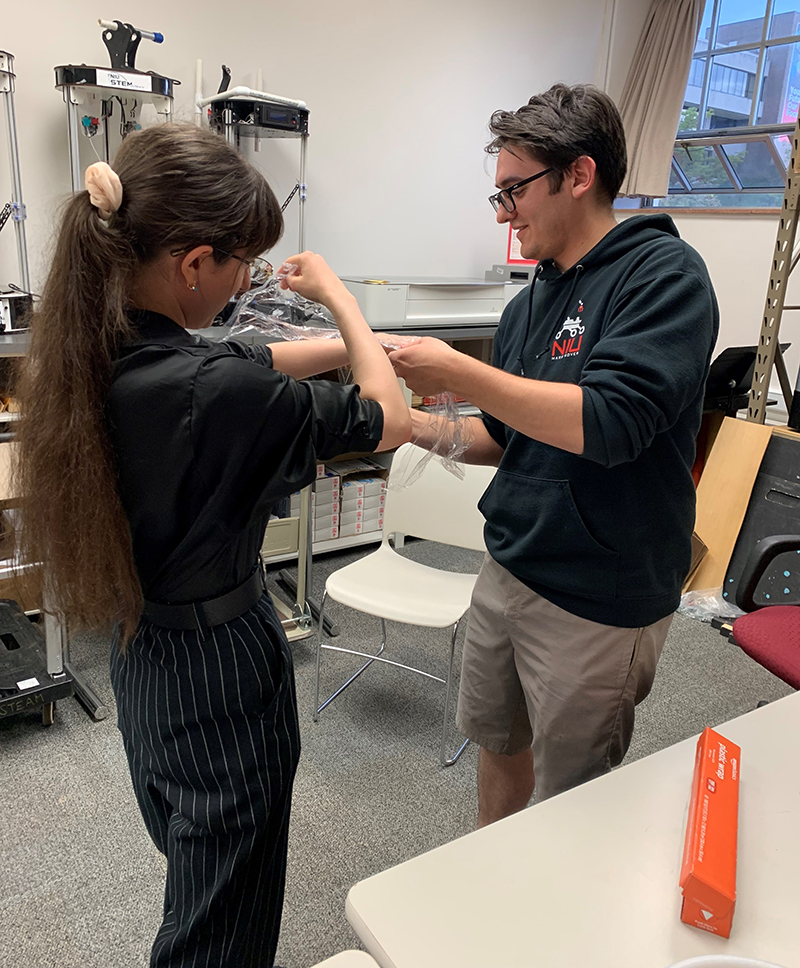
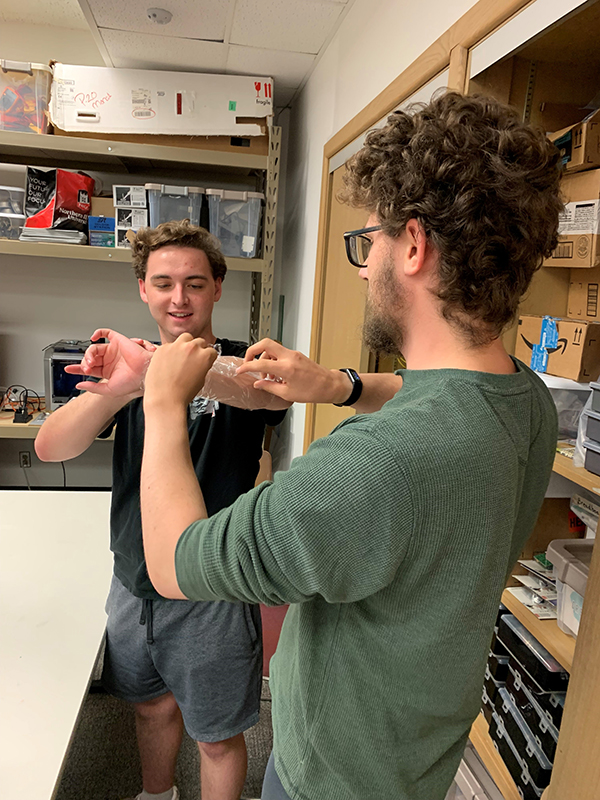
The Maker community is a fun community. You will find them everywhere. Even here at NIU, we have a student Maker Club. During October, the club gathered weekly to learn new techniques in costume design. We built wearable items out of EVA foam. We taught each other painting techniques and ways to add lighting to our costumes. The month ended with a showcase of fun creative costumes and explained in detail how they were made. Future meetings will be packed full of a wide variety of projects and learning. Everything from crocheting to glass etching to constructing with cardboard and electronics.
But why do Makers make things? For me, the drive to make comes from a desire to explore and try new things. I love the challenge. It keeps my brain engaged and happy. Learning an new skill that I can put to use in a new project is exciting and fun. I also like to see the looks on people’s faces when I give them a gift that I made. I was interested in why others who see themselves as makers and make things. So, I asked a couple of the NIU Maker club members why they create things. Gunner told me, ”I love the process of taking an idea from concept to reality, transforming it into something I can hold in my hands and use in my daily life. Each project I undertake is a journey that challenges my creativity and problem-solving skills. The deep sense of accomplishment I feel when I succeed is what keeps me passionate about making things.” Chris, the president and founder of the club stated, “I feel that being a maker can help me in the future by giving me a hobby that I can enjoy… it doesn’t have to be expensive but can still give me things that I can enjoy looking at or even things that I can give to other people that they can enjoy having.”
I also asked Chris why he wanted to start the maker Club. For him, it was about both the building of things and the building of a community. ” I always like making things out of different mediums and I wanted a club where I would be able to do that. I always liked making physical objects and as an engineering student I wanted to take some of my skills and combine it with those of other majors such as art or theater or those who are just passionate.” Besides making things with wood, he said he really enjoys making communities. His hope for the Maker Club is, “to create a space where people can come together over the joys of making stuff.”
That is really the idea with the Maker Movement. Building a community around the building. It really doesn’t matter what we are building as long as we are building and have others to share it with and teach. If this appeals to you but you have never made anything, it is never too late to start. The best way to become a maker is to just make something. That is also the best way to encourage the younger generation of makers. Give them room to make and build. I think the reason I love making today is because I spent my childhood building things. I was inspired by watching my dad tinker with cars and electronics and my mom doing any craft she could from sewing to cooking to woodworking. I watched my parents enjoy it and I wanted to make things too.
So, get out there and pick up a hammer or a crochet hook or a soldering iron and make something amazing, or maybe not so amazing but make it anyway! Find others who enjoy it and go make things together. You, and your community, will be better for it.
Phaner, Mirza, Kotraika, Sadabe, and even the hairy-eared dwarf lemur – they may sound like comic book characters, but these are all names of different lemur species. Most people, if they know about lemurs at all, recognize the ring-tailed lemur – aka, King Julian. This species is found in many zoos because it is a flexible eater that adapts well to captivity. But what many don’t realize is that there are more than 110 lemur species, ranging from the 2-ounce mouse lemur to the 13-pound Indri, each with its own distinct look, ecology and way of life.
Every year, the last Friday of October marks “World Lemur Day”, when lemur scientists like us do all we can to remind people about these unique creatures. One reason this is so important to us, and to others, is that lemurs are barreling towards extinction – 98% of those species are listed by the IUCN as threatened, and 31% fall into the highest-risk category, critically endangered. All are restricted to Madagascar and a couple of nearby islands – and sadly, this wonderfully rich country in terms of culture and biodiversity is also one of the world’s poorest. The rapidly growing human population frequently encroaches on wild habitats for subsistence agriculture, often because there are few other options. This means that the solutions needed for preserving lemur habitat while also protecting human rights and livelihoods are challenging to pursue.
Here at NIU, our lab group does research that is designed to understand lemur adaptations and diversity while also protecting their populations. Just like us, primates need a diet that is both adequate in calories, and varied – a healthy mix of carbohydrates, proteins and fat with vitamins and minerals too. But one thing that’s different about wild lemurs is that their food availability varies so much across the year. In the winter, some lemurs capture only a quarter of the caloric intake they achieve in rich months – a very lean reality that they seem to just barely squeak through. When habitats are disturbed by selective logging, a lot of key foods are lost and we have shown that diets decline in quality – and the animals show reduced growth and body fitness. This bodes poorly for future survival, especially when we consider that global climate change is also likely to affect the availability of the foods they rely on.
One of the issues we still are tackling is that wild lemurs, like most non-human animals, eat food with some particularly nasty chemicals inside. This is especially true for folivores (leaf-eaters): trees love the fruit-eaters that disperse their seeds, but do all they can to make life difficult for the folivores that munch on their leaves. These leaves are often loaded with toxins, which essentially poison the lemur, or digestion inhibitors like tannins, that interfere with digestion. Our lab group focuses on the diademed sifaka, and we’ve found out that its leaves have such high levels of tannins that it seems they shouldn’t be able to access any protein in their leaves at all. Yet… they are, because they are surviving. Current Anthropology graduate student Edgar Villeda has set up a multidimensional research project to solve this mystery. He is searching for tannin-deactivating proteins in sifaka saliva, as well as culturing live microbes from their feces to see if those microbes are deactivating those tannins during digestion. Until we know better how much protein they’re actually getting, it is impossible to know how close they are to protein starvation and eventual population decline. If they’re living on the edge, we want to know!
Even though all this is unfolding halfway around the world, there are still ways to get involved. You can spread the word – tell a friend or family member something you just learned about lemurs. Familiarize yourself with the many governmental and non-governmental agencies engaging in lemur research and conservation – the Lemur Conservation Network webpage is a great place to start. Finally, get involved here at NIU by taking classes in the Department of Anthropology, or just drop by and meet Professor Irwin or some of the graduate students working on solving lemur problems!